
Scanning the web with Ammonite
Ammonite is a Fiddler extension used to scan web application for common vulnerabilities like verbose and blind SQL injection, OS commanding, local file inclusion, buffer overflows, format string vulnerabilities etc. Ammonite can also scan responses for important information like credit card numbers. Some of the unique features of Ammonite is its ability to test all sections of an HTTP Request for which includes headers (ever heard of SQL injection through HTTP headers ? ), cookies etc. One of the other features which is particularly interesting about Ammonite is the ability to pause, cancel and resume individual test cases. This is different than the conventional web scanners where the tests are executed in a particular order and we can just wait and watch if some test is taking a long time. Ammonite also has features for exporting requests in Python which aids in exploit development. We can also generate our own customised HTML report.
Please note that Ammonite is not a web exploitation tool. It is a lightweight web application scanner which is extremely fast and reliable. In this article, we will be looking at all the features of Ammonite through demonstrations.
Fiddler
Since Ammonite is an extension of Fiddler, it is important that you have a little bit of experience with Fiddler. Fiddler is a Web Debugging Proxy which allows us to inspect traffic for both HTTP and HTTPS. We can tamper data by setting our own custom rules or use breakpoints to observe and fiddle with specific requests and responses. If you have little or no experience will Fiddler, you can start by watching some introductory videos for Fiddler here. The figure below shows a screenshot of Fiddler in Action.

Setting up Ammonite
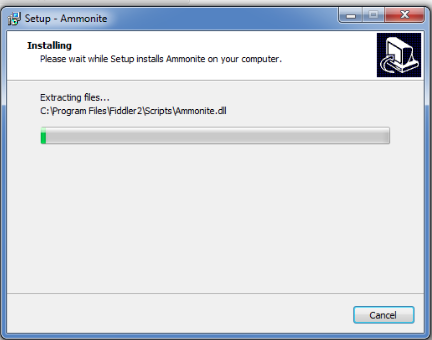
Ammonite can be bought from here. There is also a 30 day free Trial version available. The first and foremost thing for Ammonite to work is to have Fiddler set up on your computer. Once this is done, open up the Ammonite setup file and follow along the instructions. In between it will also ask for the license file. You can get the license file from the Ammonite installation directory.
Once it is installed, restart Fiddler for the changes to take effect. You will see two new tabs named “Testing” and “Results” being added to Fiddler as shown in the figure below. This means Ammonite is now set up for use.

First Look
Let’s have a look at all the options that Ammonite provides us with. As you can see from the figure below, we have an option to choose from a various number of vulnerabilities like SQL Injection, Local File inclusion, Cross-Site Scripting etc. We can also perform passive checks to gather confidential information like credit card numbers etc. We also have the power to inject into all the different sections of an HTTP Request like headers, cookies etc which makes a lot of the advanced attacks (for e.g SQL injection through HTTP cookies) possible. We can also choose between Manual and Automatic mode. In Manual mode, you have to manually choose a web session and perform a vulnerability scan on it. In the automatic case, we have to specify the URL patterns that will be tested. We can also save the requests and responses to a file. We can set limits on the request timeout, change the number of requests per second, specify a limit on the maximum number of retries, and can also set the number of threads. We can skip testing with identical requests so that we can save time, stop testing on the first vulnerable parameter and can also skip automatic testing of media responses which include images, videos etc.

Test Enviroment
In order to run the tool and see the results, we need a vulnerable test environment to perform all the scans on. In this case we will be using the “w3af test enviroment” to perform the scans on. w3af test environment is available on the Security Distro Web Security Dojo which can be downloaded from here
Manual Testing
1)Testing for OS Commanding
-We will now be testing for OS commanding vulnerabilities in the test environment. To test it using Ammonite, simply browse to the vulnerable url. The url will appear on the left hand side under the Web Sessions section in Fiddler.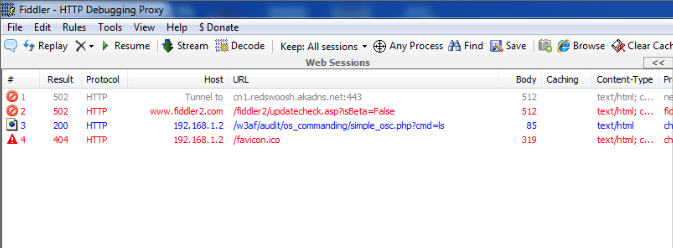
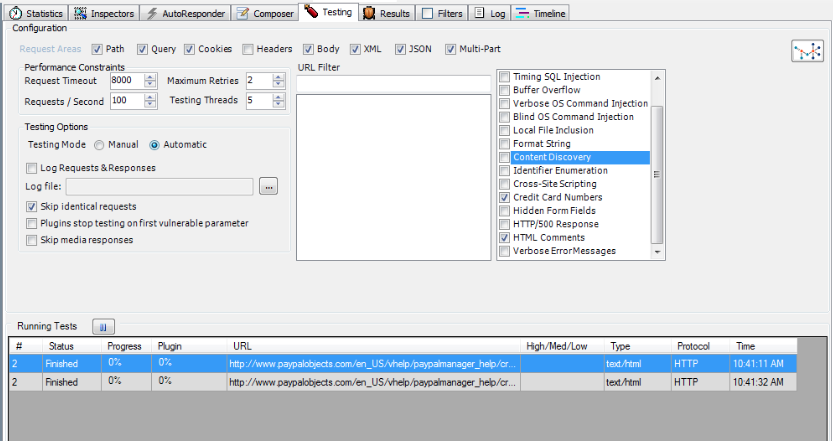
Once this is done, make sure Ammonite is configured according to our requirements. As it is clear from the figure below, i am only testing the url for some specific vulnerabilities like OS and blind command injection. Also, i have checked the Skip media responses and the Skip identical requests option. 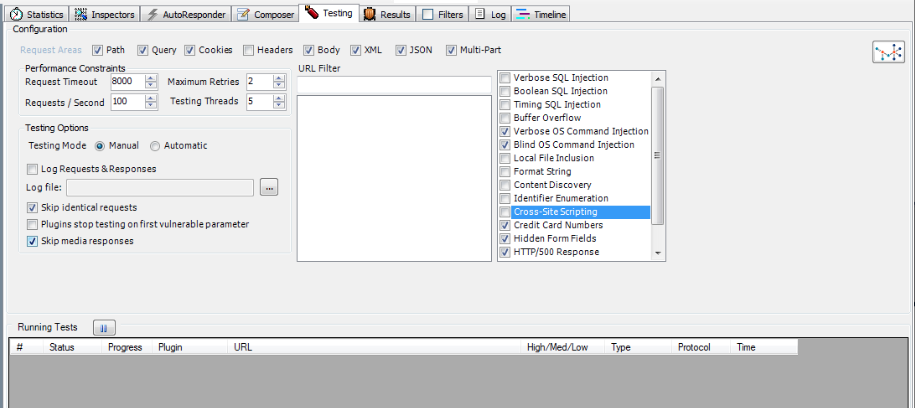
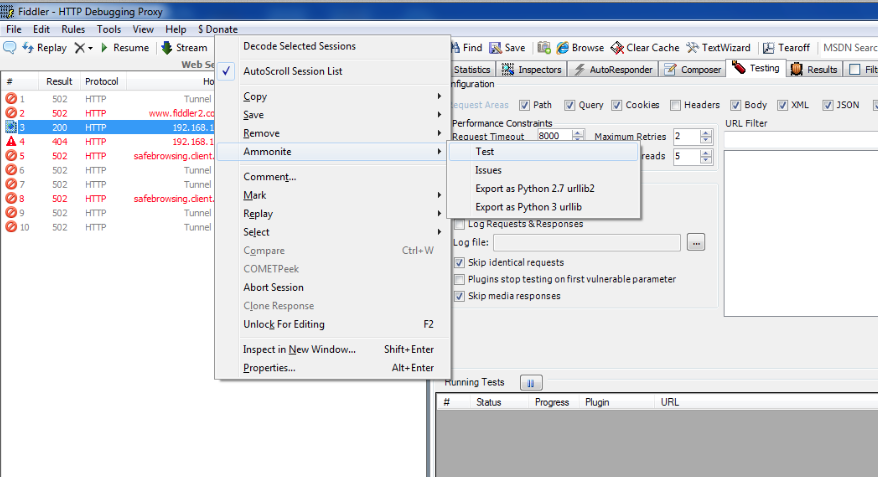
Once this is done, you can just right click on the appropriate Web Session in Fiddler and go to Ammonite –> Test to start testing the session for vulnerabilities.
Once the test has run, you can see the Status down in the Running tests section. As it is clear from the figure below, Ammonite obtained 1 vulnerability with Risk Level High.

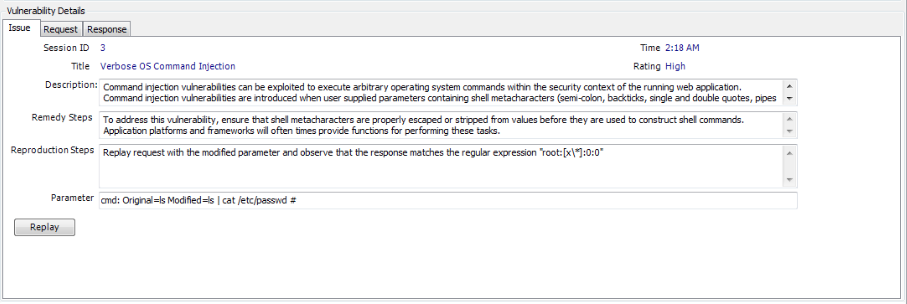
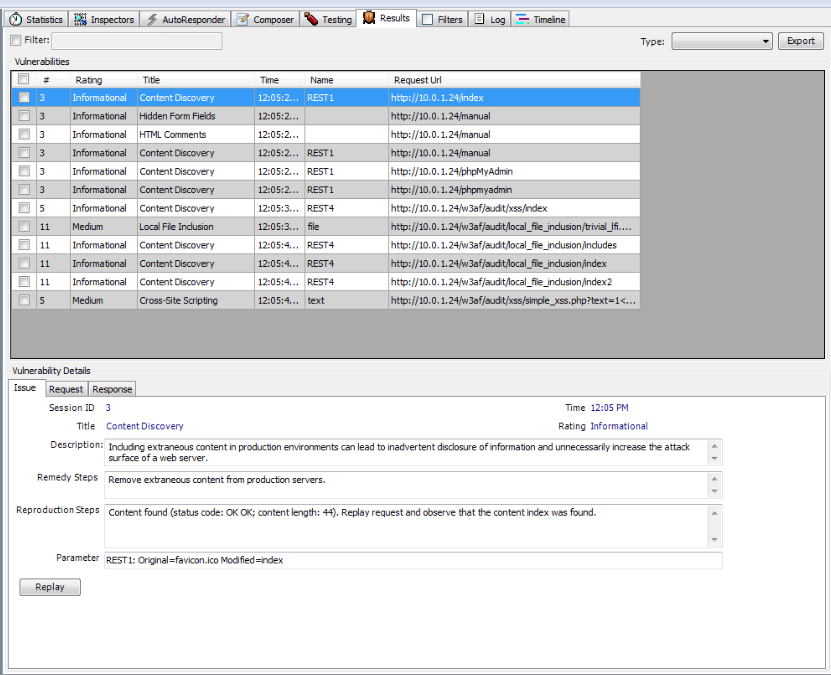
| Go to the results tab to get a better idea of the vulnerability. As we can see from the figure below, Ammonite has given a clear description of the vulnerability along with the Remedy and the Reproduction steps. Another important thing to note is the information in the parameter section. The text under the parameter section reads _cmd: Original=ls Modified=ls | cat /etc/passwd #_ . The thing below colon specifies the vulnerable parameter which in this case is cmd. The original parameter (in this case ls) is the one sent in the original request whereas the modified parameter (in this case _ls | cat /etc/passwd #_ ) is the one which actually led to identification of the vulnerability. This provides valuable information about what goes on under the hood. |
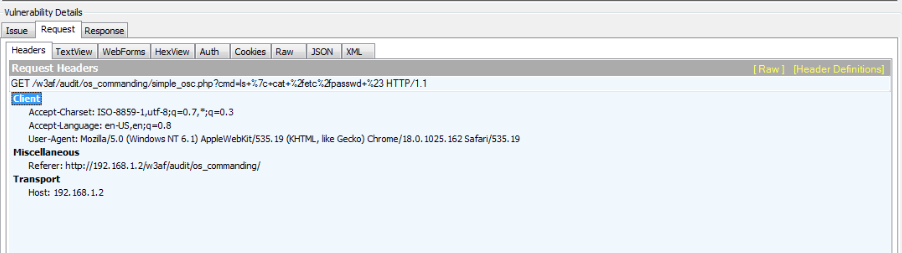
If you are interested in learning more about the vulnerability, it is a good thing to look at the request and the response that led to its identification. We can see the vulnerable parameter being passed over as is clear from the Headers tab of the request. Fiddler allows us to see the request in may different forms and also see other information like the cookies, auth parameters as is clear from the different tabs.
From the response section, it is clear that the output corresponding to the input parameter (the os command) was found. Again, we can view the response in many different forms.

2)Testing for Blind OS commanding
-Ammonite can also detect blind OS commanding vulnerabilities. In case of blind OS commanding in which the response is not echoed in the output, Ammonite uses time delays to identify if a OS commanding vulnerability is present. For e.g if it sends a command which delays the response for some seconds, and if it notes a delay in the output, we can say that a blind OS commanding vulnerability is present. To test the session, simply right click on the web session and click on Ammonite–>Test
The vulnerability is identified by Ammonite as shown in the figure below. From the parameters shown for identifying the vulnerability, we can see that a delay of 5 seconds (sleep 5) was sent.

3)Testing for Local File Inclusion
-In this case, we are testing a Local File Inclusion vulnerability using Ammonite. We can just browse to the vulnerable url on the w3af test environment. Fiddler recognizes the session and now we can test it using Ammonite. The figure below shows that Ammonite identified the LFI vulnerability. We can see more info from the parameter information or from the Request/Response tabs.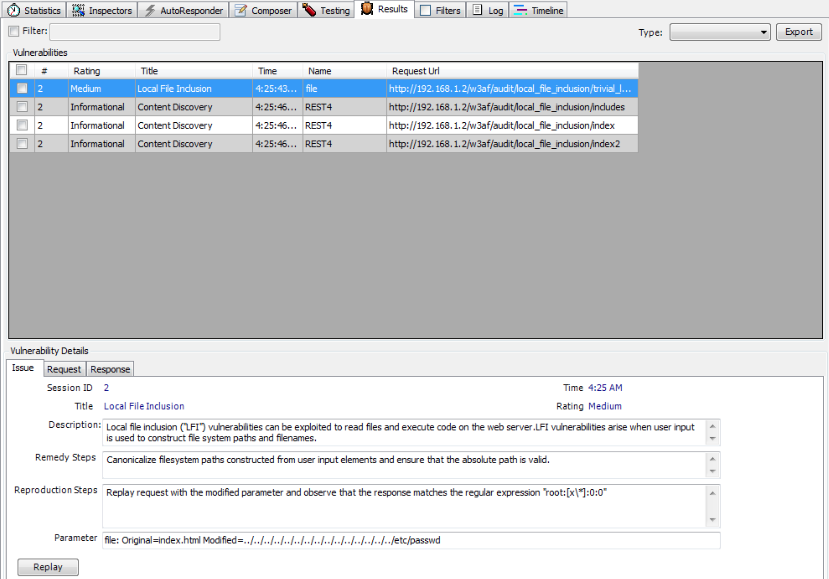
From the figure below, we can also see that Ammonite was able to make some Content discovery. Let’s have a closer look at what it found.
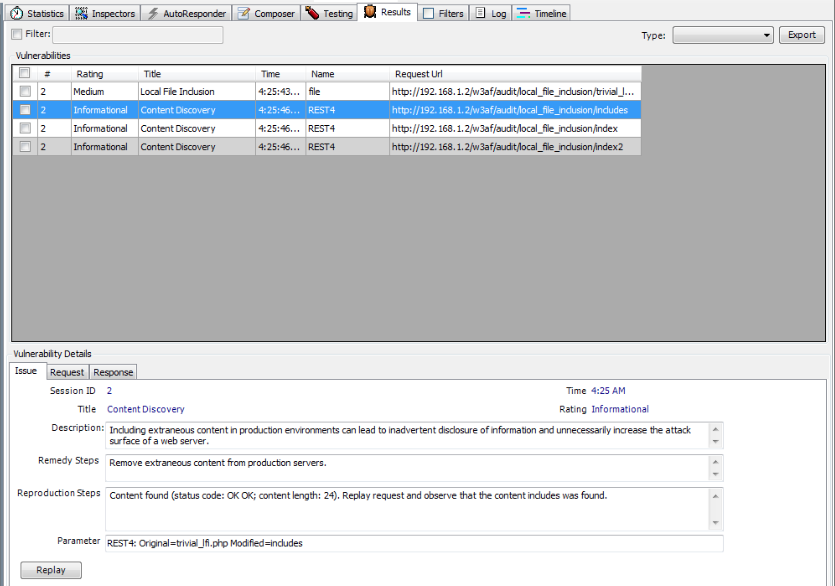
As we can see from the details below, Ammonite was able to find some other content while performing the tests. By looking at the parameter section, it is clear that when Ammonite entered the parameter REST4 as includes, it found some content on the url which was created. It recognized this as an information leakage issue and reported it to us. Getting extra information like this could be valuable in a web application vulnerability scan. It also increases the attack surface of the web application.
4)Testing for Cross Site Scripting
- Let’s perform a test for Cross Site Scripting. We follow the same process again and perform a XSS check on the vulnerable url in the w3af test environment. As we can see, the vulnerability was identified as shown in the figure below.

Again, it is a good practice to look at the request and the response that led to the identification of the vulnerability.
Automated Testing
Uptil now, we have been performing manual scanning. In order to perform fast scanning over a large target surface, the whole process should be automatic. However, we don’t want to scan every session url which Fiddler idenifies. In order to circumvent this issue, we use regular expressions to filter url’s that we want to scan. To use Fiddler in automatic mode, simply check the Automatic mode in the Testing Options.
Once this is done, we need to specify a URL Filter to specify which url’s we want to test on. For that, we will be using regular expressions. If you are performing a large scan, you should check the Skip media responses option which skips automatic testing for sessions with media responses. An example of a regular expression would be ^www.example.com. This will test all the url’s which start with www.example.com.
So lets perform an automated scan. I will be performing scans on all the urls on my local server with the IP address 10.0.1.24 . The appropriate url filter is set as shown in the figure below.

So now when we browse to any url on my local server, ammonite will start the scan automatically as shown in the figure below.
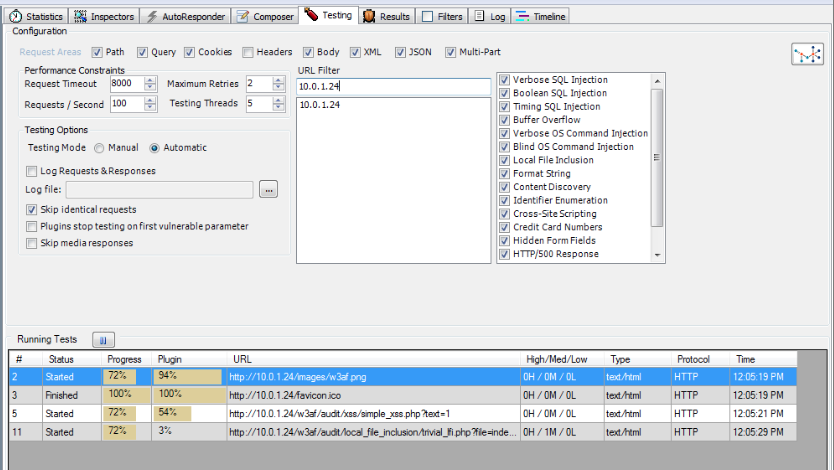
The results obtained by performing the scan are displayed in the figure below. We can see that ammonite was able to find a couple of vulnerabilities in the pages we browsed.
When performing a scan on a large target surface, it is essential to check only those vulnerabilities which we want to scan for. Otherwise, the scan may take a long time. One of the other advantages with Ammonite is that we can pause, resume or cancel any specific task. So if a task is taking too long, you might just want to stop it. We can also specify the various options like no of requests per second, timeout, number of threads etc in order to get the best performance.
Exporting Requests
Ammonite also allows us to export requests as Python 2.7 urllib2 or Python 3 urlib code. This could be useful in cases where you would like to regenerate the request while doing some exploit development etc. In order to regenerate the request, right click on the request and click on Export as Python 2.7 urllib2 or Export as Python 3 urllib as shown in the figure below.

Once this is done, we can see that Ammonite generated a function in Python which initializes the request, adds the required header fields and then return the request. Please note that we can also edit the function before saving it. So if i want to change the User-Agent field in the header, i can do that before saving the function.

Generating Reports
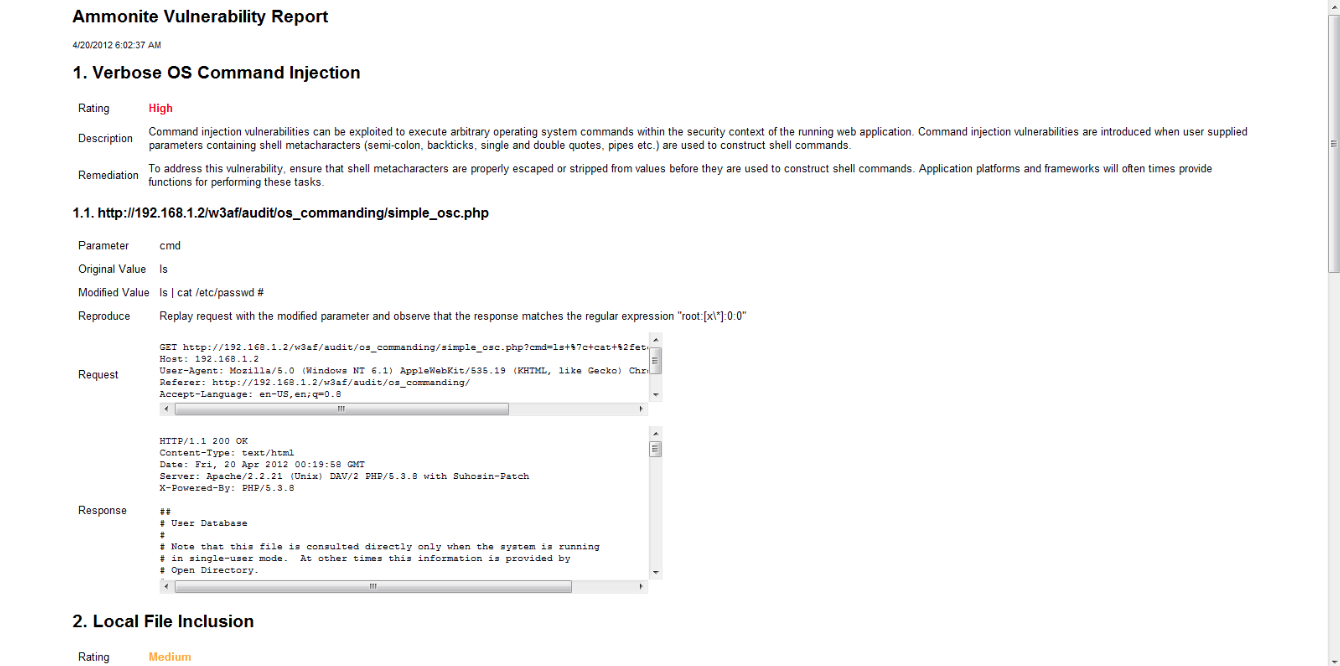
Once the vulnerability scan has been performed, we can also generate HTML reports from the results of the scans. The generated report includes information like issue description, risk rating, reproduction steps, remediation instructions, and sample requests and responses. We can also filter the results based on a specific criteria or simply select the vulnerabilities which we want to be included in the report or we can choose a combination of both.

Once we have generated the report, we can save it as a html file. Here is how a sample report generated by Ammonite looks like.
Conclusion
Ammonite is a Fiddler extension which allows us to scan web applications for common vulnerabilities. In this article we looked at some of the examples where ammonite helped us detect vulnerabilities like verbose and blind OS commanding, local file inclusion, cross site scripting etc. It can also identify information disclosure by scanning the response for important information like credit card numbers etc or finding out hidden forms etc. One of the other interesting features of Ammonite is that we can pause, cancel and resume individual test cases. Ammonite also allows us to export requests in Python and generate reports.
References:
- Ammonite Features
http://ammonite.ryscc.com/features.html - Ammonite FAQ
http://ammonite.ryscc.com/faq.html