
w3af walkthrough and tutorial part 2 - Discovery and Audit plugins
In the previous article w3af walkthrough and tutorial Part 1 we looked at how to use the w3af console. We also learnt about the different plugins in w3af and how they interact with each other to perform various tasks. In this article we will look at how to use the discovery and audit plugins in w3af to perform a vulnerability scan of the web applications and consequently exploit the vulnerabilities present. We will also look at the various techniques used by w3af to identify these vulnerabilities. In this article we will be working with the w3af GUI version.
Web Security Dojo
One of the first and foremost things while testing w3af is to have a test environment where we can test all the features of w3af. Web Security Dojo is a vulnerable VM which has some vulnerable web applications as well as the tools needed to break into these web applications. Among the vulnerable web applications is the “w3af Test Environment”. This is the environment used by w3af to perform unit tests. Web Security Dojo also has both w3af console and w3af gui installed on it by default. You can get a copy of Web Security Dojo from here.
Once you have downloaded Web Security Dojo, go to Applications–>Targets–>w3af Test Environment. You will be greeted with a message as shown below.

Please note that even though Web Security Dojo is very useful for performing w3af tests, i would always recommend to use Backtrack 5 for the same purpose. One of the major problems with Web Sec Dojo is that it may not have the latest version of w3af. For e.g in the version of Web Sec Dojo which i have, the auth plugin is not there. You can just copy the w3af test environment folder (present in /var/www/w3af) from Web Sec dojo to your Backtrack machine and you are all set and ready to go. Also, please keep your w3af updated as major bug fixes are done with every new revision.
Audit Plugins
So Let’s go to the Audit section in the w3af test environment. As we can see, the page has different links categorized on the basis of the vulnerabilities.

If we go on the page Cross Site Scripting we see that there are a number of url’s that are vulnerable to Cross Site Scripting.

Hence the next step is to give the url to w3af and scan it for XSS vulnerabilities. Open up w3af GUI. Once it is open, on the left hand side, we can see an option to choose from various profiles.
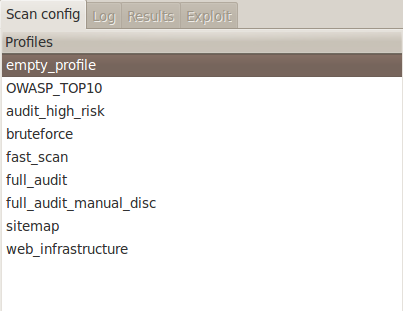
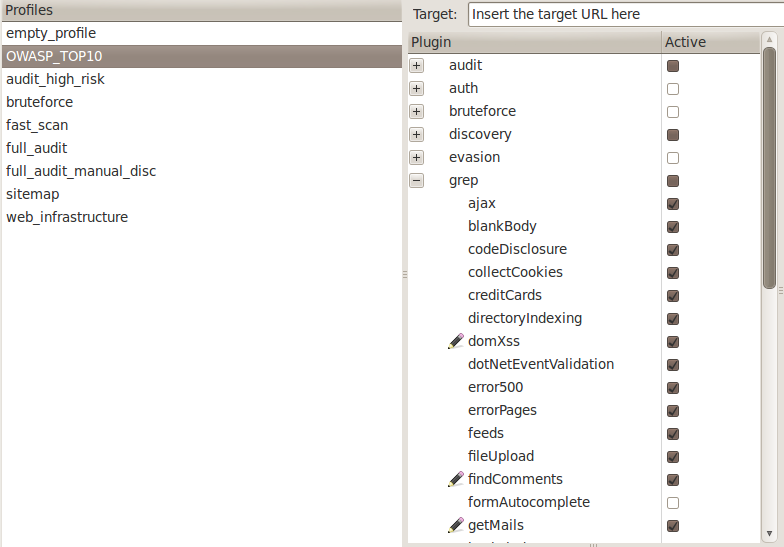
We can choose any profile from the list depending on our need, as well as the time availability. These profiles already has configurations to use some specific plugins for a particular task. For e.g if we if look the profile OWASP_TOP10, we will see that it uses several of the Audit, Grep and Discovery plugins to perform its tasks.
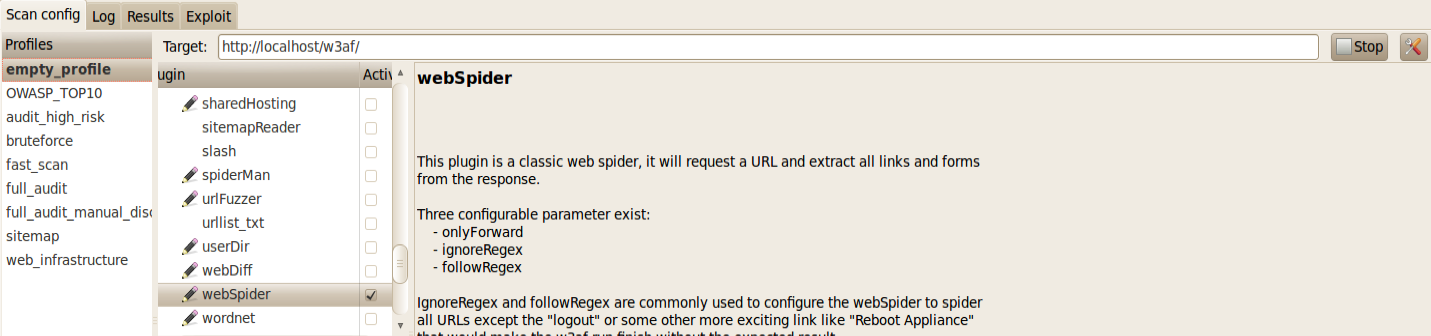
For the time being, we are going to use an Empty profile as we just want to check a single url for an XSS vulnerability. Note that this is usually not the way in which we will use the w3af framework. In a real world environment, we will choose some specific discovery plugins to find different url’s to check for injections, auth plugins to automatically log in to forms and crawl ahead, grep plugins to look for interesting information in the response, and audit plugins to scan for vulnerabilities in the found injection points.
Type in the url in the target field and choose the xss plugin from the audit plugins.
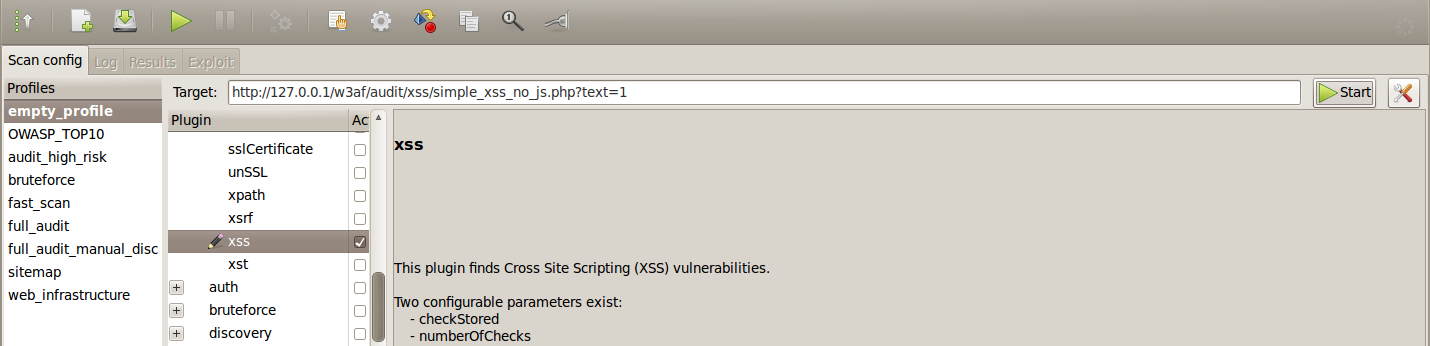
Once this is done, click on Start. This will start the scan on the given url. As we can see from the output, it found a XSS vulnerability.

If you are interested in knowing what actually happened, go to the Results Tab. Click on xss on the left side. On the right side, you can see a description of how the vulnerability was found. On the bottom right, you can also see the request and response which led to the identification of the vulnerability. It is a very good practice to look at the requests and responses sent through by w3af as this lets us know what’s going on under the hood.

So basically what happened was that w3af sent javascript strings to every parameter in the url, and then checked for those strings in the response. In case of stored XSS, w3af takes a note of the injected string and makes a request again to the url looking for that string. If it finds that string, then a stored XSS has been identified.
Let’s now use an OS commanding vulnerability to obtain a shell on the system. From the OS commanding section in the w3af test environment, choose a url and give it as target to w3af. Under the audit plugins section, check the OS commanding plugin.

Once this is done, click on start to launch the vulnerability scan. As we can see from the output, w3af identified an OS commanding vulnerability.
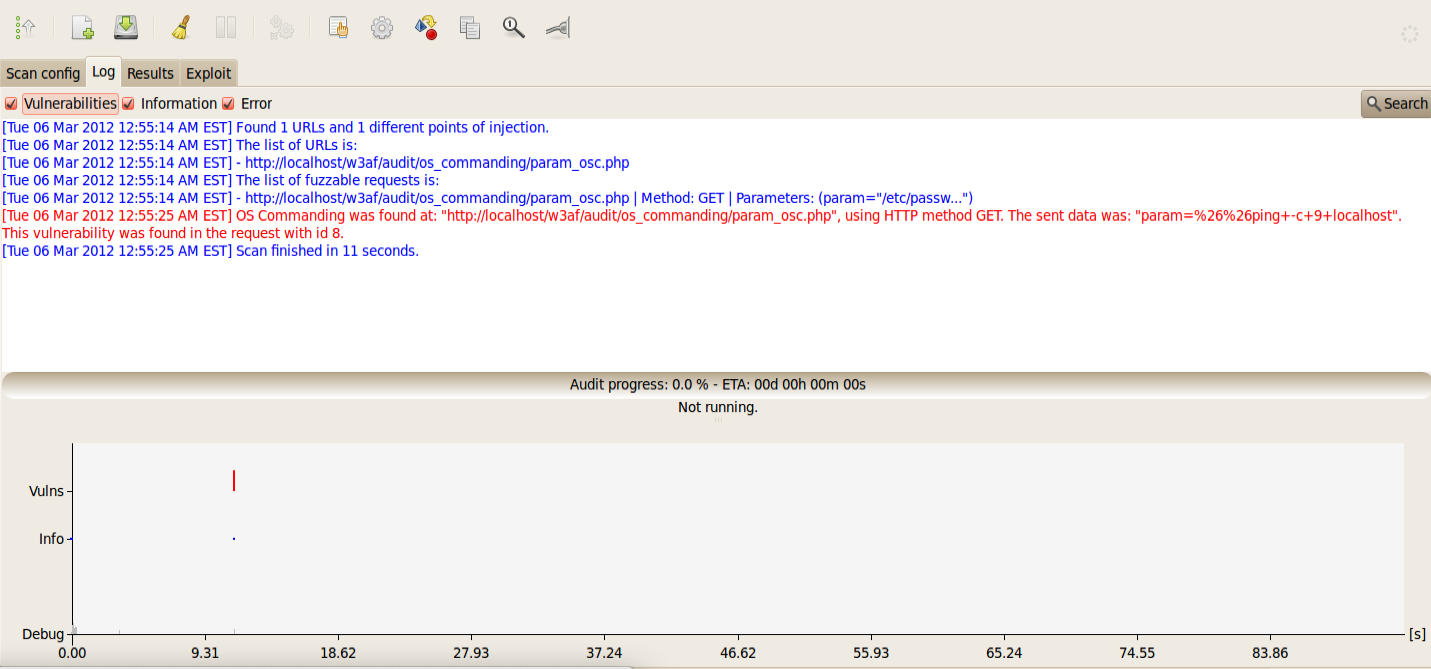
w3af supports detection of both simple and blind OS commanding vulnerability. In simple OS commanding, it sends a simple command to every parameter and then looks for a response to that command in the output. In case of blind OS commanding in which the response is not present in the output, it uses time delays to identify if a vulnerability is present. For e.g if it sends a command which delays the response for some seconds, and if we note a delay in the output, we can say that a blind OS commanding vulnerability is present.
Again, in the results section, we can see the request and the response which led to identification of the vulnerability.

w3af also allows us to exploit vulnerabilities. If we go under the Exploit section, we can see the identified vulnerability in the Vulnerabilities section. If we click on it, we can see that osCommandignShell in the Exploits section turns black. This is an indication that the vulnerability can be exploited using the osCommandingShell plugin in w3af. Right click on osCommandingShell and click on Exploit ALL vulns.
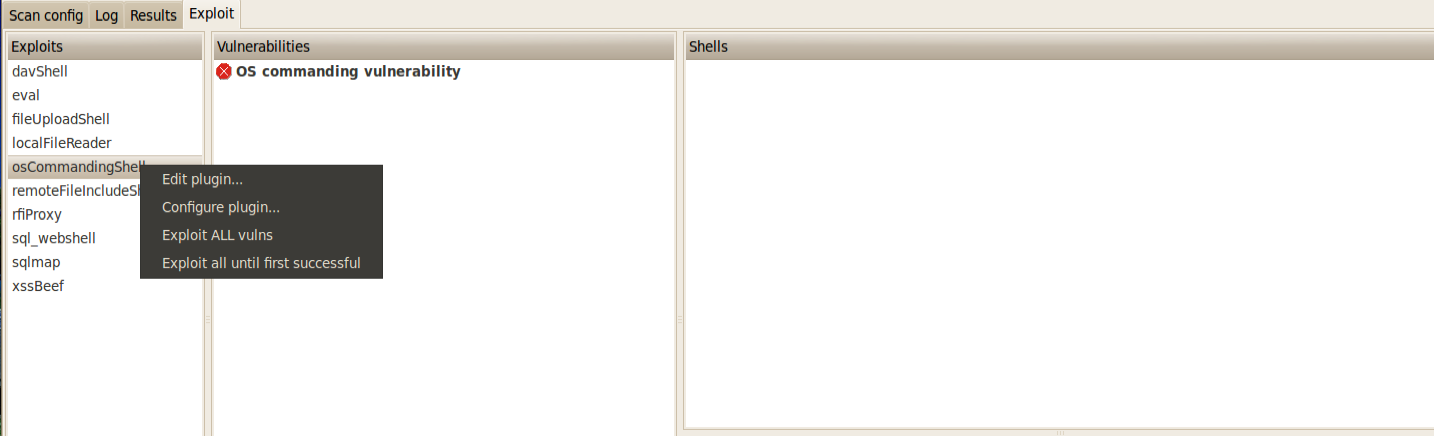
Once this is done, if the vulnerability is exploited successfully, we will get a shell on the target machine. We can see the list of shells on the right side. Note that it is not possible to get a shell in case of every vulnerability.
 Just double click on the shell and you are all set and ready to go.
Similarly, let’s use a file upload vulnerability to get a shell. Give the vulnerable url as a target to w3af. Make sure, the fileUpload plugin is checked in the audit plugins list.

Also make sure to check the extensions option in the fileUpload plugin. Since in some cases, the web application allows only some specific extensions, it would be favorable to add those extensions to the list as well.

Click on Start. As we can see from the output, w3af identified a file Upload vulnerability.

Click on the Results Tab. You can see that w3af tried to upload a file named w3af_dt4LqT.html. It did this by sending the file object in the uploadedfile parameter. It then looked for these files in common directories like uploads etc. If the file is found, then it can be said that a Insecure File Upload vulnerability exists. However, this is not always the case as most of the web application filter files based on their extension. To bypass this w3af has templates for some of the most common file extensions. These templates have valid extensions but have a section that can be replaced with scripting code. The figure below shows the files with different extensions present in w3af.

If we open up any of these files with Kate, we can see the content inside it. As we can see from the figure below, the file template.png has a string of A’s in its comment section. This string can actually be replaced by scripting code like php.

With all of these basics out of the way, let’s exploit this vulnerability using the fileUploadShell plugin. You can also set the configuration of these plugins by right clicking on them and clicking on Configure the plugin.
As we can see from the figure below, the vulnerability was successfully exploited and we got a shell on the target machine.

Similarly you can perform tests for many other exploits like Local File Inclusion, Remote File Inclusion, SQL Injection etc.
The Need of Discovery Plugins
In our previous tests, all we have been doing is giving the specific vulnerable url’s to w3af. However, this is not how real world Web application Vulnerability scanning works. The web application should itself be capable of identifying different url’s in the web application. These url’s will then serve as different injection points for the audit plugin. This is a good example of how the discovery and audit plugins work together with each other, passing along information.
Two of the most popular Discovery plugins are webSpider and SpiderMan. Basically webSpider uses the given input URL, makes a request and extracts any links or forms obtained in the response. Using these links, it crawls on looking for more links (possibly injection points). The other plugin named SpiderMan is also a very useful plugin for sites which uses Flash or Javascript. Basically it is difficult for web crawlers to look for information if the website uses Javascript etc. In actual, most of the web crawlers just ignore Javascript completely. This is because it is not able to figure out what the Javascript code is supposed to do. Most of the web crawlers just look for static information like links, forms etc. In case the webSpider crawler hits a login form, it will enter the credentials automatically if the auth plugin is enabled (and all the options on it are filled correctly) and keep crawling ahead.
In cases where the web application uses Javascript or Flash, the spiderMan plugin should be used. The spiderman plugin starts a proxy, and the user has to navigate through that proxy. Based on the results from the user’s navigation, spiderMan plugin is able to identify different injection points which could be then sent to the different audit plugins for vulnerability scanning. Another important feature of the spiderMan plugin is the ability to save cookies and reuse them. Let’s say we use the spiderMan proxy and login to a form using the browser and receive a cookie. The spiderMan plugin will then send the cookie to the rest of the plugins which can use it to crawl the rest of the application.
Let’s run the webSpider plugin on the w3af test environment. Give the url of the test environment as the target url, make sure only the webSpider plugin is checked inside discovery plugins and click on Start.
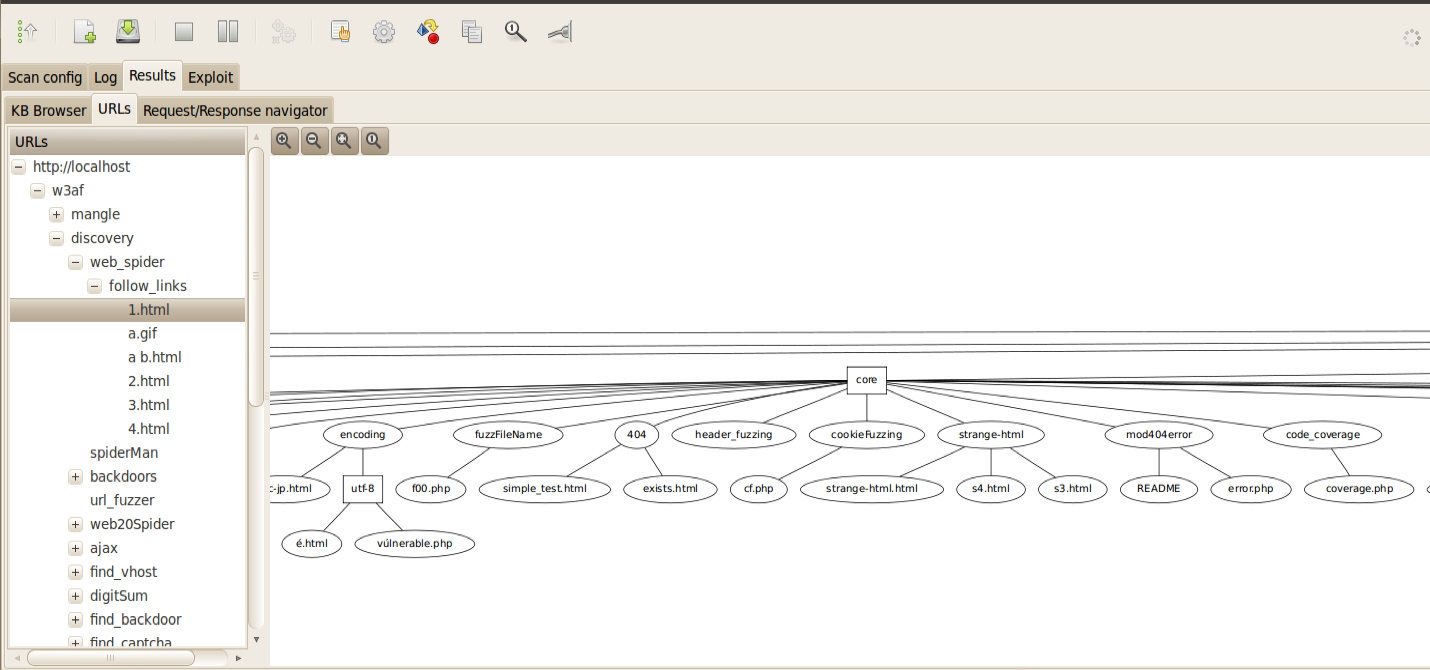
We can see from the Log that the webSpider plugin has been able to identify some new url’s. The graph below gives a good idea of the information obtained with time.

As the scan is progressing, go to the Results Tab, click on URLs. As we can see from the figure below, w3af has made a graphical diagram which defines the web application structure. On the left hand side, you can click on the + sign to see detailed information about a particular branch.
Let’s do another example of webSpider plugin. Give the target as the dvwa login page, make sure the WebSpider plugin is checked and click start. In the result, we obtain a graphical structure of the application as shown below.
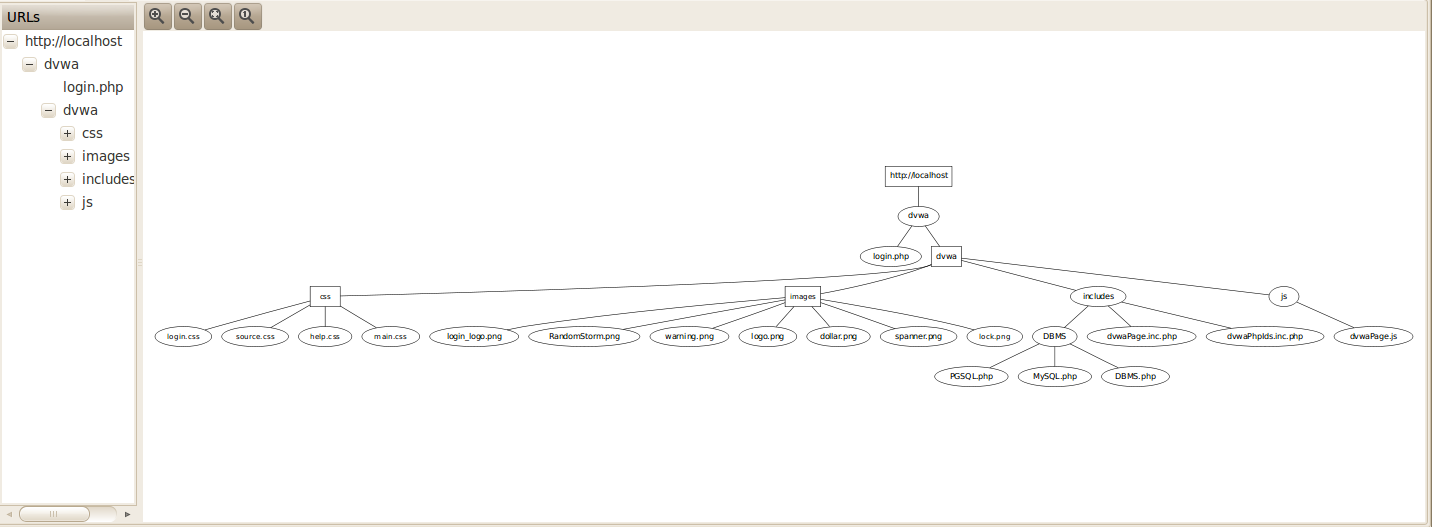
This, however is not correct. This is because DVWA has a whole list of url’s inside the vulnerabilities folder. However webSpider plugin was not able to crawl to that directory because it required us to enter a login form as shown below.

This is where the spiderMan plugin comes into use. A good idea is to use the SpiderMan and WebSpider plugin in conjunction with each other. This is because the SpiderMan plugin will help us in reaching places where the webSpider crawler cannot go, and the webSpider crawler can them carry on from those places to crawl the rest of the web application.
Let’s do the same test again using the SpiderMan plugin as well. Make sure both SpiderMan and WebSpider plugin are enabled and click on start. Also make sure to check the listen Address and listen port as well.

Once this is done, we need to configure our browser to use the SpiderMan proxy for navigation. If we have to terminate the SpiderMan plugin, we have to browse to a specific url as clearly indicated in the figure below.

Now we need to configure our browser to use the SpiderMan proxy for navigation. In my case, i changed the port number to 44448. It is usually 44444 by default in w3af.

Once this is done, log in to the dvwa application (default credentials: admin/password) and start navigating to different url’s. You can see these requests are noted by the spiderMan plugin as shown in the figure below.

To terminate the spiderMan plugin, browse over to the following url as shown below.

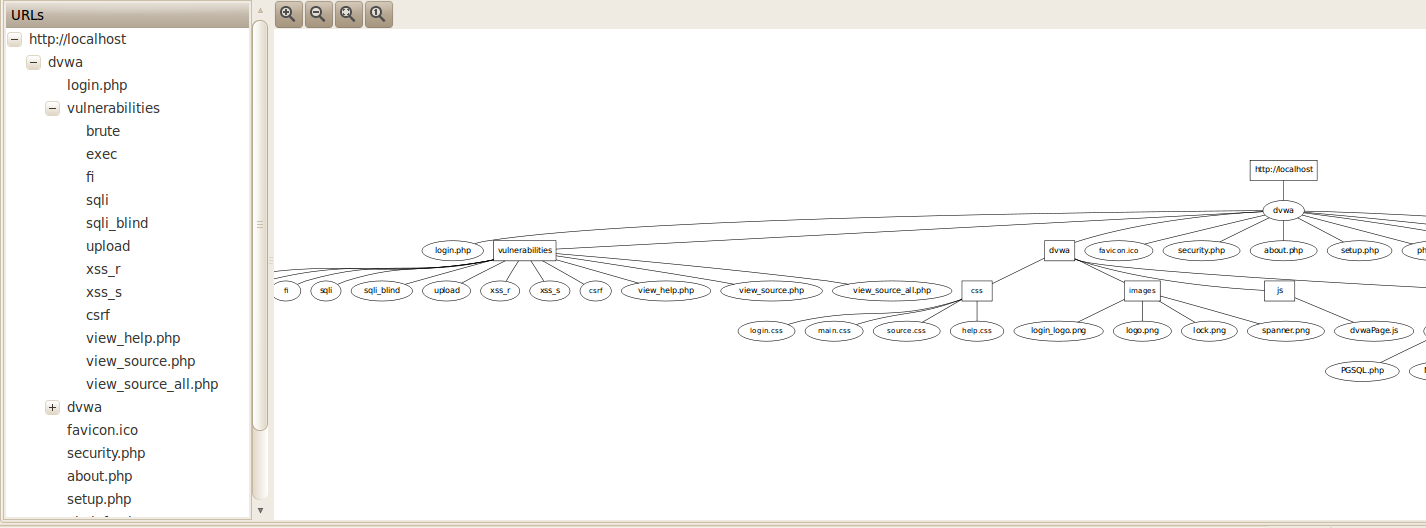
Once this is done, the SpiderMan plugin will terminate and the information will be passed over to the different plugins. As we can see from the figure below, the webSpider plugin has found some new url’s (for e.g http://localhost/dvwa/vulnerabilities/csrf/) to which it was able to crawl to using the information from the spiderMan plugin.

If we look at the structure of the application, we see that it is actually correct as even the vulnerabilities section was identified.
Conclusion
In this article, we looked at the various discovery and audit plugins in w3af, how they communicate with each other and looked at some of the ways of exploiting these vulnerabilities by using the exploit plugins available in w3af.
In the upcoming articles in this series, we are going to look at the following features in w3af.
- Using different profiles
- Using the Manual Request and Fuzzy request feature
- Using the Mitm proxy and the encoder/decoder features
- w3af scripting
- Optimizing w3af scans
Please drop a comment if you liked the article or if there is something about w3af that you want to see in the upcoming articles.
References:
-
w3af User Guide
http://w3af.sourceforge.net/documentation/user/w3afUsersGuide.pdf -
w3af-Plugins and descriptions
http://w3af.sourceforge.net/plugin-descriptions.php
This article was originally published on the resources page at Infosec Institute. For more information, please visit my author page.