
w3af walkthrough and tutorial part 4 - w3af tools
In the previous articles in this series, we looked at all the plugins available in w3af and looked at their applications in different scenarios. In this article, we will look at some of the other tools present in w3af which allow us to send Manual Requests, perform Fuzzing, Encode and Decode requests and responses, use a Proxy to intercept and modify requests and responses, and allow us to perform a comparison between different HTTP requests and responses. We will also look at how we can write our own w3af scripts to automate the task of Web Application Penetration Testing. We will then look at the various profiles present in w3af.
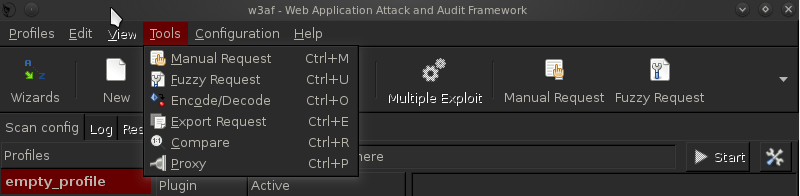
1)Manual Request -The Manual Request feature in w3af allows us to send specially crafted requests and then analyze the response. This technique could be used in various cases which includes testing for SQL Injection, Cross Site Scripting etc. The tools present in w3af can be found by clicking on the Tools menu as shown in the figure below. Click on Manual Request to open up the Manual Request editor tool.
Once this is done, you can write your own manual request and send it to analyze the response. As you can see from the figure below, i am making a simple GET request to http://google.com . Also, you might want to change the User-Agent field as this gives away the fact that the request is coming from w3af.

Click on Send Request to send the request. Once this is done, the response will be displayed. You can then simply analyze the response or send it to other w3af tools.

It is also possible to send requests to the Manual Request Editor from the results of scans by clicking on its corresponding button below the request/response as shown in the figure below. Same applies to all the other tools like Encoder/Decoder, Fuzzy Request editor, Export Requests etc.

2)Fuzzy Request - The Fuzzy Request feature present in w3af allows us to send different requests with varying data and analyze the responses. 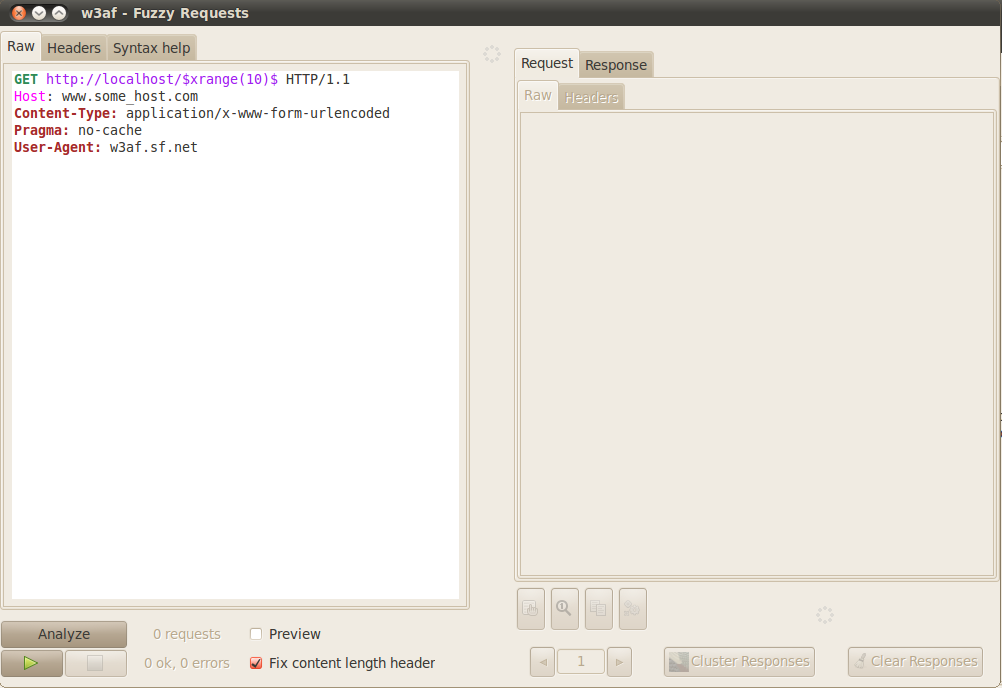
The fuzzy request editor is shown in the figure above. The varying text is added between the dollar sign ($). It is clear from the figure above that the varying data is determined by the syntax “$xrange(10)$” which includes numbers from 0 to 9. In case two such text generators are present, then the requests will be combined. For e.g if one of the generator generates 5 values whereas the other generator generates 6 values, then the total number of requests that will be sent will be 30. Some of the common syntax used to generate variable text is shown in the figure below from w3af GUI.

Once we have written the generators, we can simply click on Analyze to analyze the requests that will be generated during the fuzzing test. This is useful because it allows you to actually see these requests before sending them.

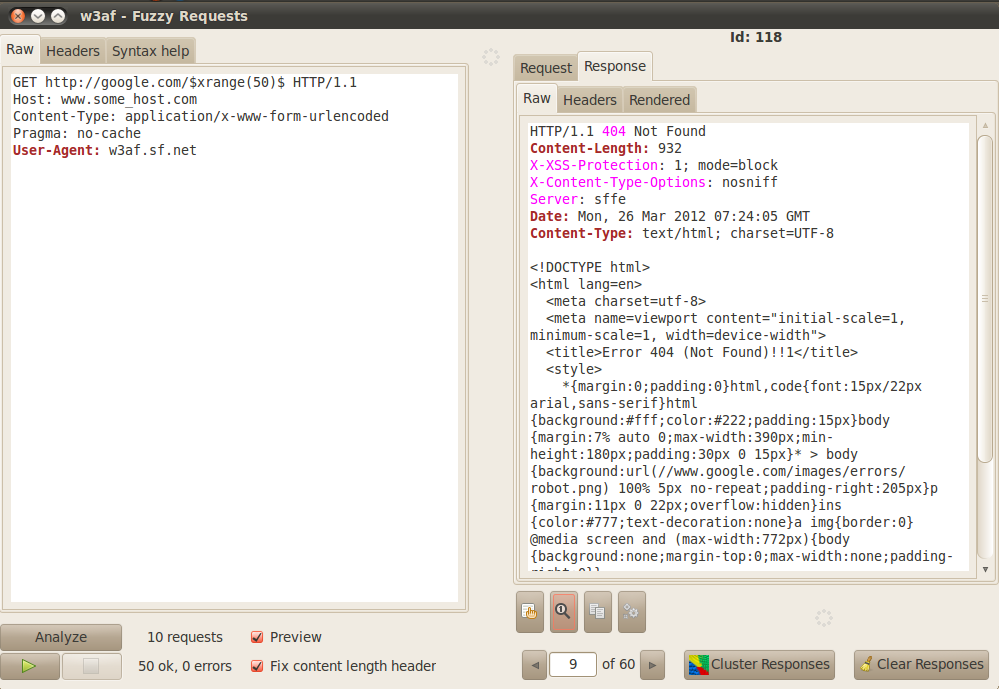
Click on the play button in the bottom left to send the requests. Once the requests have been sent, you can analyze the responses by clicking on the Response tab.
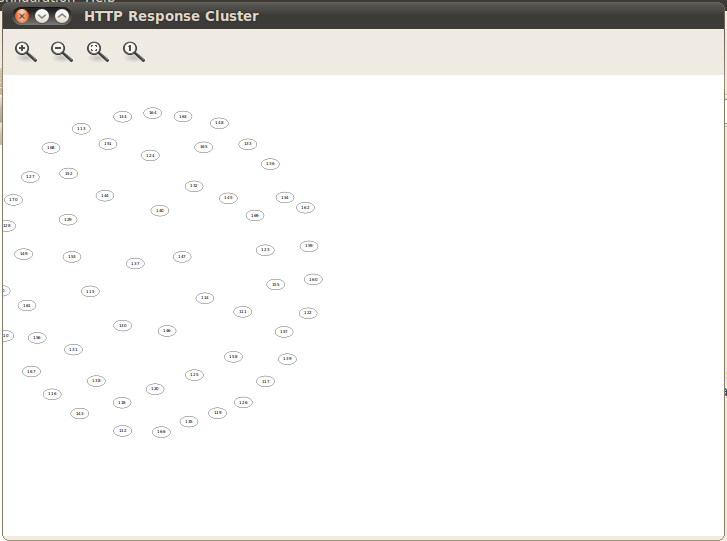
Once the responses are received, you can seperate these responses into different clusters. There are different clustering methods present in w3af which have different ways of determining the distance between these HTTP responses. Using these responses, different clusters are created and the responses with the minimum difference between them are added to the same cluster. This is a quick way to determine which response stands out as different from the other responses which is an important step in Fuzzing.
The figure below shows the cluster created by using the method Levenshtein distance of the HTTP bodies. w3af also allows you to write a customized clustering method to perform the task. It is also possible to send requests to the Fuzzy Request generator from the results of scans.
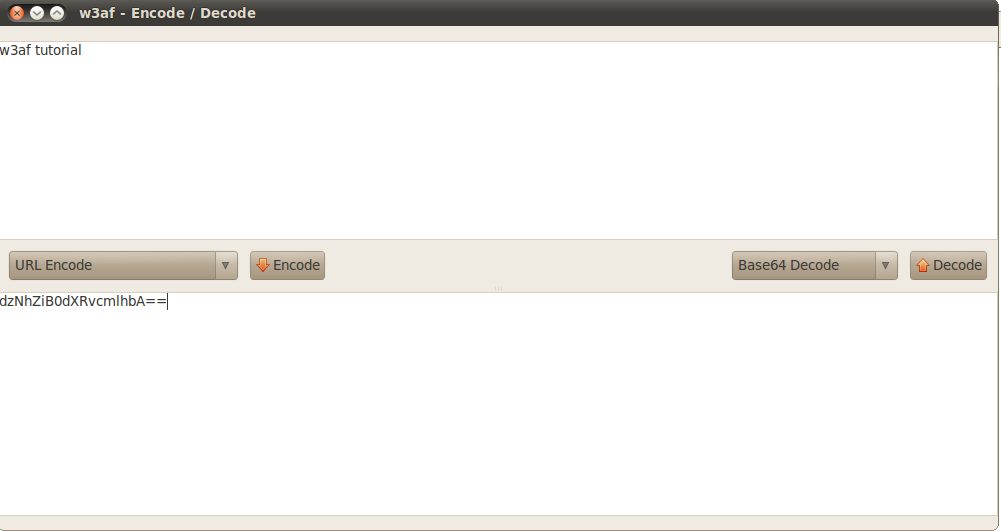
3)Encode/Decode - The Encode/Decode tool in w3af is used to encode or decode strings, urls etc. You can choose from a variety of encoding and decoding options. The figure below shows a base64 encoded string being decoded by the w3af decode tool.
4)Export Requests - The Export Requests tools allows us to generate code in different languages which when run will regenerate the request. In the figure below, i am generating some code in Python, which when run will regenerate the original request. The Export Requests tool allow you to generate code in HTML, Ajax, Python and Ruby.

5)Compare - The Compare tool is used to perform comparison between 2 requests/responses. As shown in the figure below, i have sent the comparer tool 2 responses for 2 different requests. The difference between these responses is highlighted by the comparer tool.

6)Proxy - w3af also comes with an intercepting proxy that allow us to intercept requests, and modify them on the fly. To use this proxy, we have to configure our browser to use this proxy. In case of real world web application testing, it is important that we intercept only those requests that we want. The figure below shows the configuration for the proxy. We can see that it is running on port 8080. We have also configured the proxy to not trap requests for certain images, css, swf files etc.

Let’s configure our browse to route traffic through this proxy.

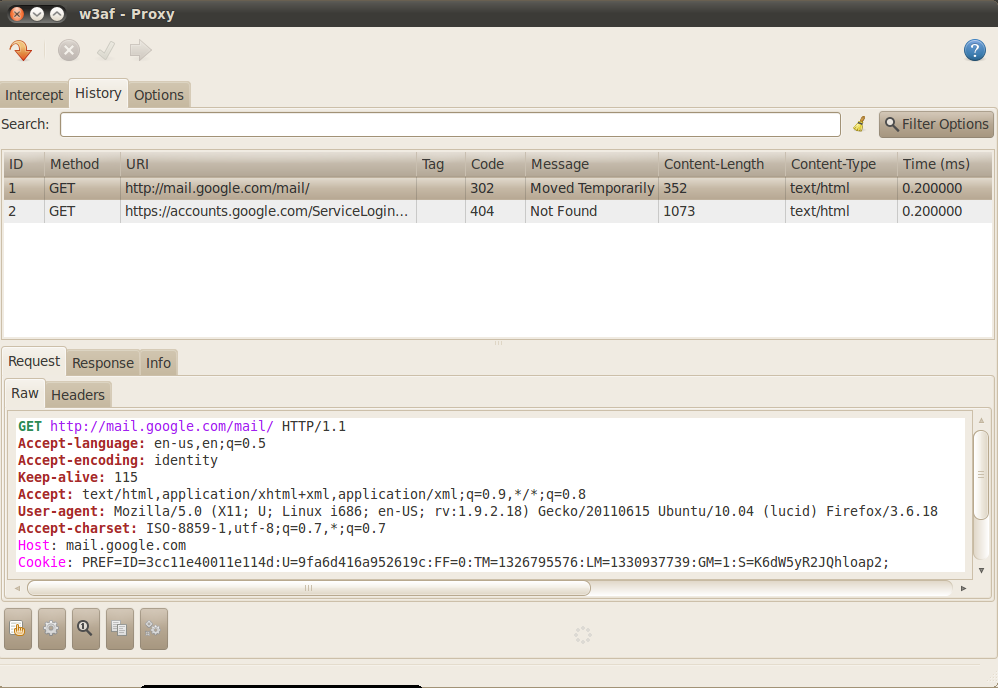
Once this is done, start browsing through your browser. You will see the requests and the responses appearing in the History tab as shown in the figure below. Right now the requests and responses are being passed through the proxy without interception.
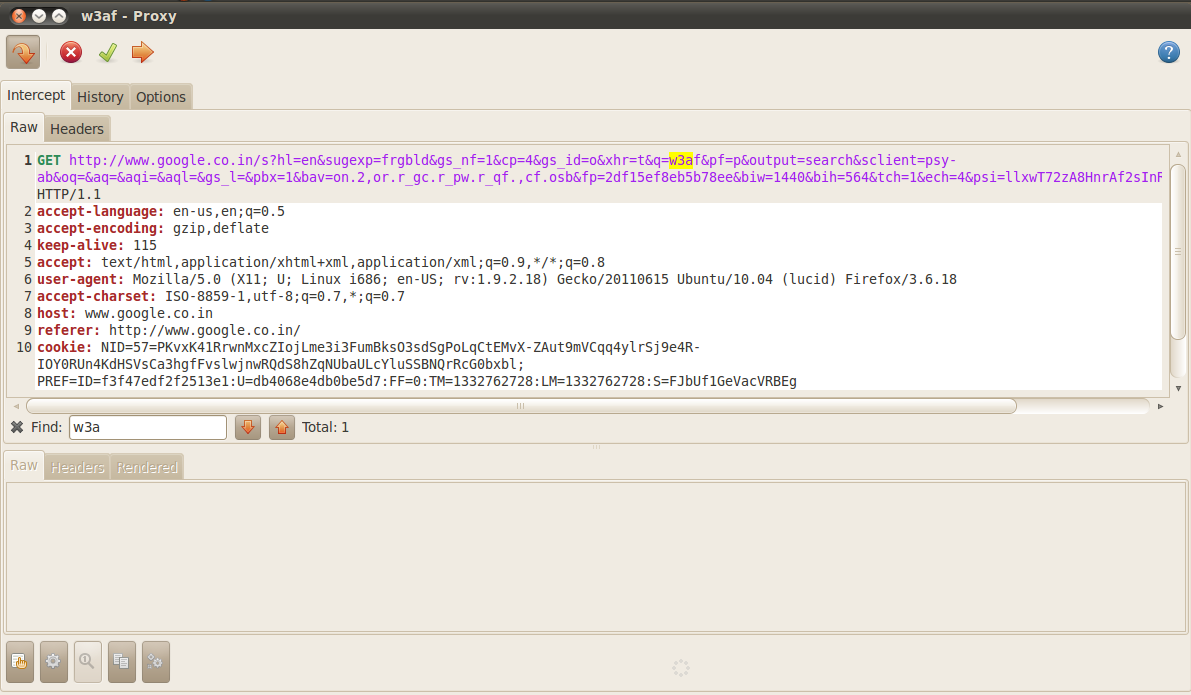
As discussed before in this article, you can send the requests/responses to the other tools like Manual Request editor, Fuzzy Request editor etc present in w3af. Click on the arrow pointing downwards on the top left to start intercepting the requests. If you browse through the proxy now, you will notice that the requests are being intercepted by the proxy as shown in the figure below.

You can simply Drop the request so that it doesn’t reach its destination, forward it as it was or modify the request and then forward it. For e.g in the intercepted request shown in the figure below, we can see that the search query was w3af. We can easily change it to whatever search query we want it to be. Some of the other uses of w3af proxy could be finding out the parameter names through which the authentication credentials are sent in a login submission.
w3af scripting
Many times we have to perform scans on different websites with the same set of plugins and the same configurations. However, for every new scan (or every new profile), we have to select the plugins, configure the options each time. This process could be time consuming. w3af scripting makes this very easy for us. We can write our own w3af scripts to automate the task of selecting the plugins, and performing the scan on different websites. w3af scripts end with the extension “.w3af” . We write a set of w3af console commands in the file. Once the script is run, each w3af console command will get executed in each line in the same order as they were written in the file. This is just the same way we would be using the w3af console. If we want to perform the scan on a different website with the same set of plugins, we can just change the target in the script. One other thing about running w3af scripts is that you can add your own commands once the script has run and made its changes. For e.g if i want to perform a scan with the same set of plugins and options on different websites i can just write a script which sets the plugins and the configurations without setting the target. Once the script has run, we can enter the target ourselves and then run the scan.
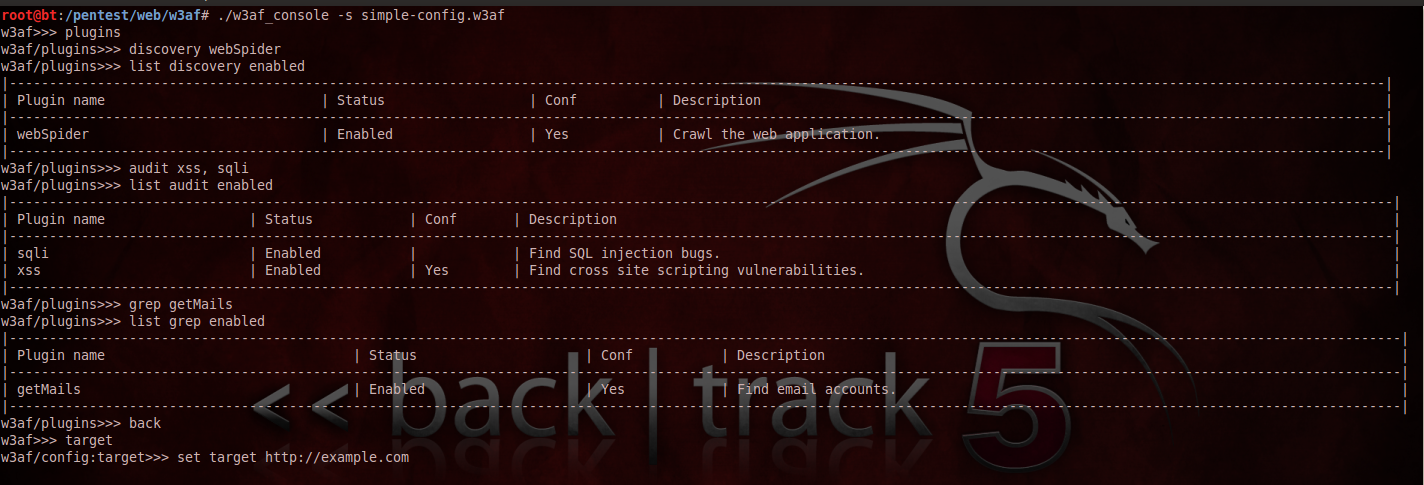
Let’s start by writing a simple script to demonstrate the use of w3af scripts. In the figure below, i am writing a script that sets some plugins for a vulnerability scan. As it is clear from the figure below, i am using the webSpider discovery plugin, the xss and sqli audit plugins and the getMails grep plugin.

Once this is done, we save the file as simple-config.w3af. To run the script we just have to use the command ”./w3af_console -s simple-config.w3af”.

We can see the output in the figure below. Once this is done, we can simply set the target ourselves and start the scan. Hence, having prewritten w3af scripts for different kinds of scans can save us a lot of time.
The following figure below shows another example of a w3af script which when run enables some plugins and starts the scan against the specified target.

w3af profiles
A w3af profile can be defined as a profile with preconfigured plugins made for a specific scenario keeping the resources and time availability in mind. We can also create our own w3af profile. However, w3af offers some of its own set of profiles which we can use in our scan as shown in the figure below.

Let’s discuss all these profiles in brief.
1)OWASP_TOP10- This profile searches the target web application for the ten most common security vulnerabilities defined by OWASP.
2)audit_high_risk- This profile searches the target web application for high risk vulnerabilities like OS commanding etc which can later be used to fully compromise the web application.
3)bruteforce- This profile can be used to perfom a bruteforce attack on the web application.
4)fast_scan- This profile is used to perform a fast scan of the target web application. It uses only the webSpider plugin for discovery as enabling a large number of discovery plugins can take a long time.
5)full_audit- This profile performs a full audit of the web application. It has almost all the audit, bruteforce and grep plugins enabled. Like the fast_scan profile, this also uses the webSpider plugin for discovery.
6)full_audit_manual_disc - This profile is very similar to the full_audit profile, except that it also uses the SpiderMan plugin to perform manual discovery on the target web application. The SpiderMan and the webSpider plugins communicate with each other to find as much information as possible about the web application.
7)sitemap- This profiles uses different discovery plugins like robotsReader, yahooSiteExplorer etc to create a sitemap of the target application.
8)web_infrastructure- This profiles uses some of the discovery plugins like fingerprint_os, hmap, serverHeader etc to fingerprint the web application.
Conclusion
In this article we looked at the various tools like Proxy, Manual Request editor etc that w3af has to offer to help us perform web application vulnerability assessment and penetration testing. We then looked at how we can write our own w3af scripts to help automate the task of web application testing. Finally, we then looked at all the different preconfigured profiles that w3af has to offer and discussed their applications in different scenarios.
This article is the final article in the “w3af walkthrough and tutorial” series. Please drop a comment if you liked this series or if you have any questions regarding this series.
References:
-
w3af User Guide
http://w3af.sourceforge.net/documentation/user/w3afUsersGuide.pdf -
w3af-Plugins and descriptions
http://w3af.sourceforge.net/plugin-descriptions.php
This article was originally published on the resources page at Infosec Institute. For more information, please visit my author page.