
Ghost USB Honeypot Part 2 - Installing and running the honeypot
This article is in continuation of Part 1 of the series on Ghost USB Honeypot. Malware threats have become very common these days and hence the need of honeypots to detect those malwares have become equally important. In the last few years, we have seen how USB based malwares can be used to target highly protected machines that are not connected to the internet. In order to detect malwares that spread over USB devices, the Ghost USB Honeypot project was started. Ghost is a honeypot for detecting malware that spreads via USB devices. The honeypot currently supports Windows XP and Windows 7. The way Ghost works is that it first tries to emulate a USB thumb drive. If the malware identifies the emulated device as a USB thumb drive, it will try to infect it. Ghost then looks for write requests to the drive, which is an indication of a malware.
In the first part of this article, we covered an interview with the project leader Sebastian Poeplau. In this article we will be discussing how to install and use the honeypot on a windows machine to capture any data or binaries that the malware will install on your USB drive.
Installing Ghost Honeypot
Ghost USB honeypot currently runs only over Windows XP and Windows 7. A quick install guide for it could be found here. We will however be discussing it in this article too. The first step in this process is to install the ghost honeypot from its official webpage. A link to the binary package can be found here. The next step is to install the 2 required dependencies. These are
a) Windows Driver Framework (WDF)- More information about it and download links can be found here. Once you have downloaded and installed it, there are two files which you will need to copy to the folder where you downloaded Ghost. The default location for these files are “C:\Program files\Windows Kits\8.0\redist\wdf\x86\WdfCoInstaller01009.dll” and “C:\Program files\Windows Kits\8.0\redist\wdf\x86\WUDFUpdate_01009.dll” as shown in the figure below. These 2 files should be copied inside the folder where you have downloaded Ghost. 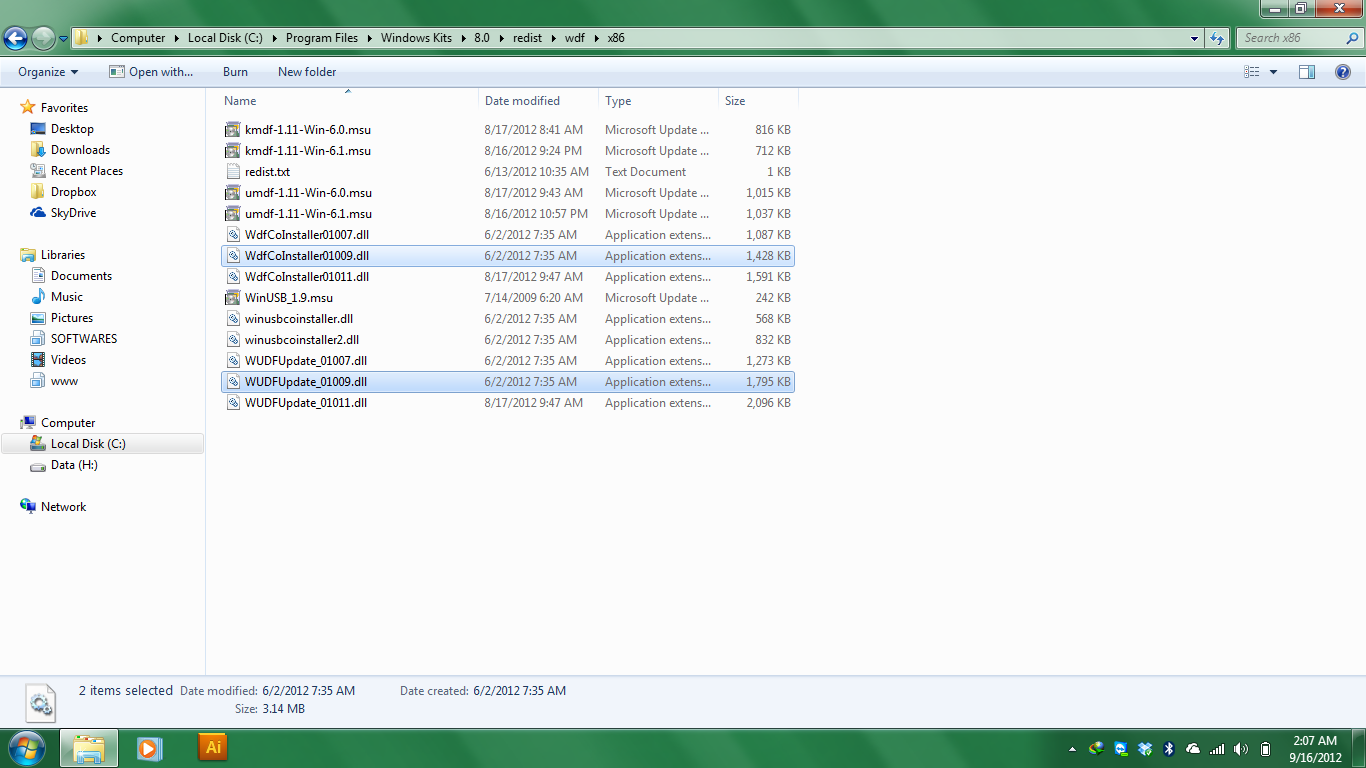 b).NET Framework version 4 or higher- Ghost also has a GUI version. If you want to install and run it on your system, then you need to have .NET framework version 4 or more installed on your system. You can download it from here.
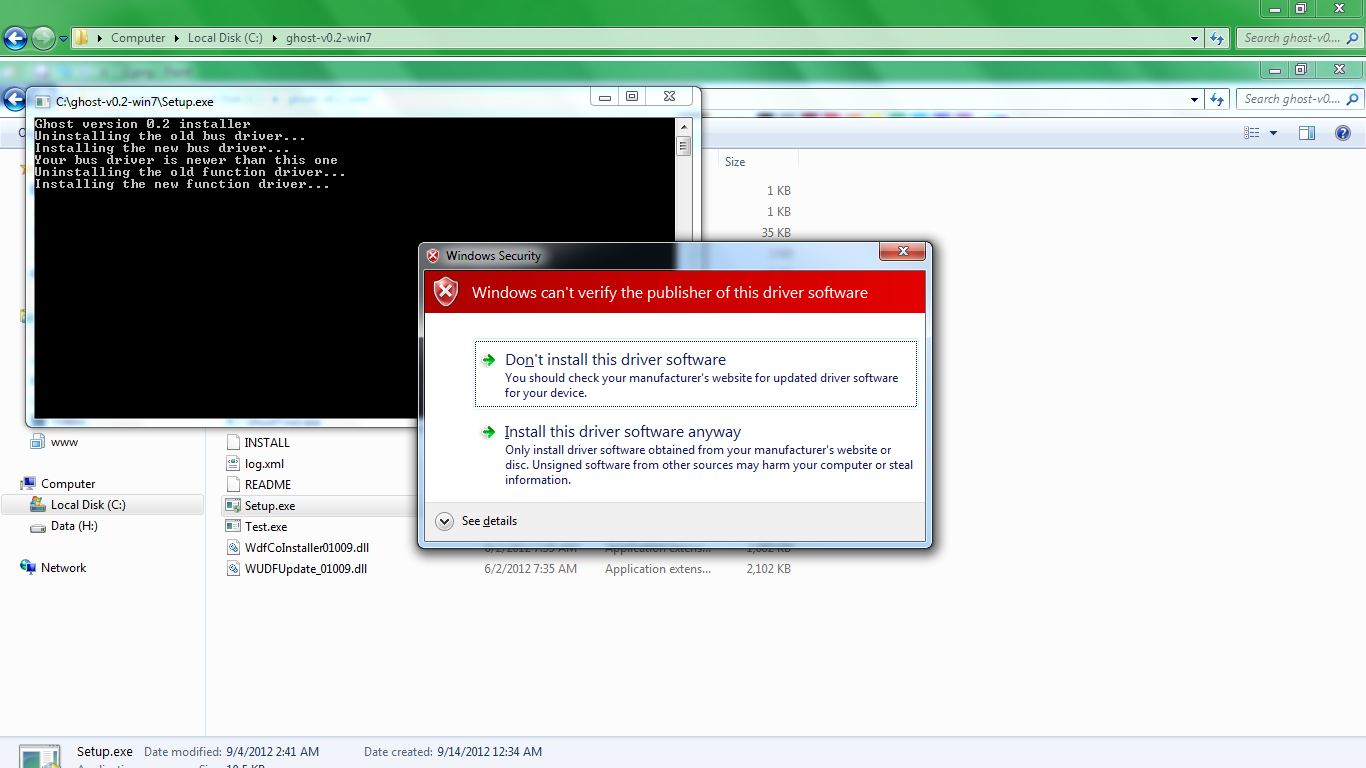
Now go to the folder where you downloaded Ghost and run Setup.exe. You may get warnings from the OS about installing these new drivers as shown in the image below. Ignore them and proceed with the installation.
As discussed previously, what Ghost does is emulate a USB flash drive. Some of the key points while emulating a USB flash drive is to make sure that it is recognized as “removable” by the Windows OS. This is because a lot of malwares will write data only to removable devices. The Ghost tool does this very accurately by installing some specific drivers to do the task. What the Ghost tool also does pretty well is write all the data that was supposed to be written to the USB device onto a image file. This way, that image file can then be copied onto another system and used for analyzing the changes that were made to that image, like copied binaries or some other malicious code.
Running the Honeypot
Once you have installed the Ghost tool onto your system, you can either use it in the command line mode or the GUI mode.Note that the emulated USB flash drives will require image files. These image files have a predefined location, i.e C:\gd[0-8] when using the command line tool or C:\gdgui when using the GUI tool. Ghost will automatically create empty image files if they are not present. But these empty image files require formatting before they could be used. And hence a more better solution is to download preformatted image files from the project’s website. The links could be found here.Once you have downloaded these preformatted image files, you should rename them properly and place it at the appropriate location. For example, an example location for one of the image files could be C:\gd0.img for the command line tool and C:\gdgui.img for the GUI version.
We will start by using the command line version of Ghost first. To use it just go the directory where it is installed and type “ghosttool”. One of the most important things to remember while doing this is to make sure that you are running command prompt as the system administrator, otherwise you will get an error.
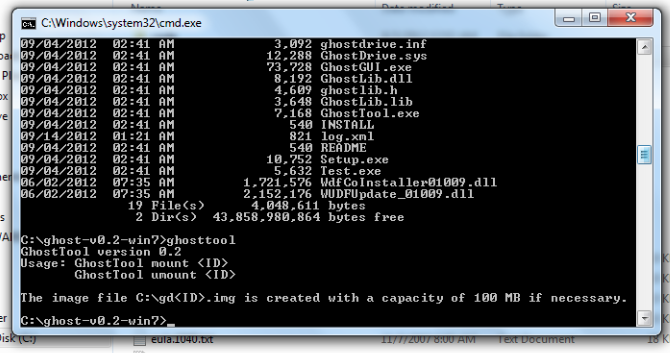
Lets mount a virtual USB flash drive.
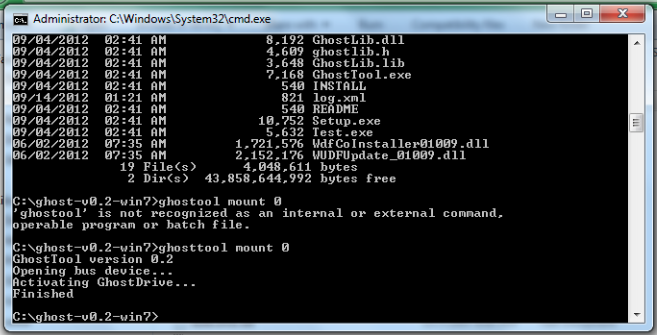
Once this is done, you will notice that you get a notification from windows that it has identified a usb device with removable storage. This makes sure that the device was emulated properly. Also, you can see that a removable device with capacity of about 100 mb is now being shown by Windows.

Now, if there is a malware installed on this system, it will detect this removable device and write data to this emulated USB device automatically. The binaries or data written to this USB will be captured in the image file, which could be then taken to a separate OS and used for analysis. In this case i will just copy some file to the usb device and when we unmount it, we will notice that Ghost has detected those write requests.

Now, we will have a quick look at the GUI version. Remember to run it as administrator. For the GUI version, the image file name will be gdgui.img. To mount an image, just click on Mount and it will emulate the USB device.

Once you unmount the device and if there was ever a write request to the drive, it will be shown to you as shown in the figure below.

You can now copy the image file to a different isolated environment and use the captured data for analysis.
Conclusion
USB malwares are becoming more and more common these days. The ghost USB honeypot project aims at emulating a USB device to capture any data that a malware may write to your USB device. This captured data can then be transferred over to another system for analysis.
References:
- Ghost USB Honeypot project
http://code.google.com/p/ghost-usb-honeypot/
This article was originally published on the resources page at Infosec Institute. For more information, please visit my author page.