
iOS Application Security Part 51 - Dumping decrypted IPA and Dynamic Instrumentation on a non-jailbroken device
In this article, we will look at how to dump decrypted IPA file for an application using frida and then look at how to set up Frida for dynamic instrumentation on a non-jailbroken device.
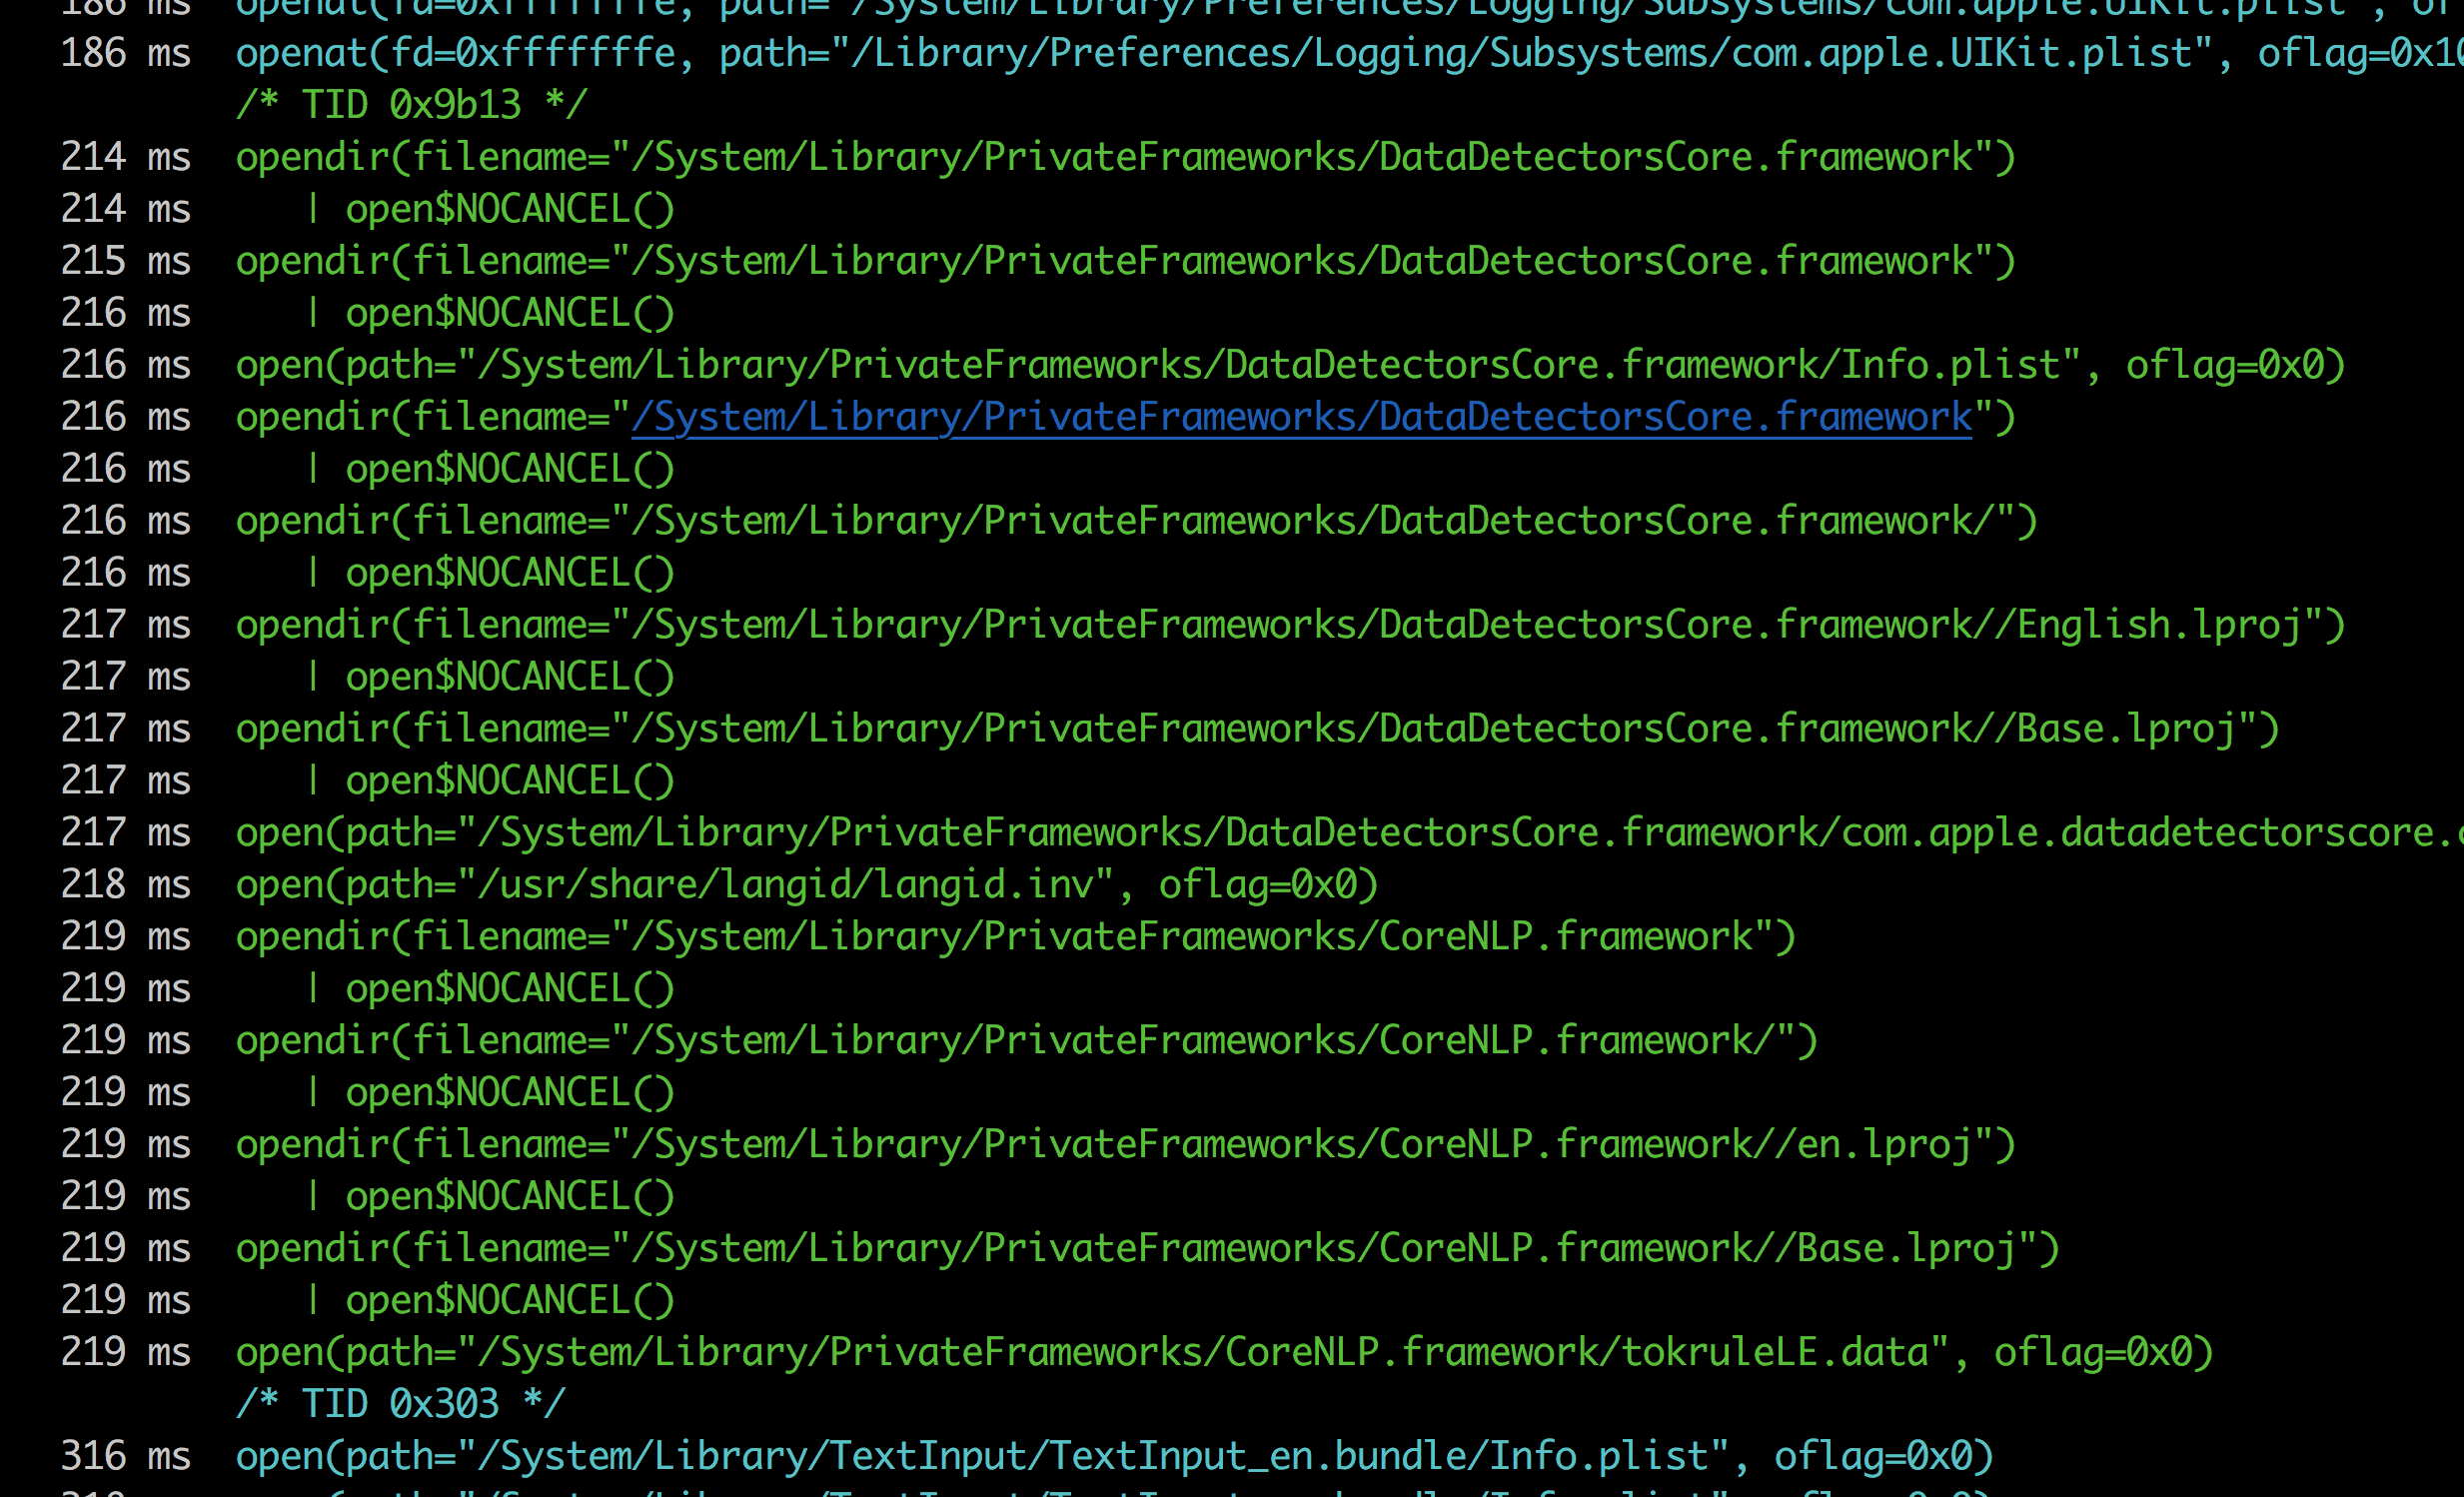
To dump an IPA, we will use an open source tool known as frida-ios-dump which can be found on https://github.com/AloneMonkey/frida-ios-dump.
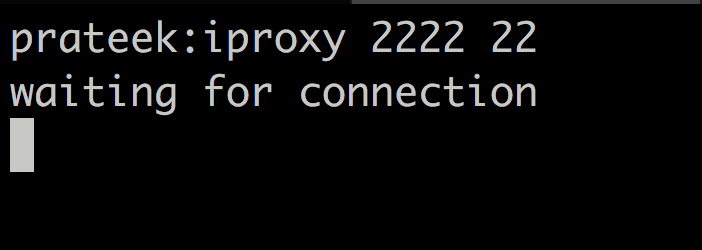
The first thing is to set up port forwarding. This can be done by using iproxy. By default frida-ios-dump will connect from local port 2222 to remote port 22. So this is what we will set up with iproxy as well.
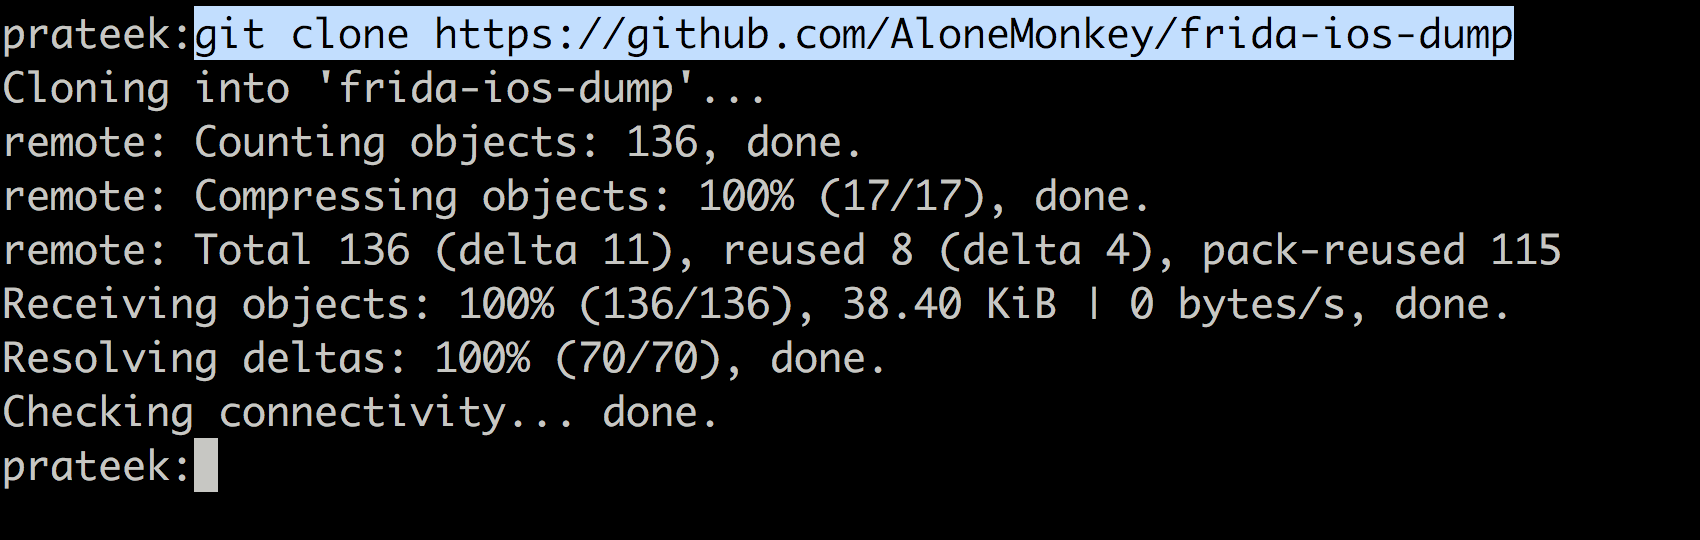
Next, clone the repo from github.
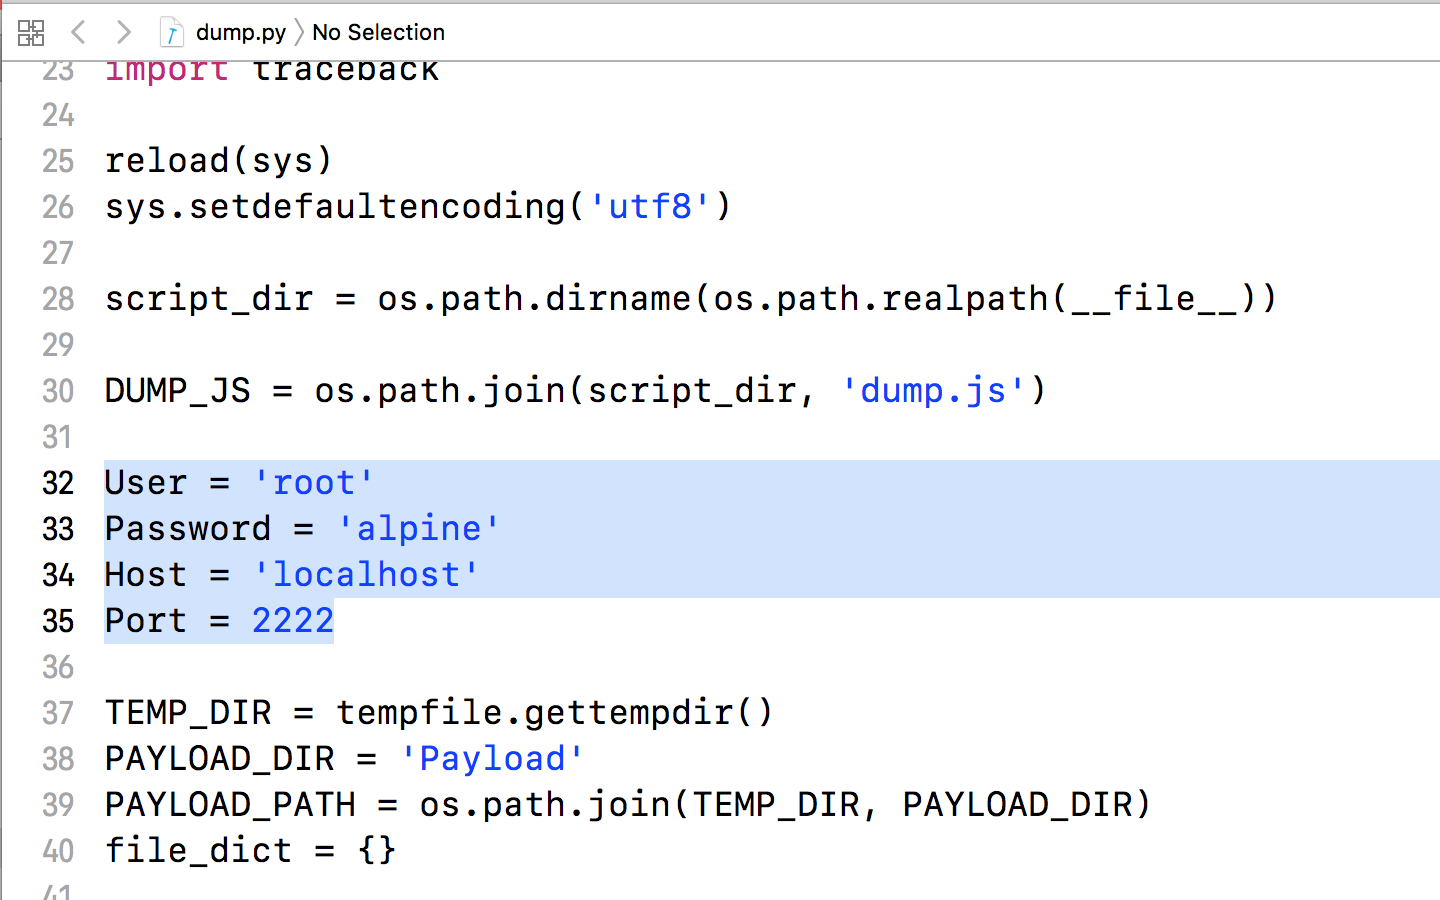
Now navigate under the tool directory, open the file dump.py and and change the user/pass to that of your device. This will allow frida-ios-dump to connect to your device over the tunnel you just created. All of this is assuming your device is connected to the computer over USB. If its over Wifi (SSH), then the public key for the device must be added to the target device’s ~/.ssh/authorized_keys file.
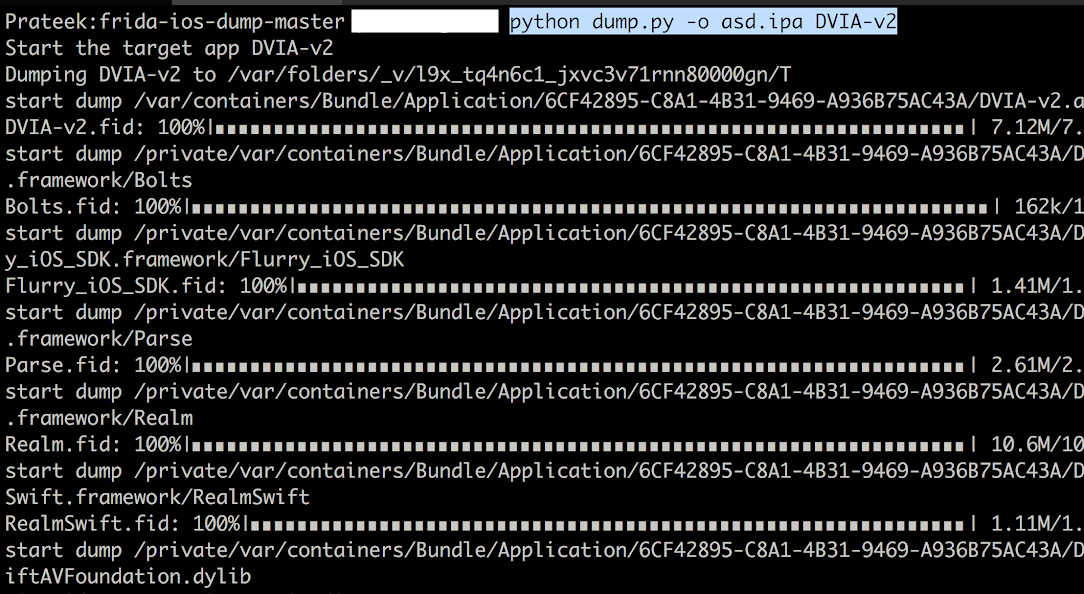
Now you can use the command python dump.py AppName to dump the IPA file from the device.
The next thing we need to learn is to do dynamic instrumentation on a non jailbroken device. This requires us to have the source code of the application or a decrypted IPA. In this article, we will only discuss the scenario where source code is required. The way it works is that we include a dylib in the application source code. This dylib needs to be obviously signed before being deployed into the device. Since the device is not jailbroken in this case, you need to sign it with your official Apple developer certificate (and not a self signed certificate). In this case, we will be inserting the dylib into Damn Vulnerable iOS application. You can clone DVIA from here.
You can grab the latest release of the Frida gadget from the Frida releases page. Look for the iOS gadget. At the time of writing this article, the latest Frida version is 12.0.4 and could be downloaded from here. Once it is downloaded, run the following commands.

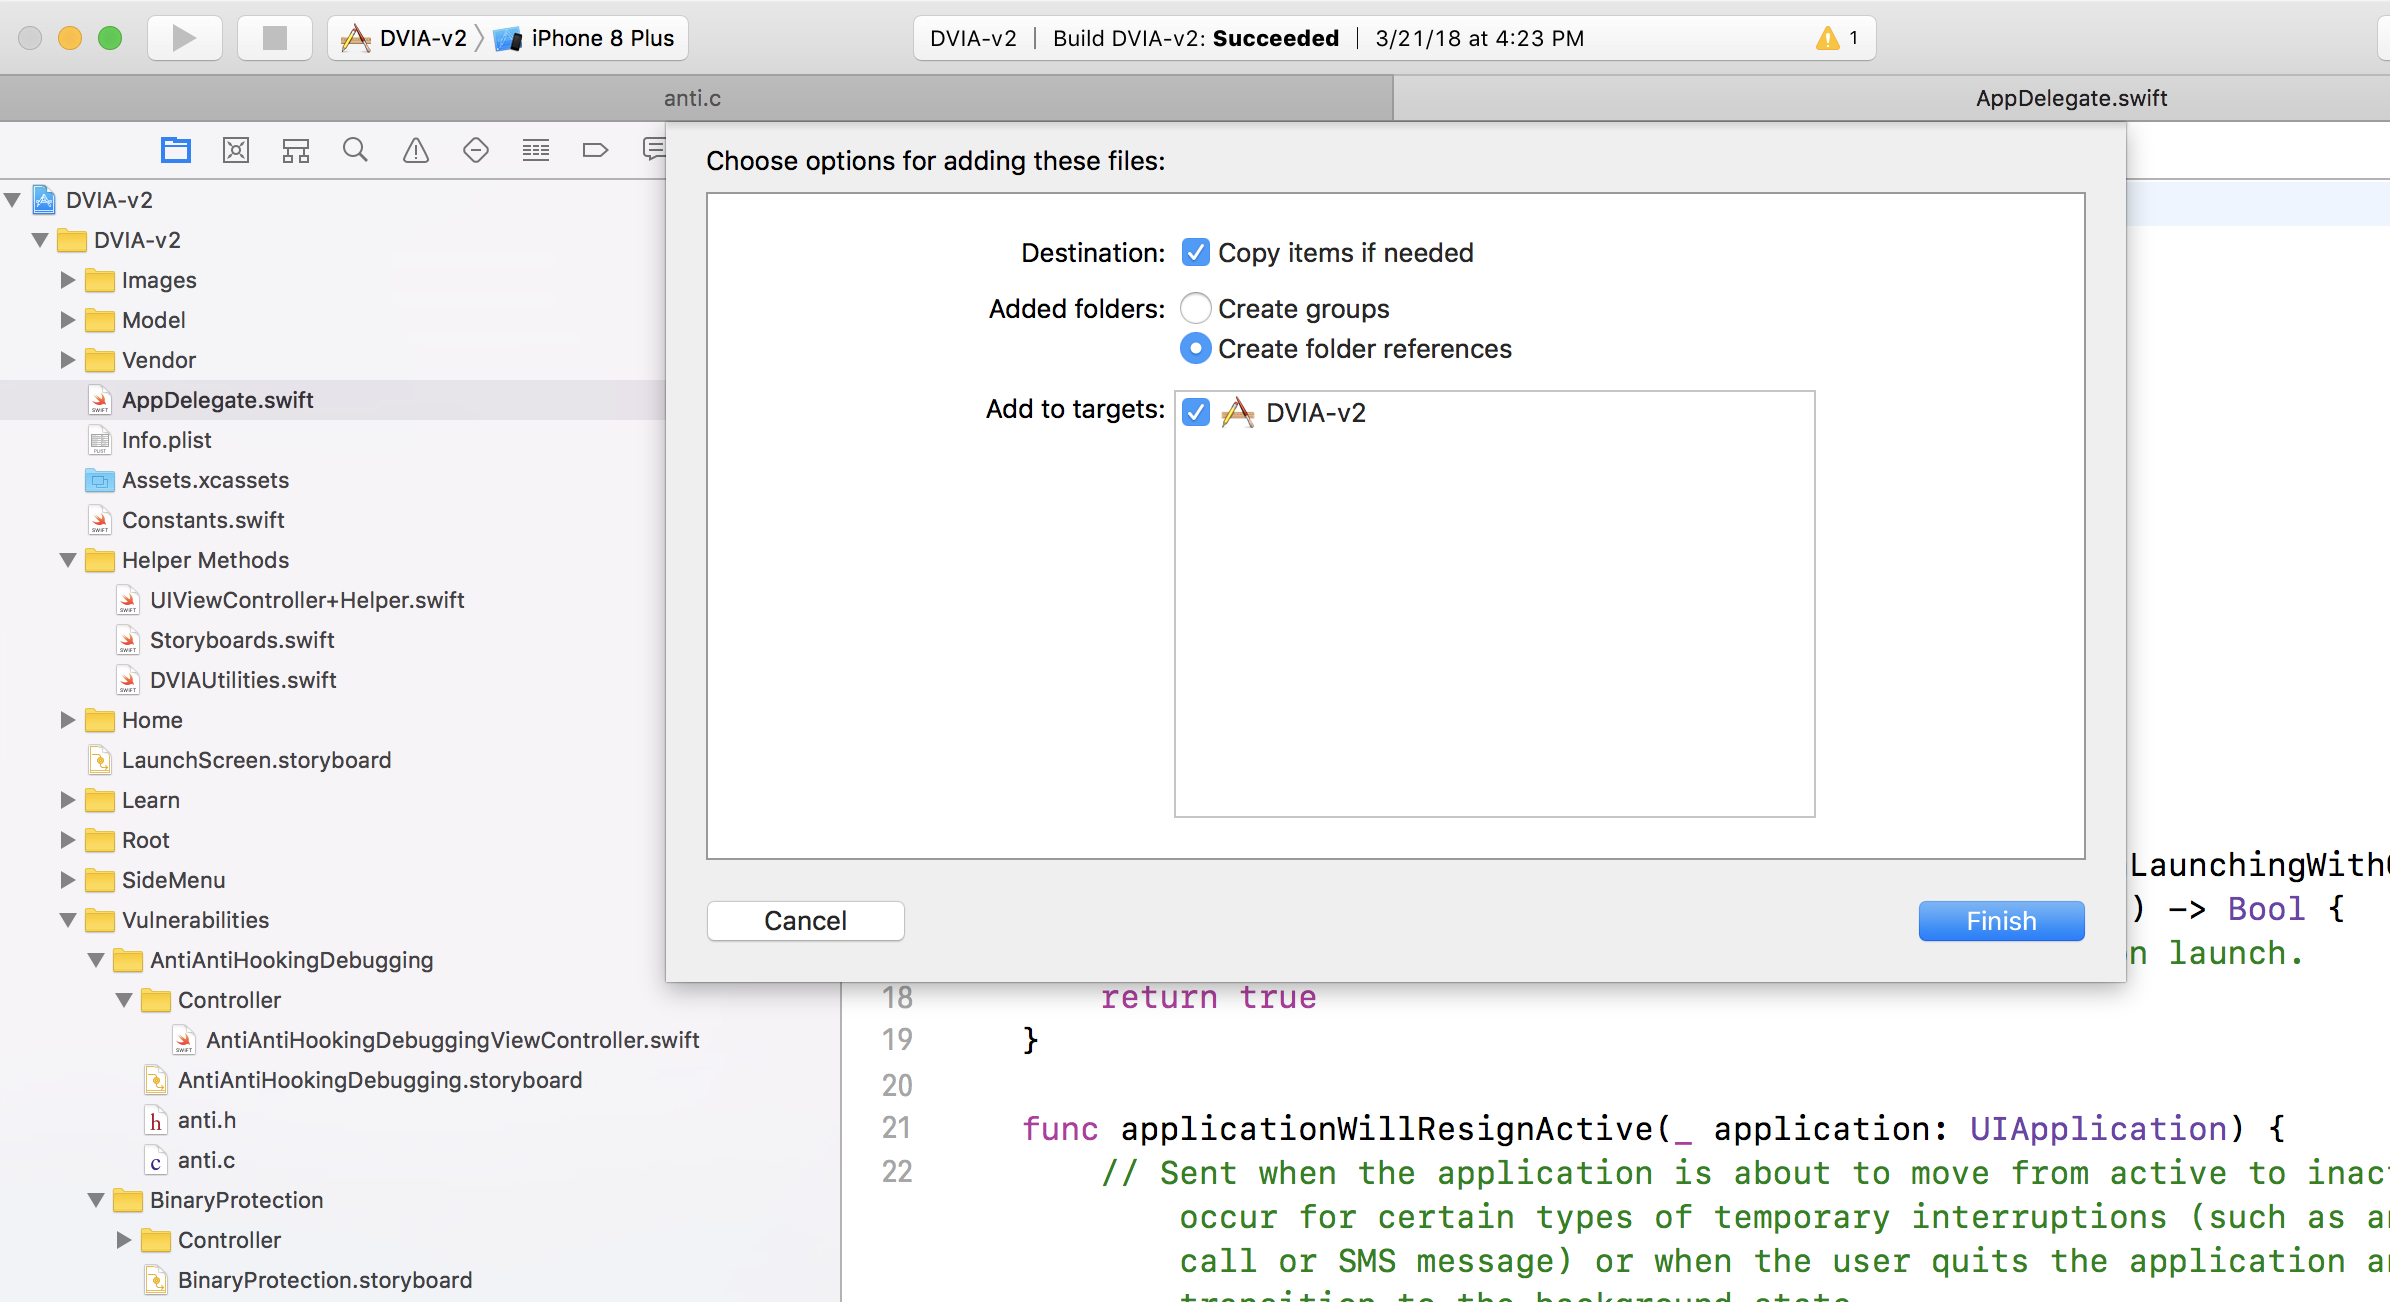
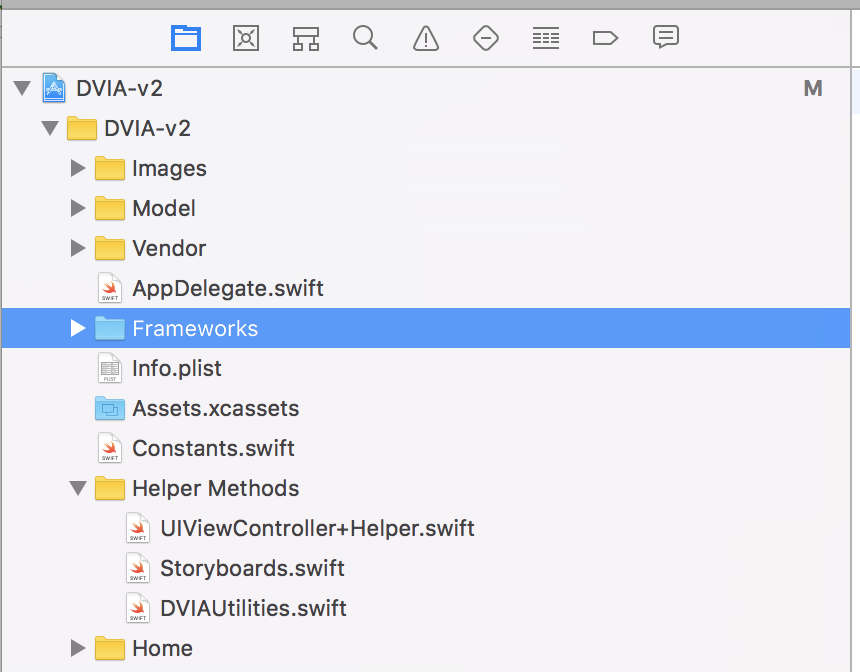
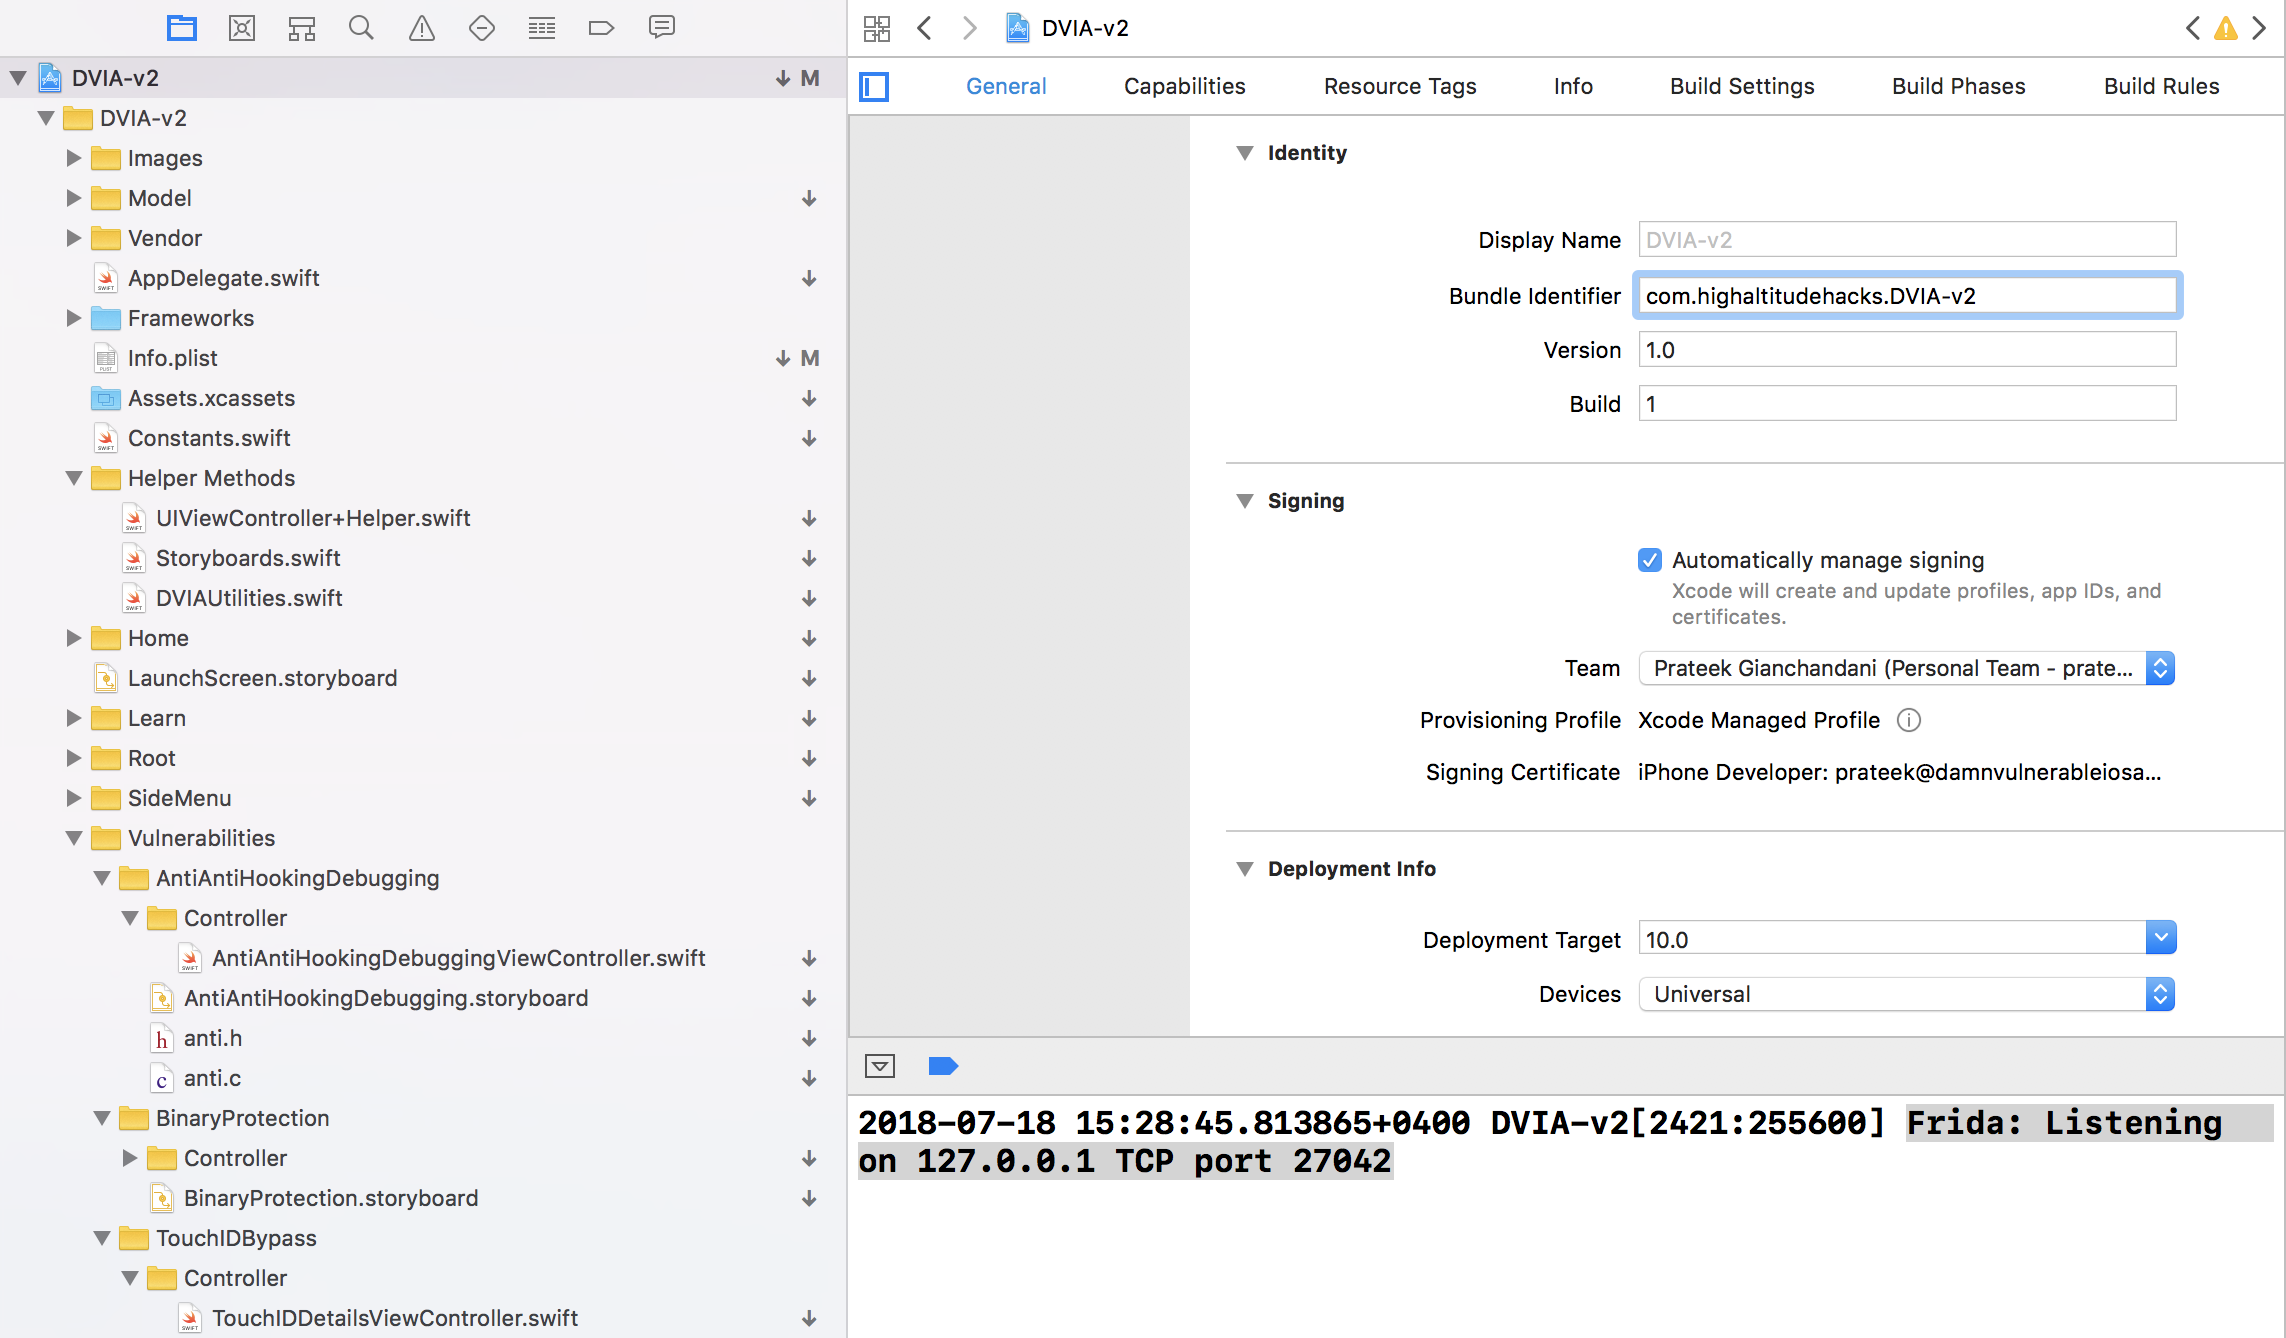
Rename this dylib file to FridaGadget.dylib. Create a directory named Frameworks and put this dylib inside there. Now open the Xcode project for the application for which you want to perform the instrumentation. Drag and drop the folder on the very top level of the directory structure (similar to App Delegate) and make sure the following options are selected.
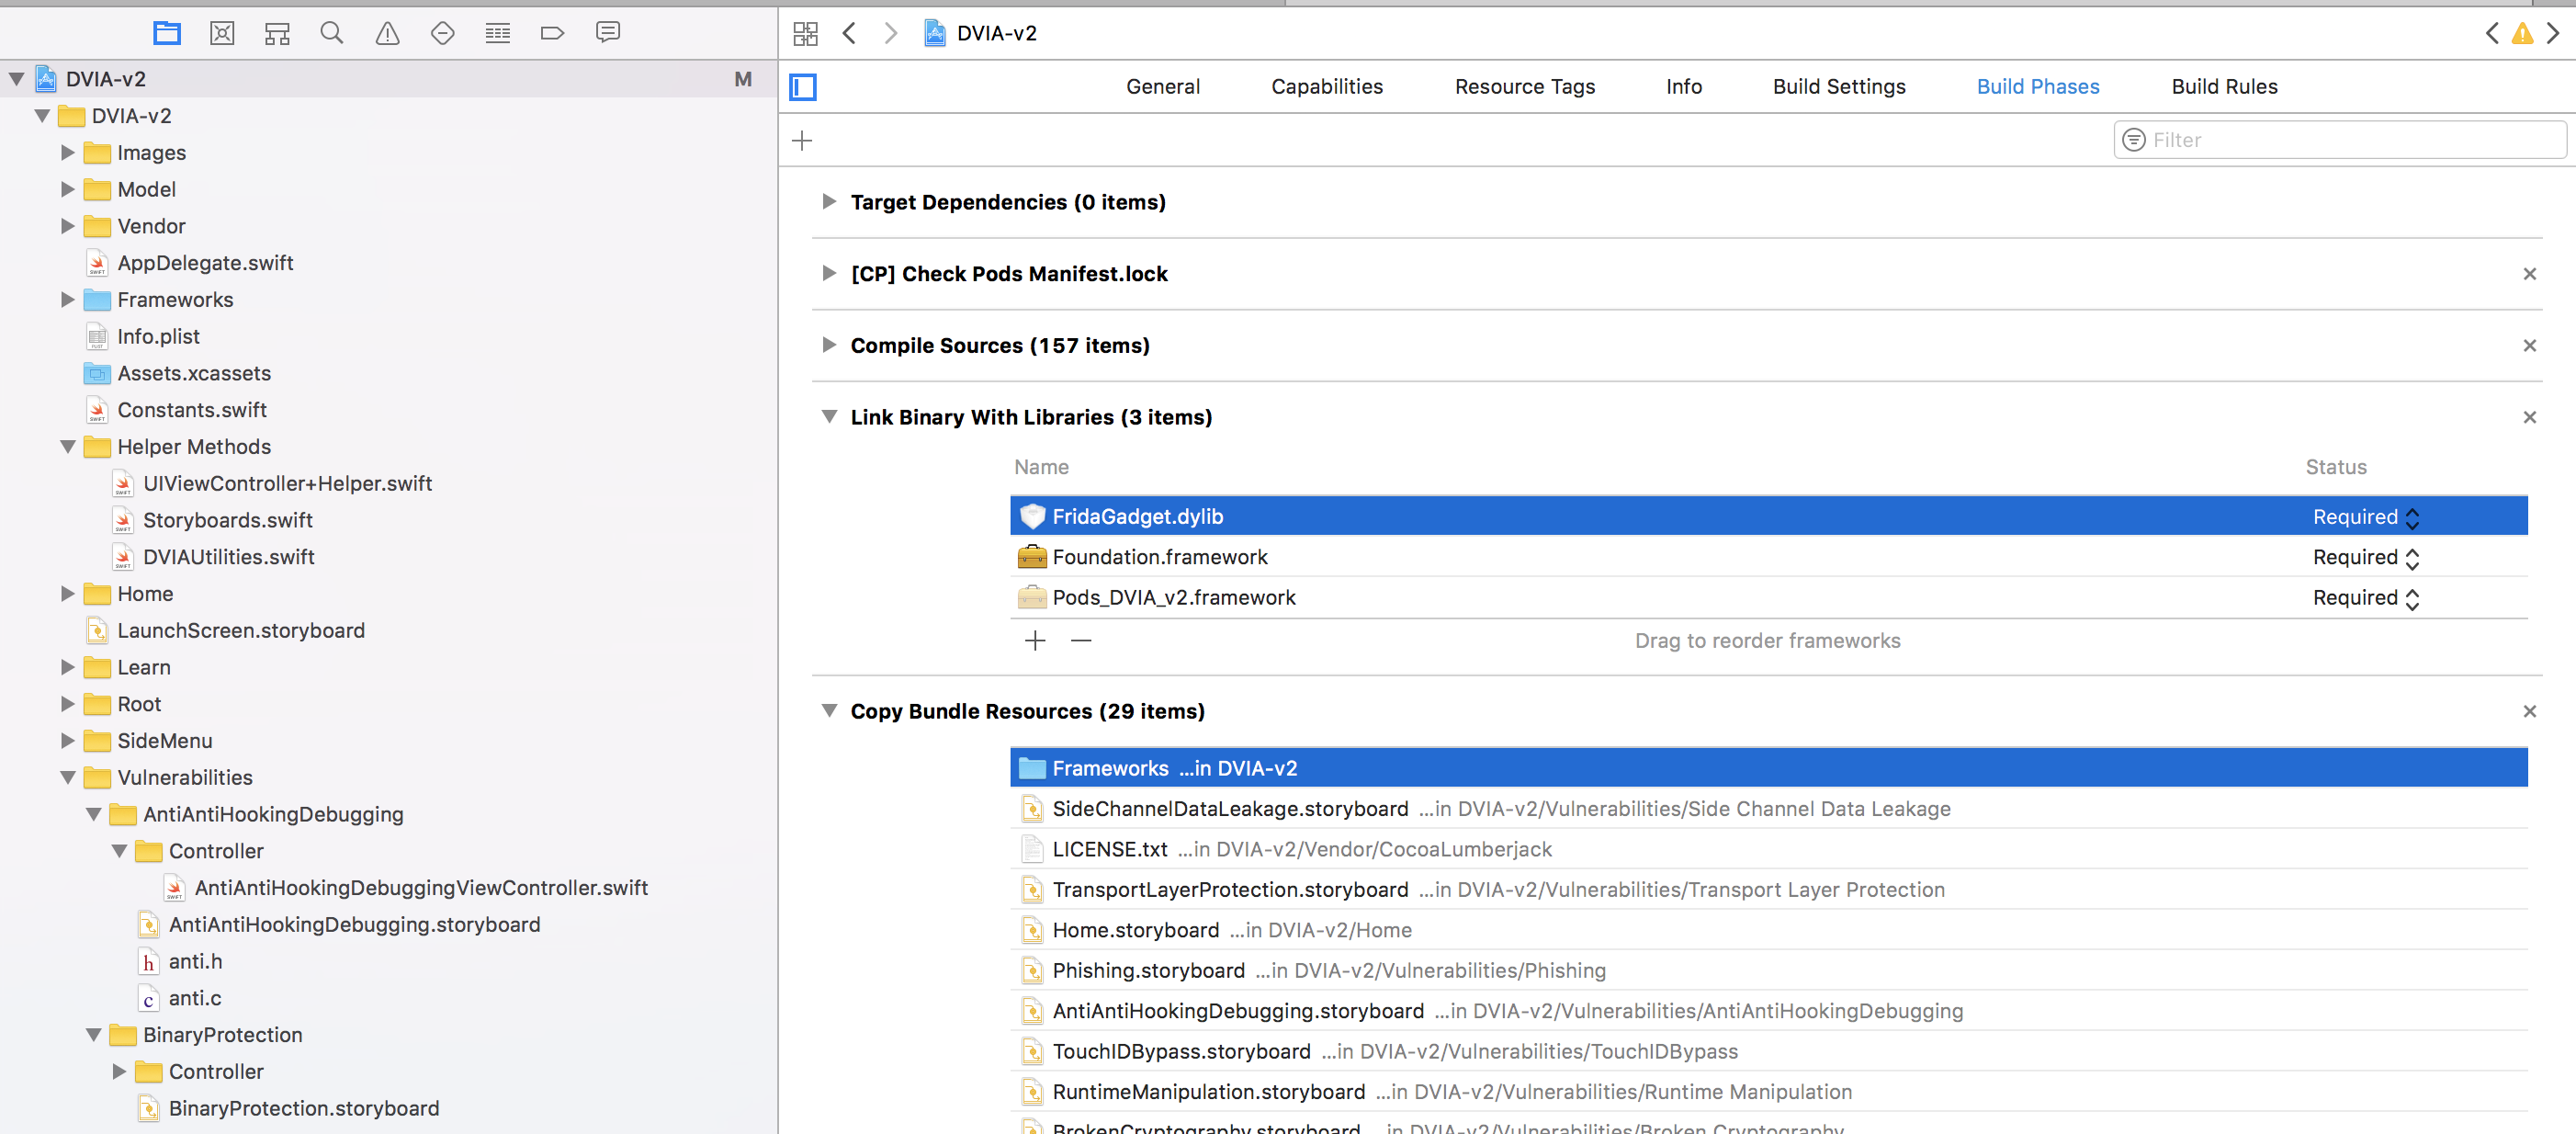
Under Project navigator, go to the Build Phases section and under the Link Binary with Libraries, drag and drop the FridaGadget.dylib file from the Frameworks folder. Also, make sure the Copy Bundle Resources section contains the Frameworks folder.
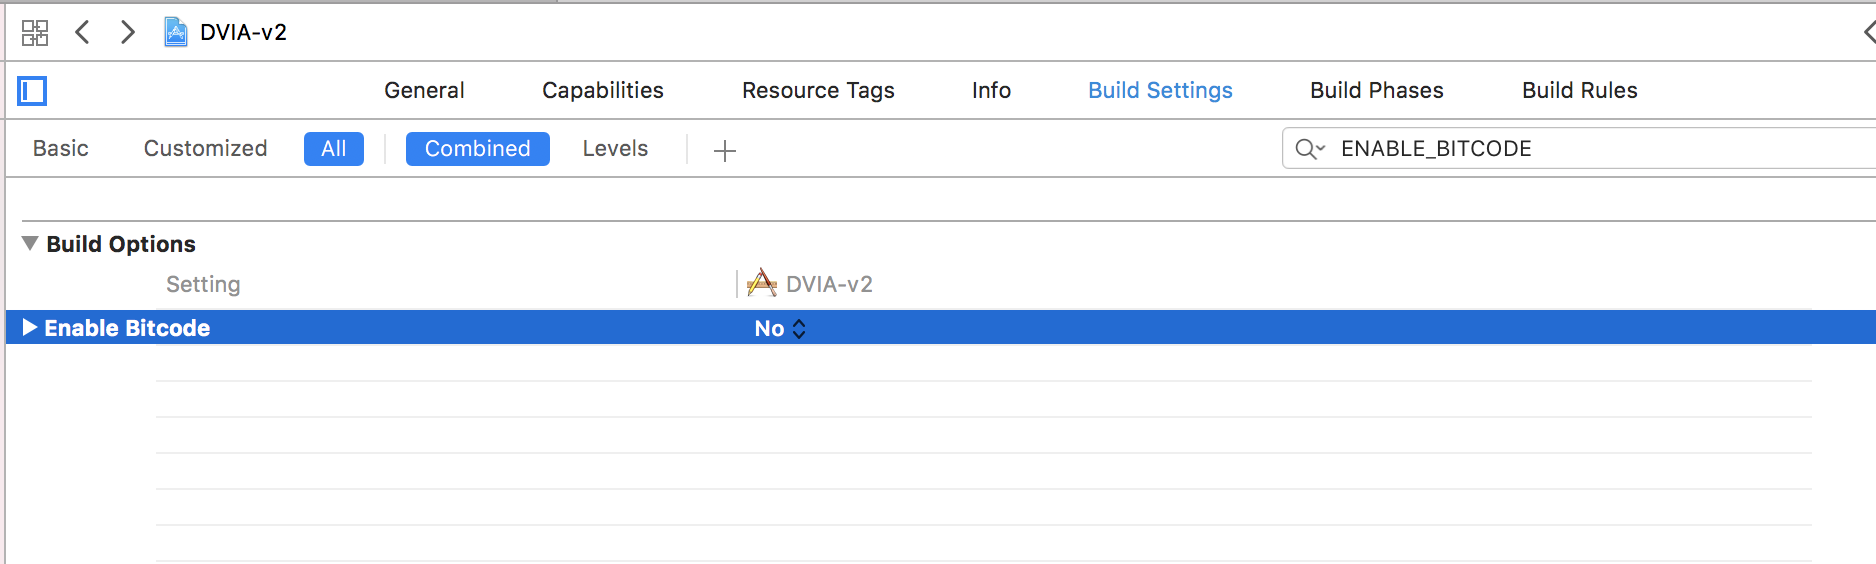
In my case, i also had to disable the setting ENABLE Bitcode by going to Build Settings and disabling it. Since we are running the app locally this shoudn’t really matter.
Now we are all set, run the app and you should a log like this in the console.
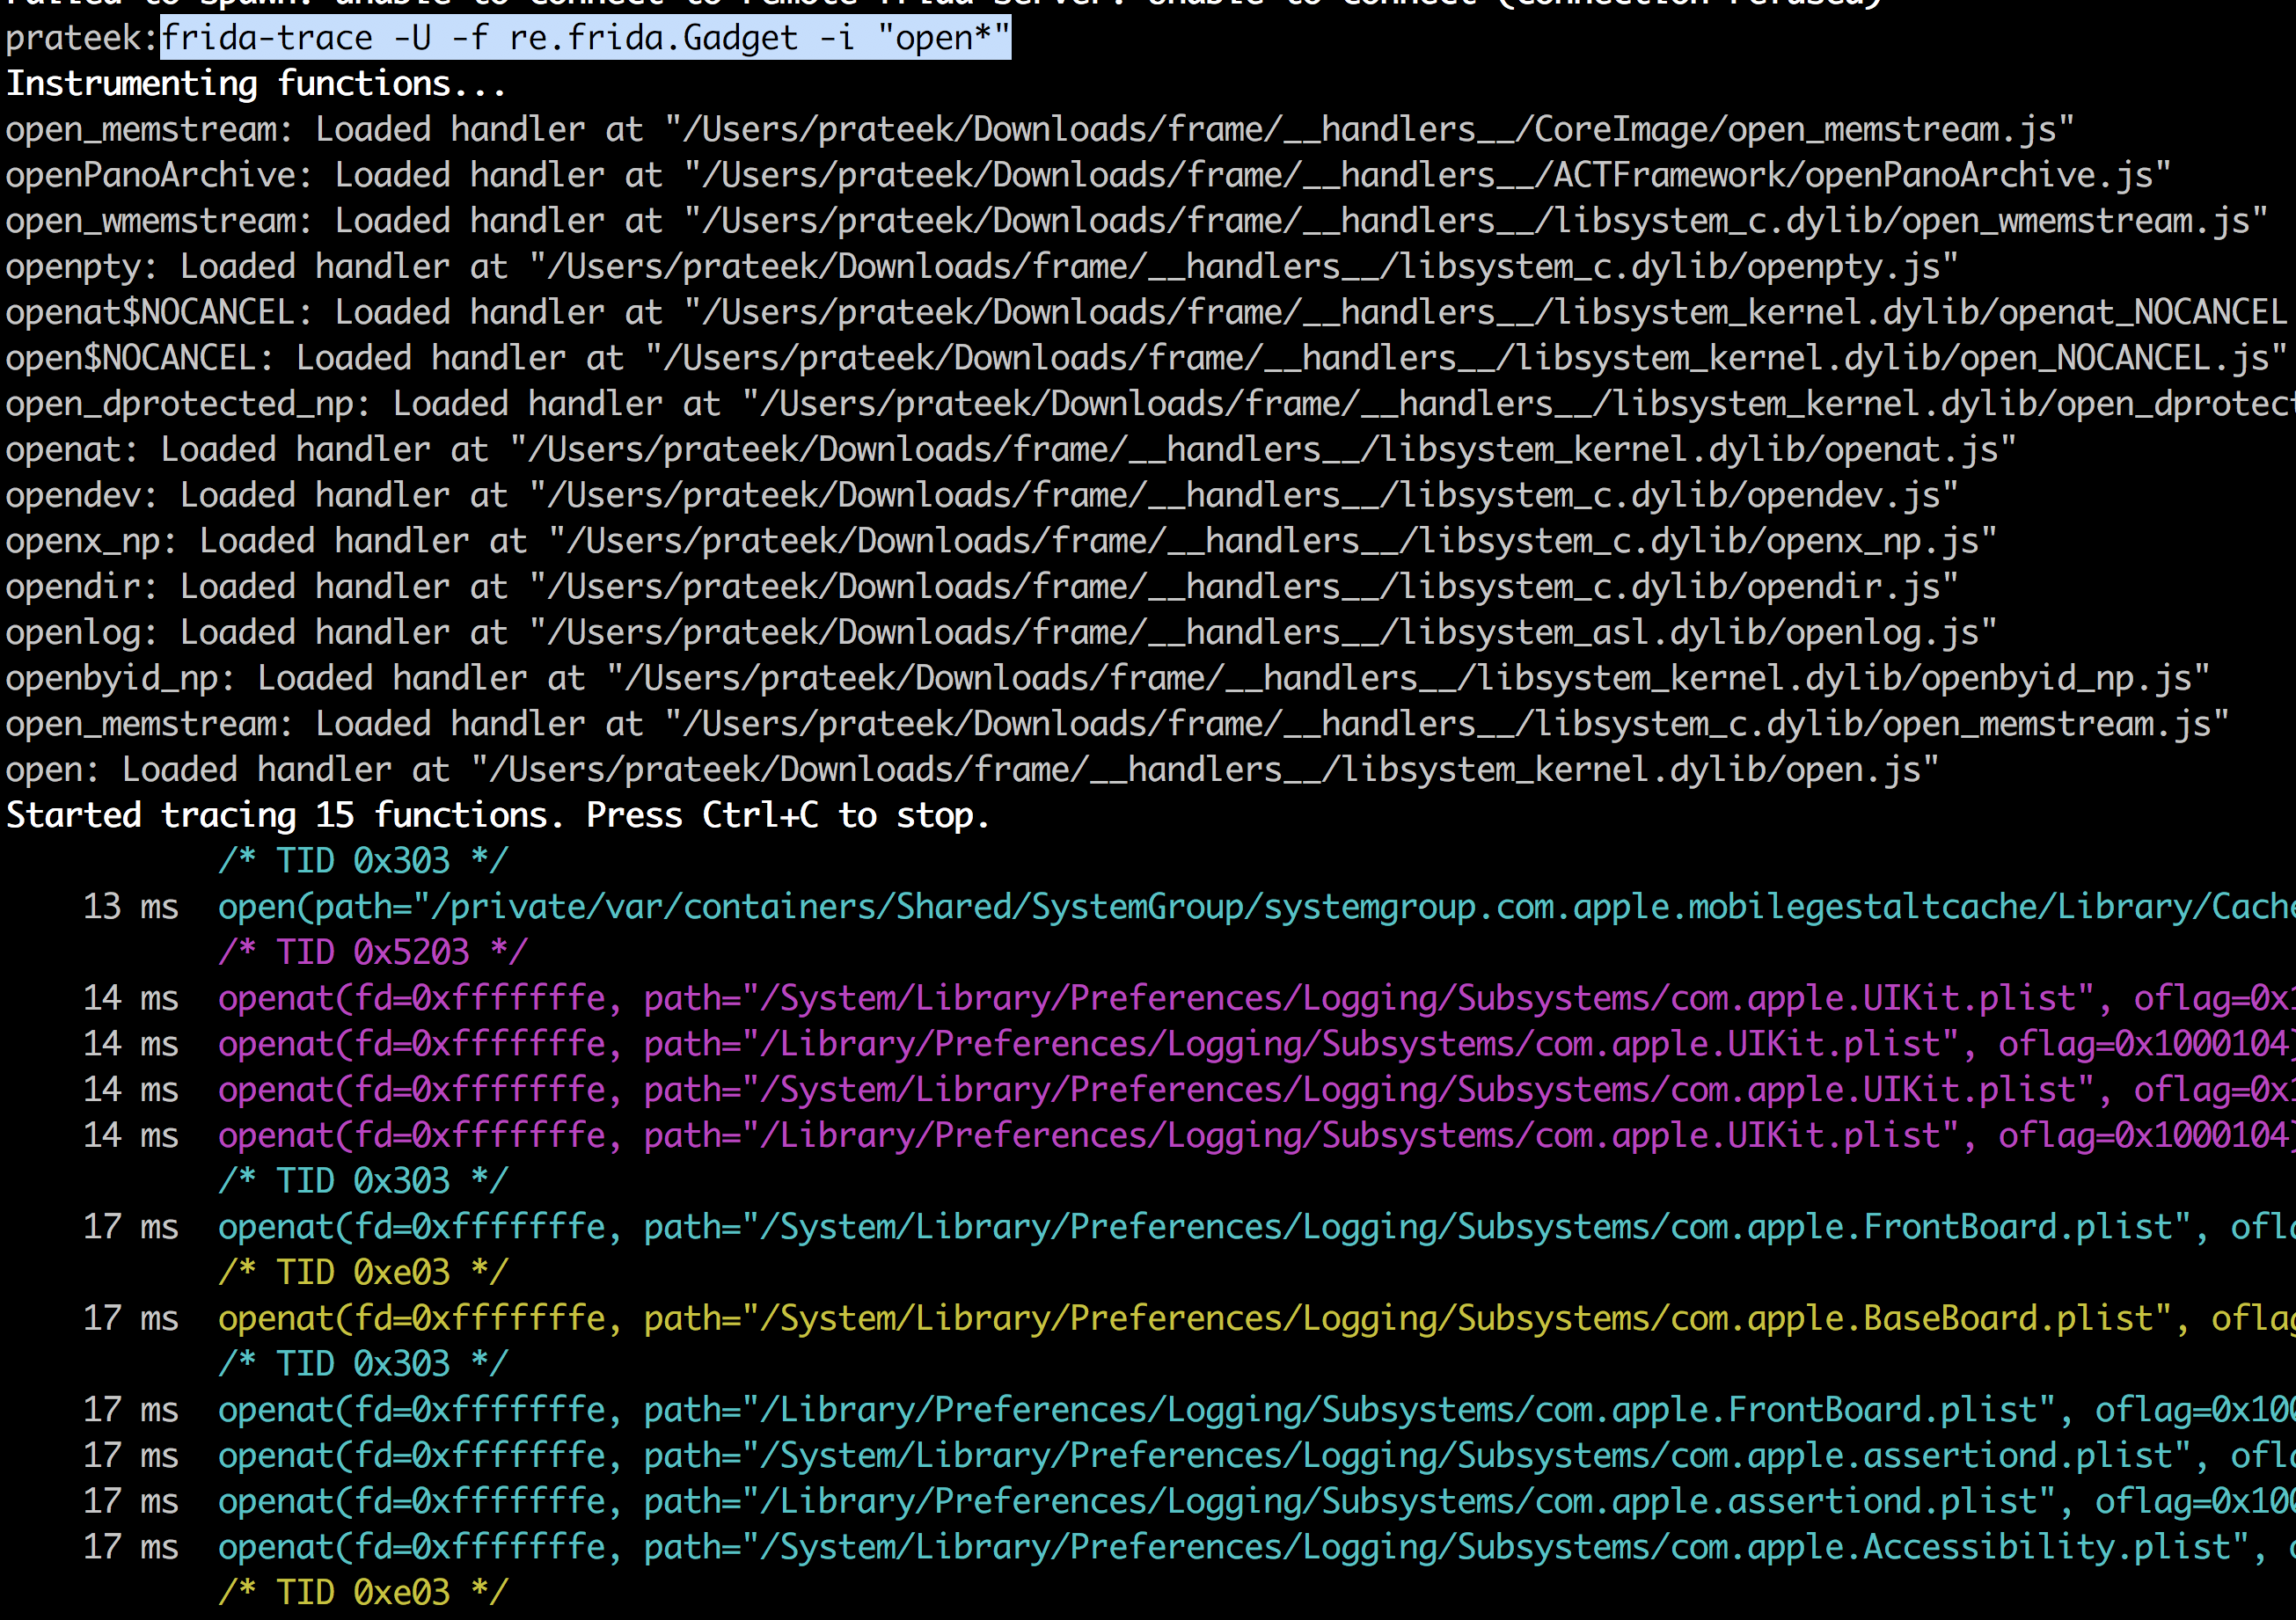
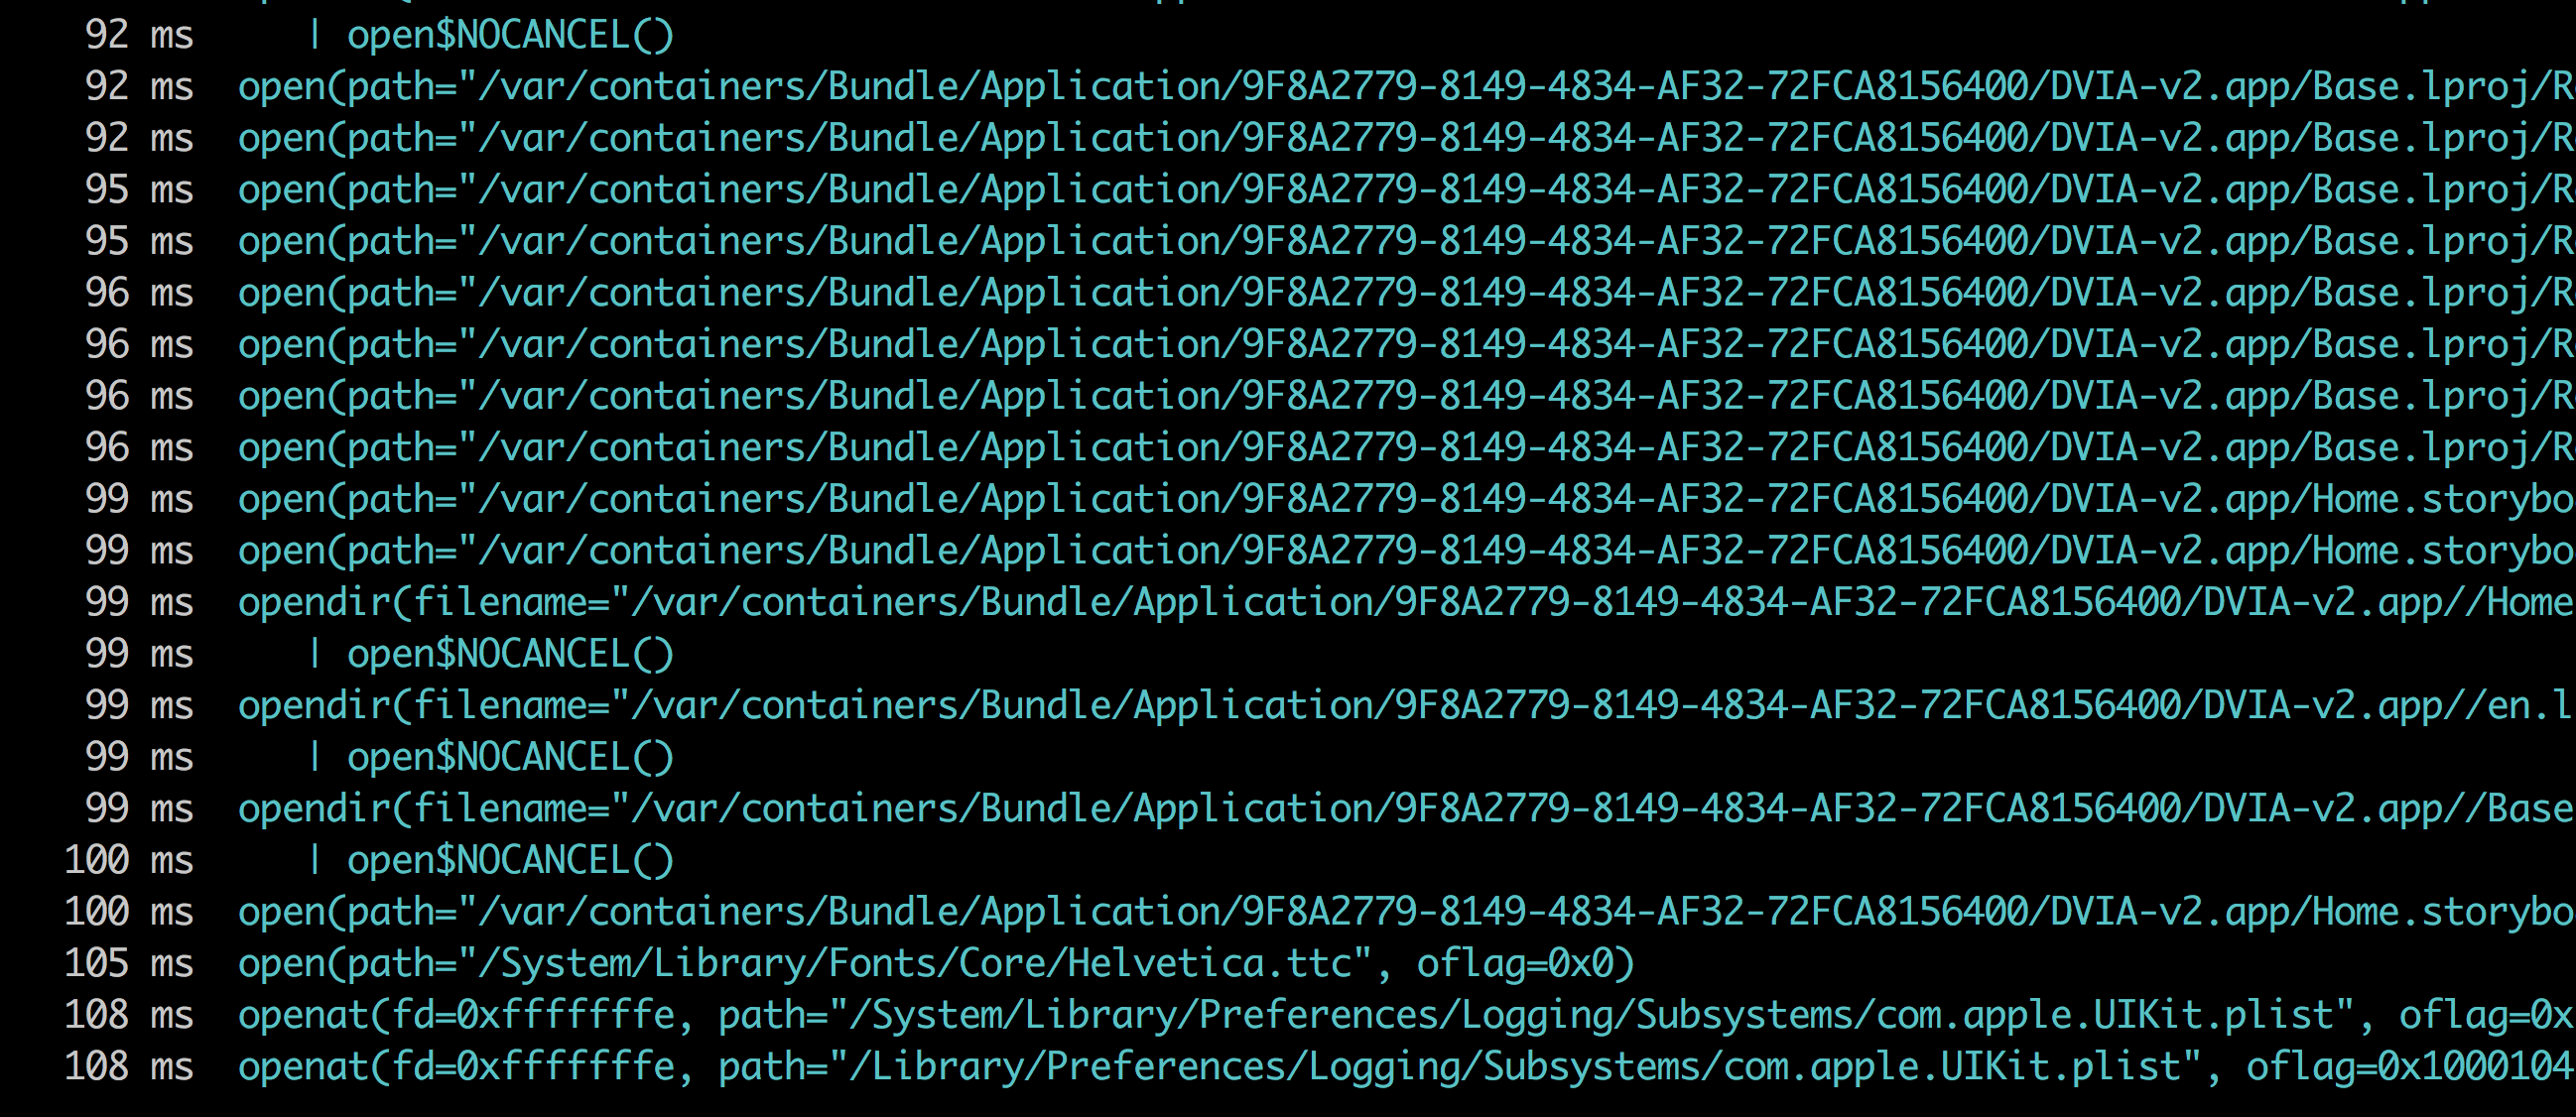
Running the command frida -Uai will now show this app in the output. You can now trace the application via the normal frida commands.
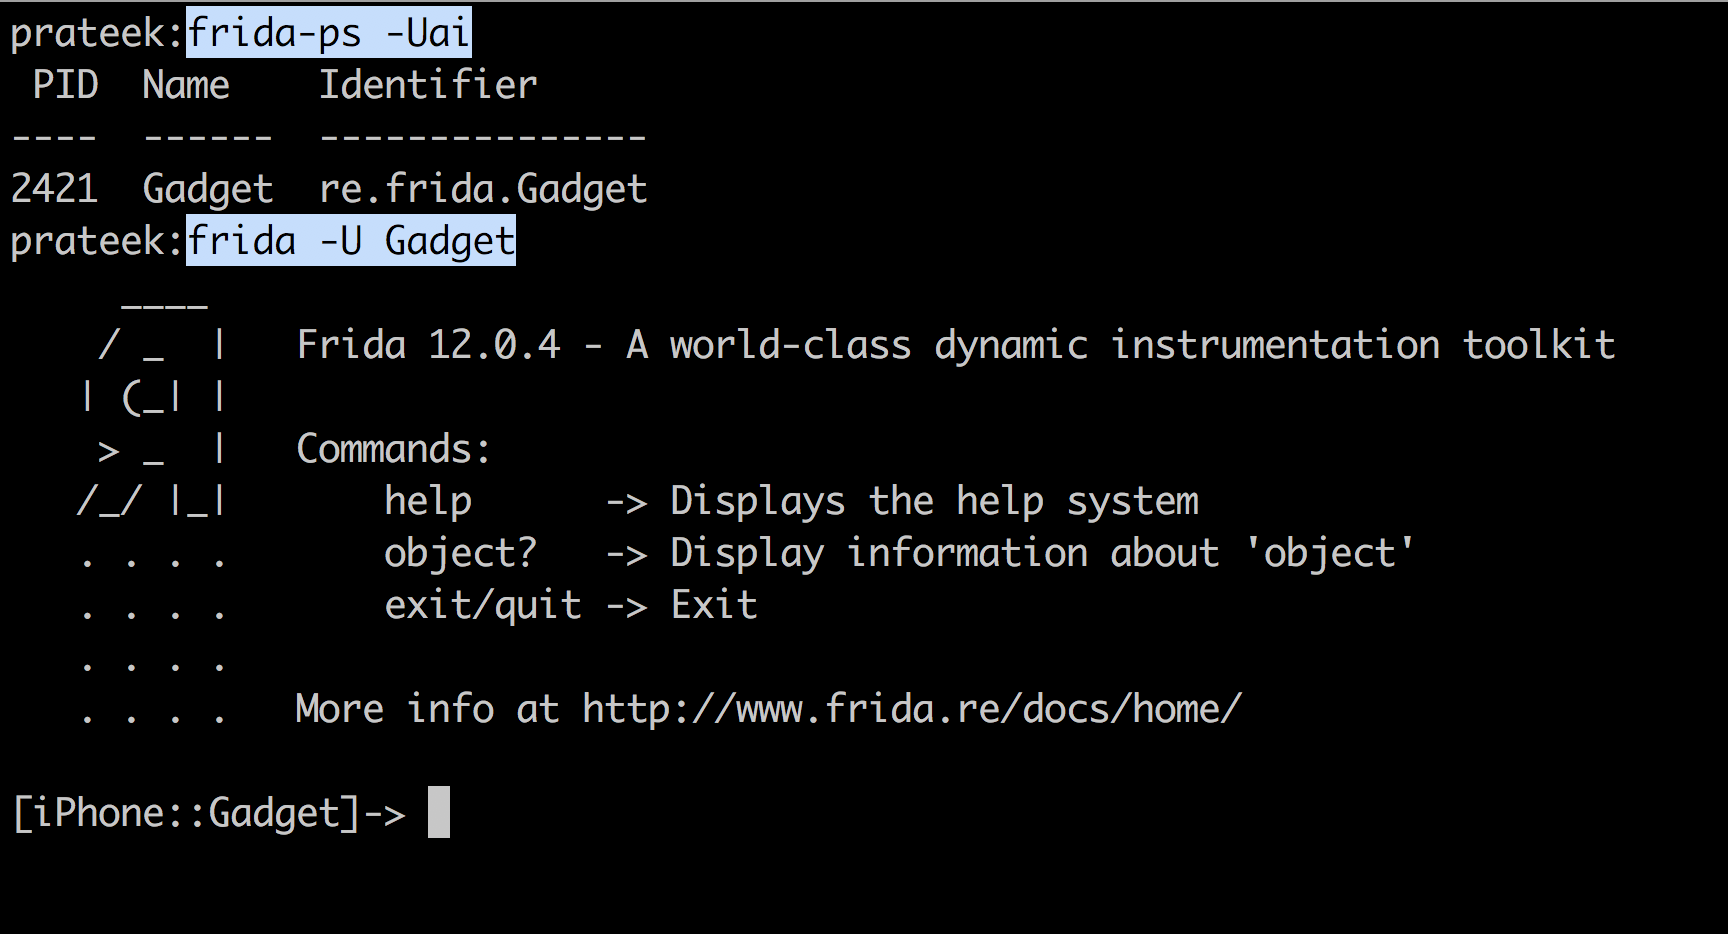
Since we attached to the application in the image above, the application finished launching. This can be done for late instrumentation. In order to attach to the application during launch for early instrumentation, you need to spawn it. This can be done with the -f option in frida which is used for spawning.
One last thing, you can also attach to the application in the iOS simulator by using the -R command.
 References
- https://frida.re/docs/ios/#without-jailbreak