
iOS Application Security Part 52 - Inspecting iOS apps with Objection
In the previous few articles, we have looked at how we can use Frida to perform dynamic instrumentation of applications. In this article, we will look at a tool based using Frida’s capabilities, known as objection, which can be very useful in testing iOS applications on non-jailbroken devices. The only thing that is required is an unencrypted IPA (insert Frida Gadget using insert_dylb) or the source code. Since in the previous article we already looked at how we can add a Frida dylib into the source code and do instrumentation, we will carry forward from there in this article. We will be using Damn Vulnerable iOS App for this article.
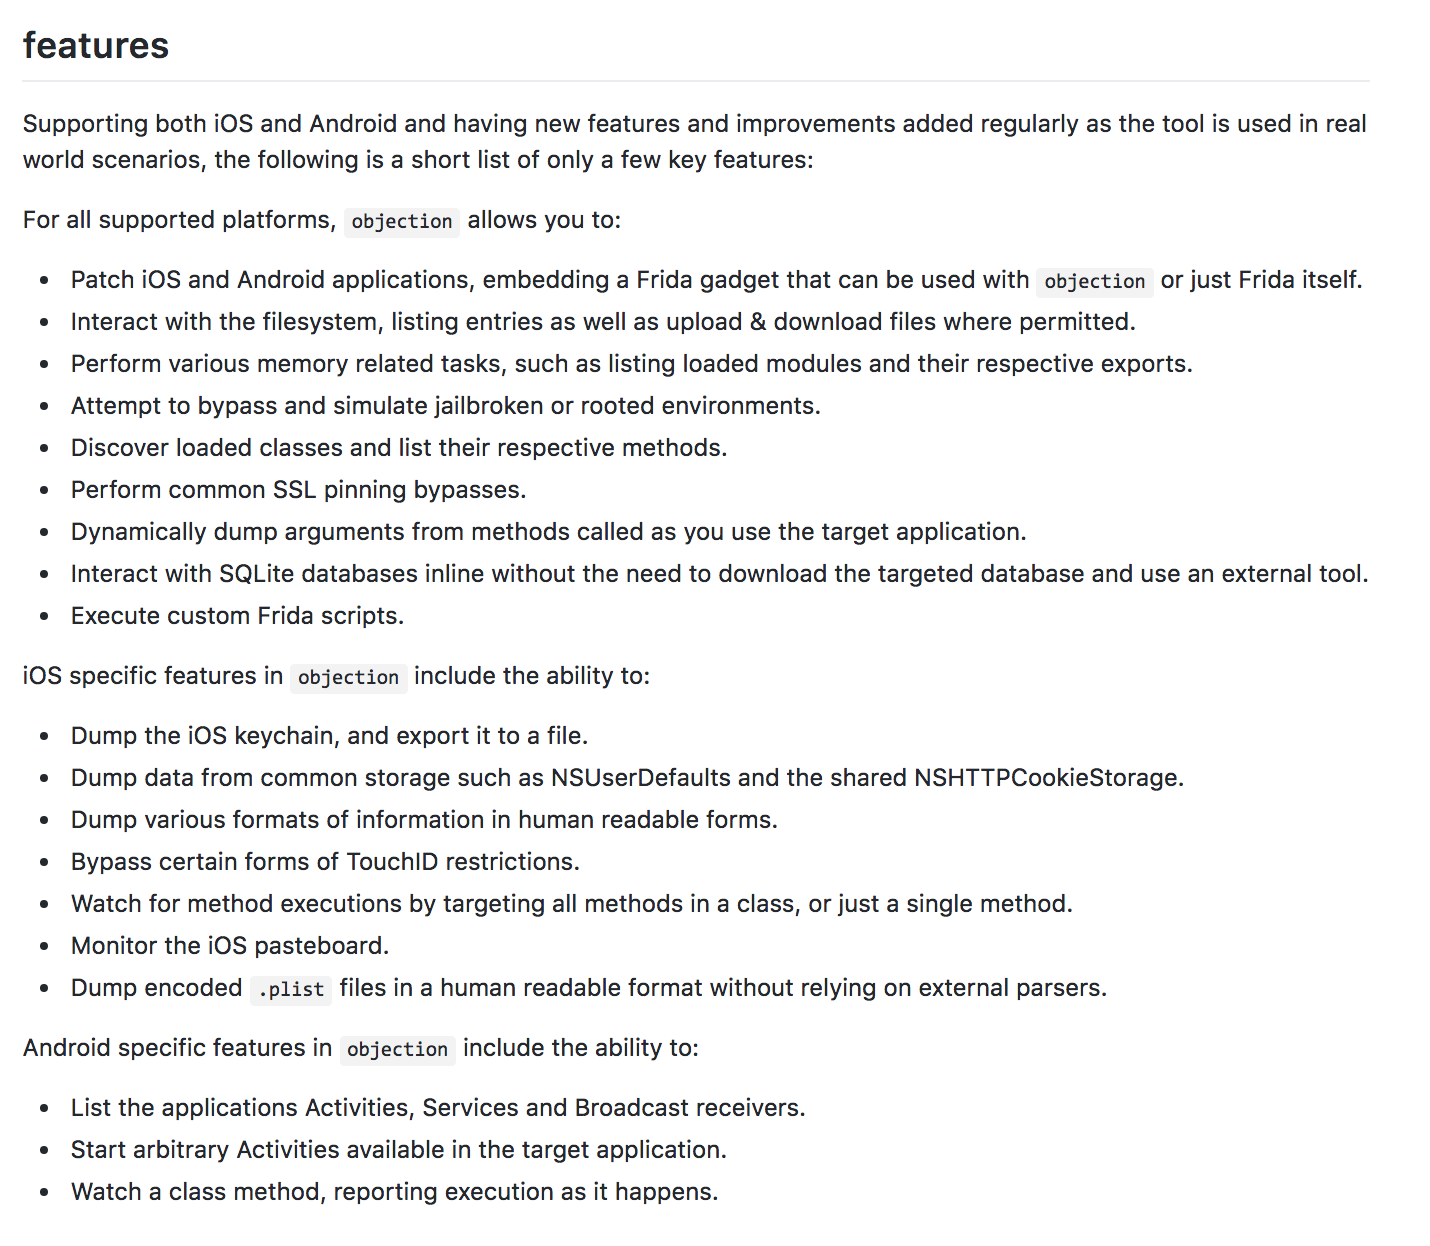
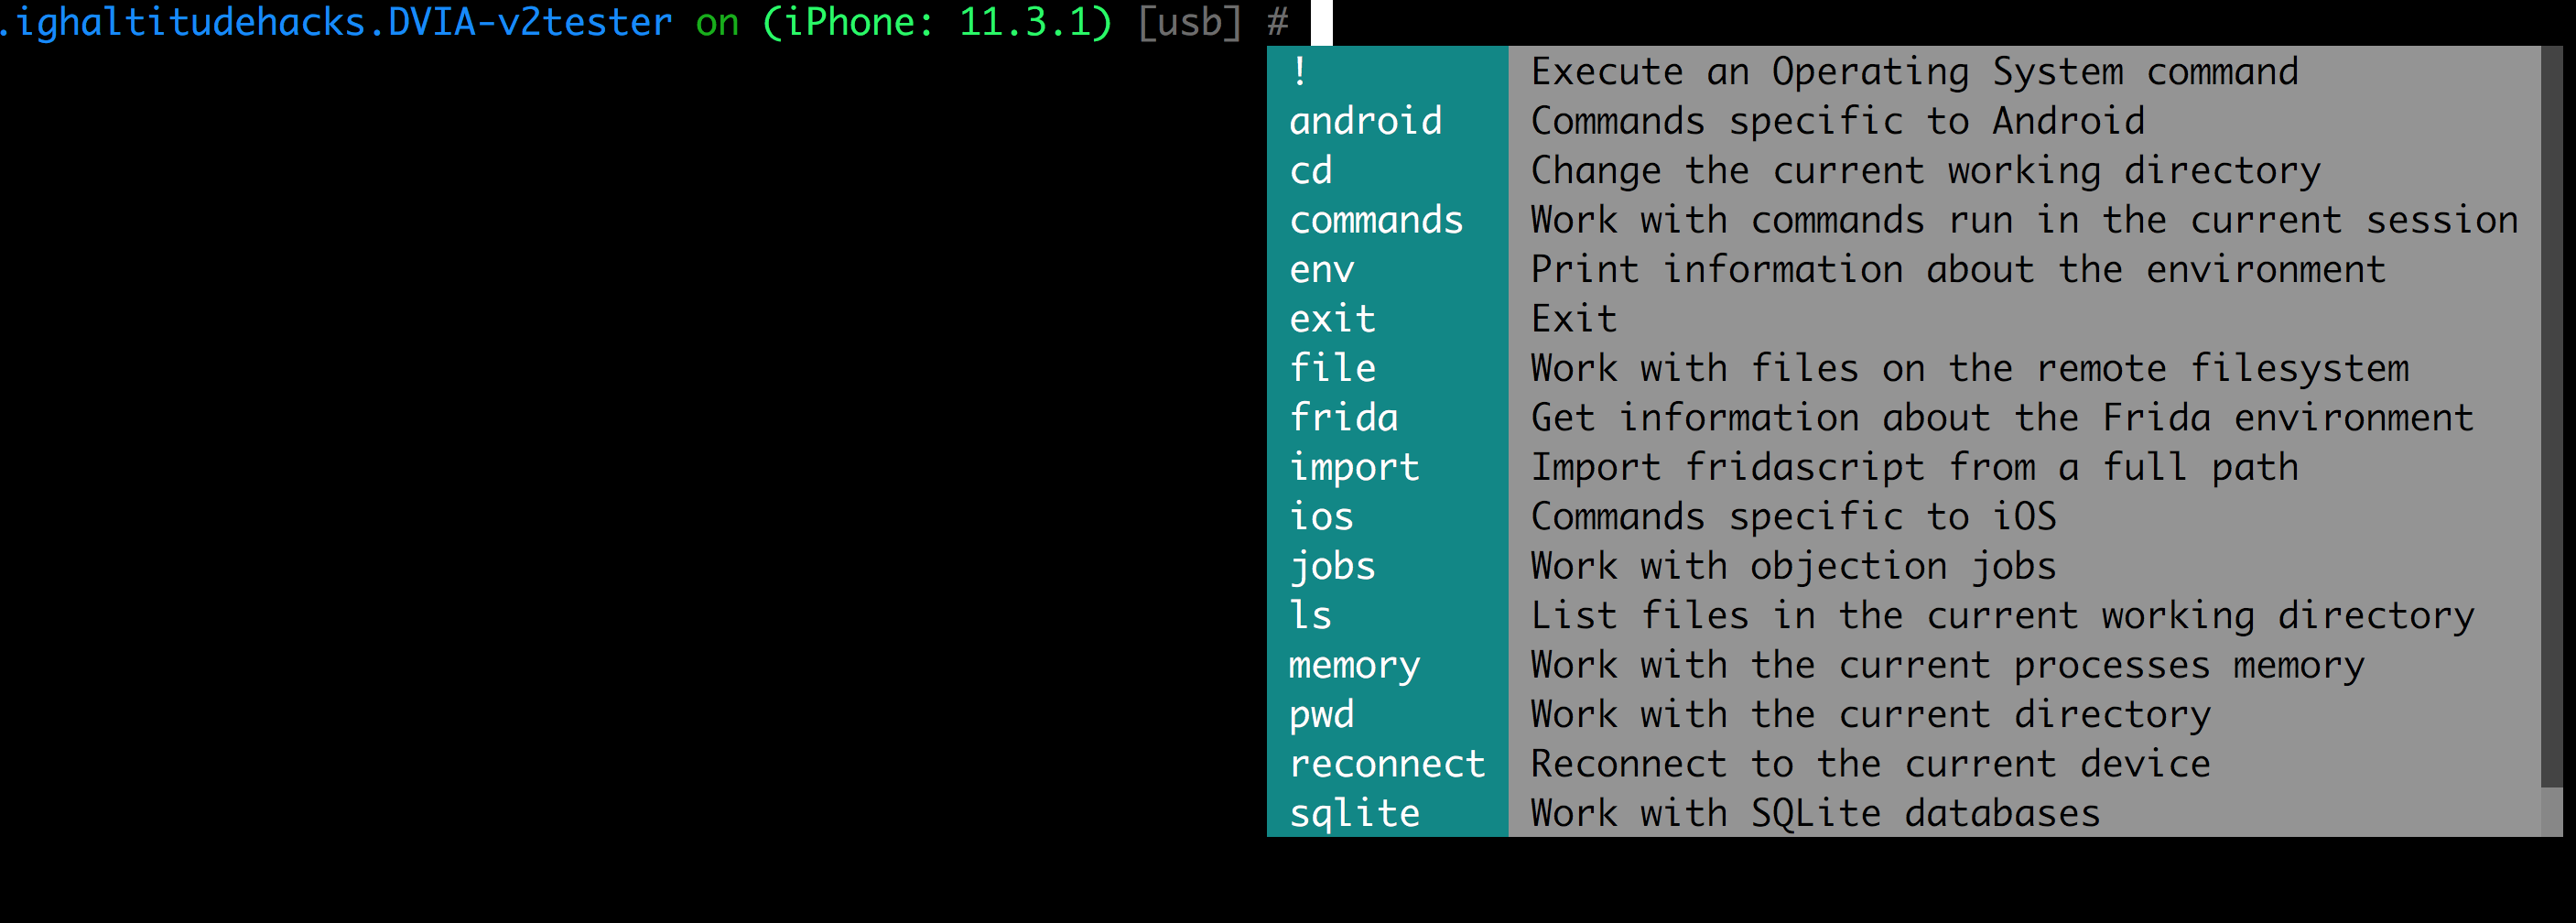
Here are the various features of Objection as mentioned on their Github page.
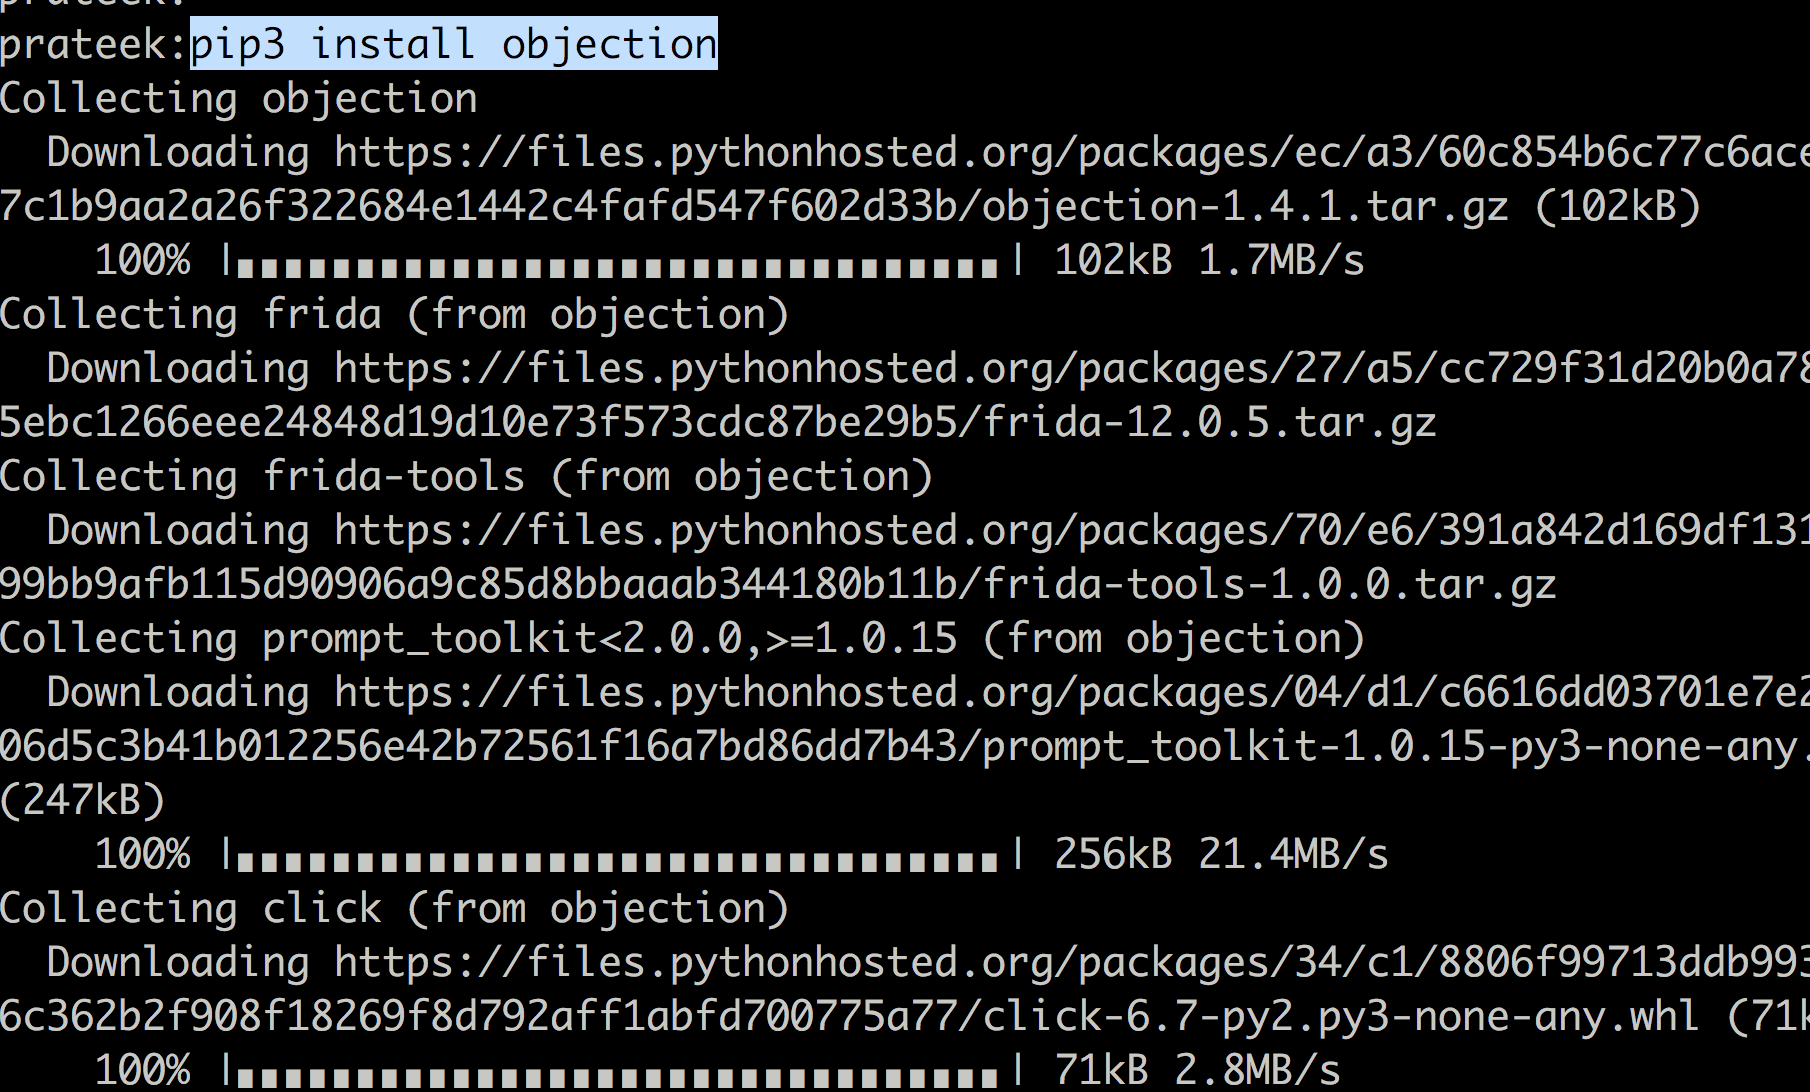
The first thing is to install Objection on the computer which can be installed very easily with pip3 install objection. In some cases, you might be better off setting up a virtual environemnt for python3. It is recommended to go through the installation instructions mentioned on their Github page.
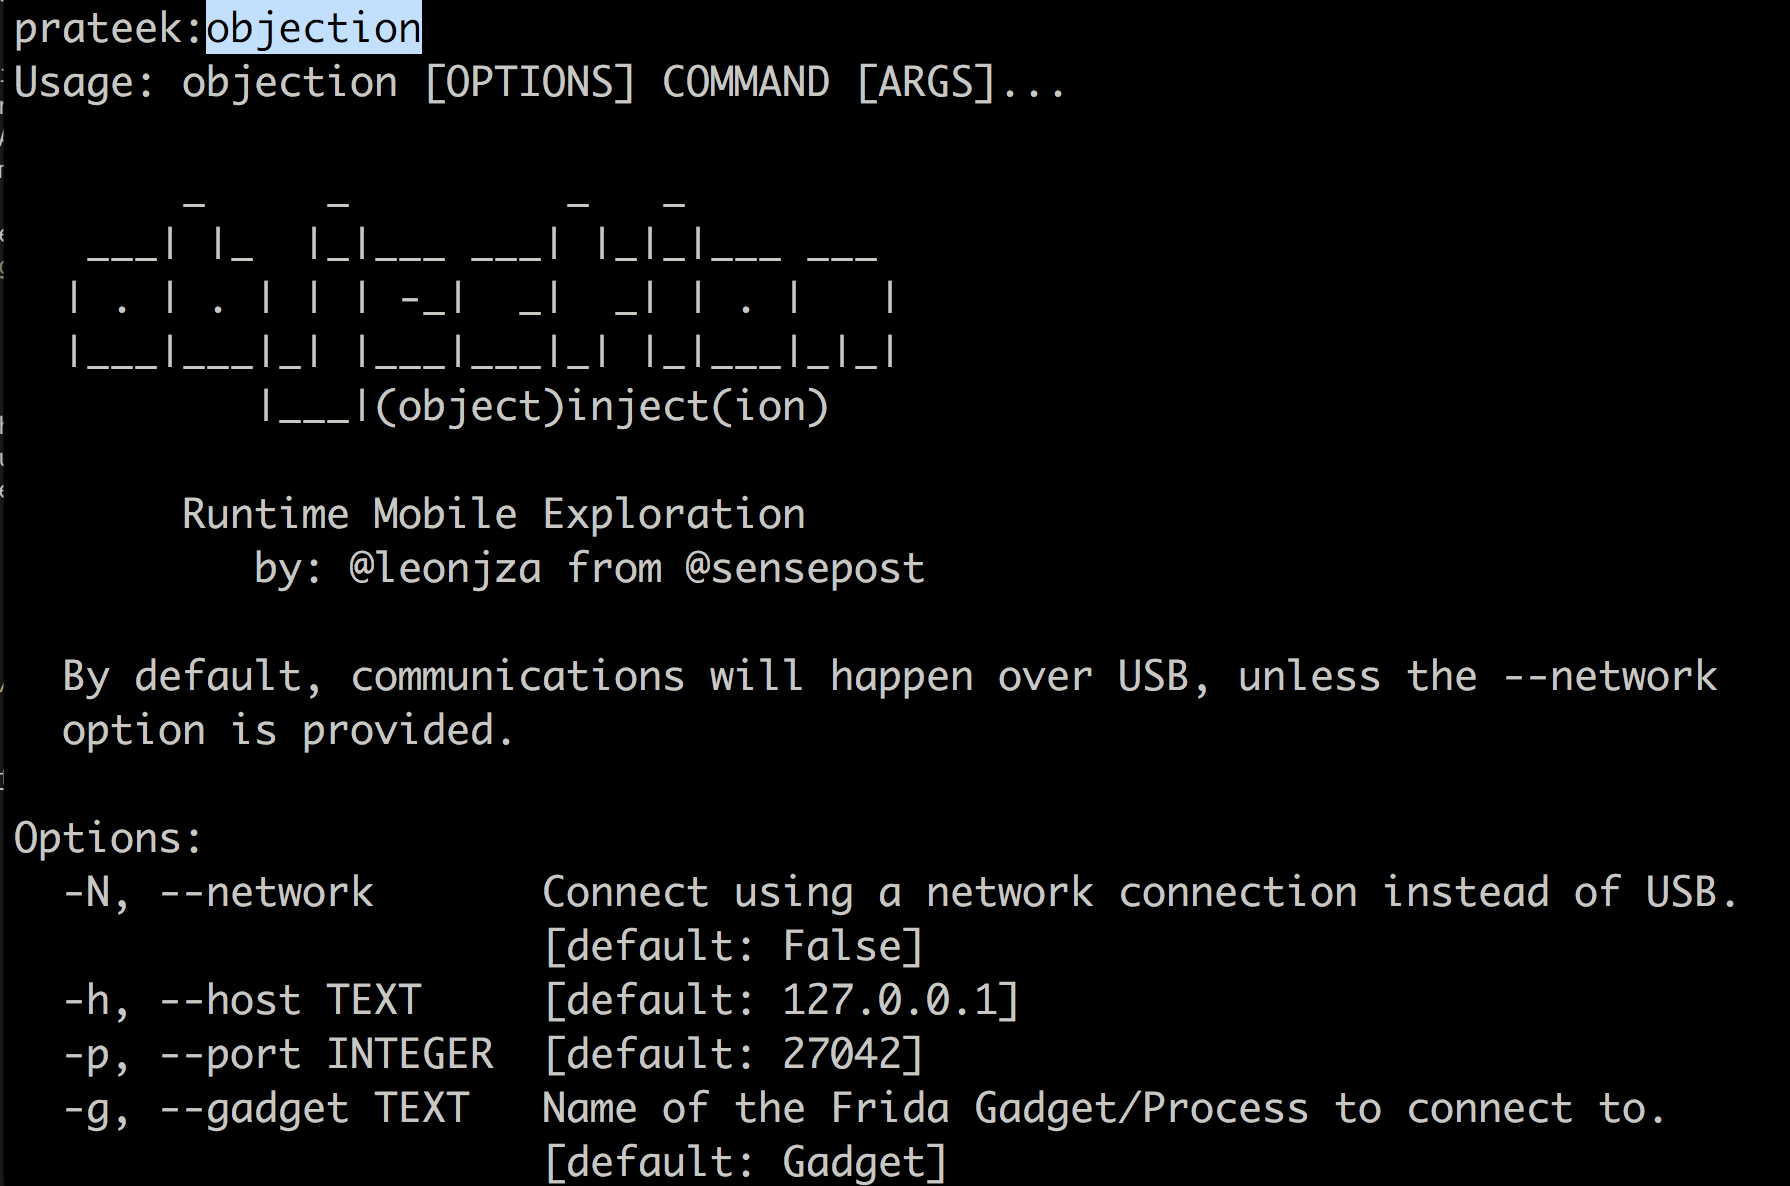
Once done, run the command objection to see if it was successfully installed.
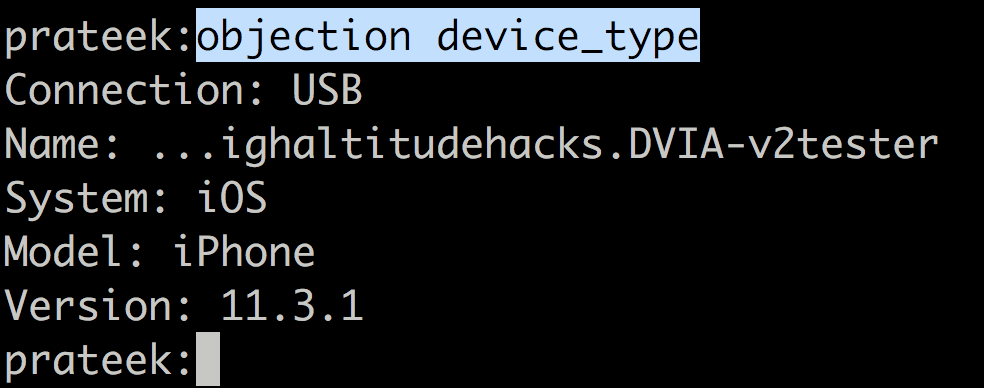
Make sure you have an application that has FridaGadget.dylib injected into it. Start the application on the device and it will pause as its waiting for a frida client to attach to it. Now from your computer, run the objecion device_type command to do a quick test.
Now run the command objection explore -q to attach to the application. Keep in mind that this is not early instrumentation since you are attaching to the application after is is being launched. For early instrumentation you can just use Frida with the spawn command.

You can just press TAB on your computer to see all the list of available commands. One of the most useful features of objection is the autocompletion feature so we don’t have to remember all these commands.
For any extra tasks not performed by objection, you can just load the corresponding fridascript with the import command.

Ok, now we can use objection to do various tasks. It is important to note that whatever is happening here is happening within the context of the application with all the sandbox restrictions still being employed in place. Also, all the ios specific commands start with ios. Also, any command you want to run on your computer from within the objection interpreter must have ! prepended to it.
Use pwd print to print out the current working directory.

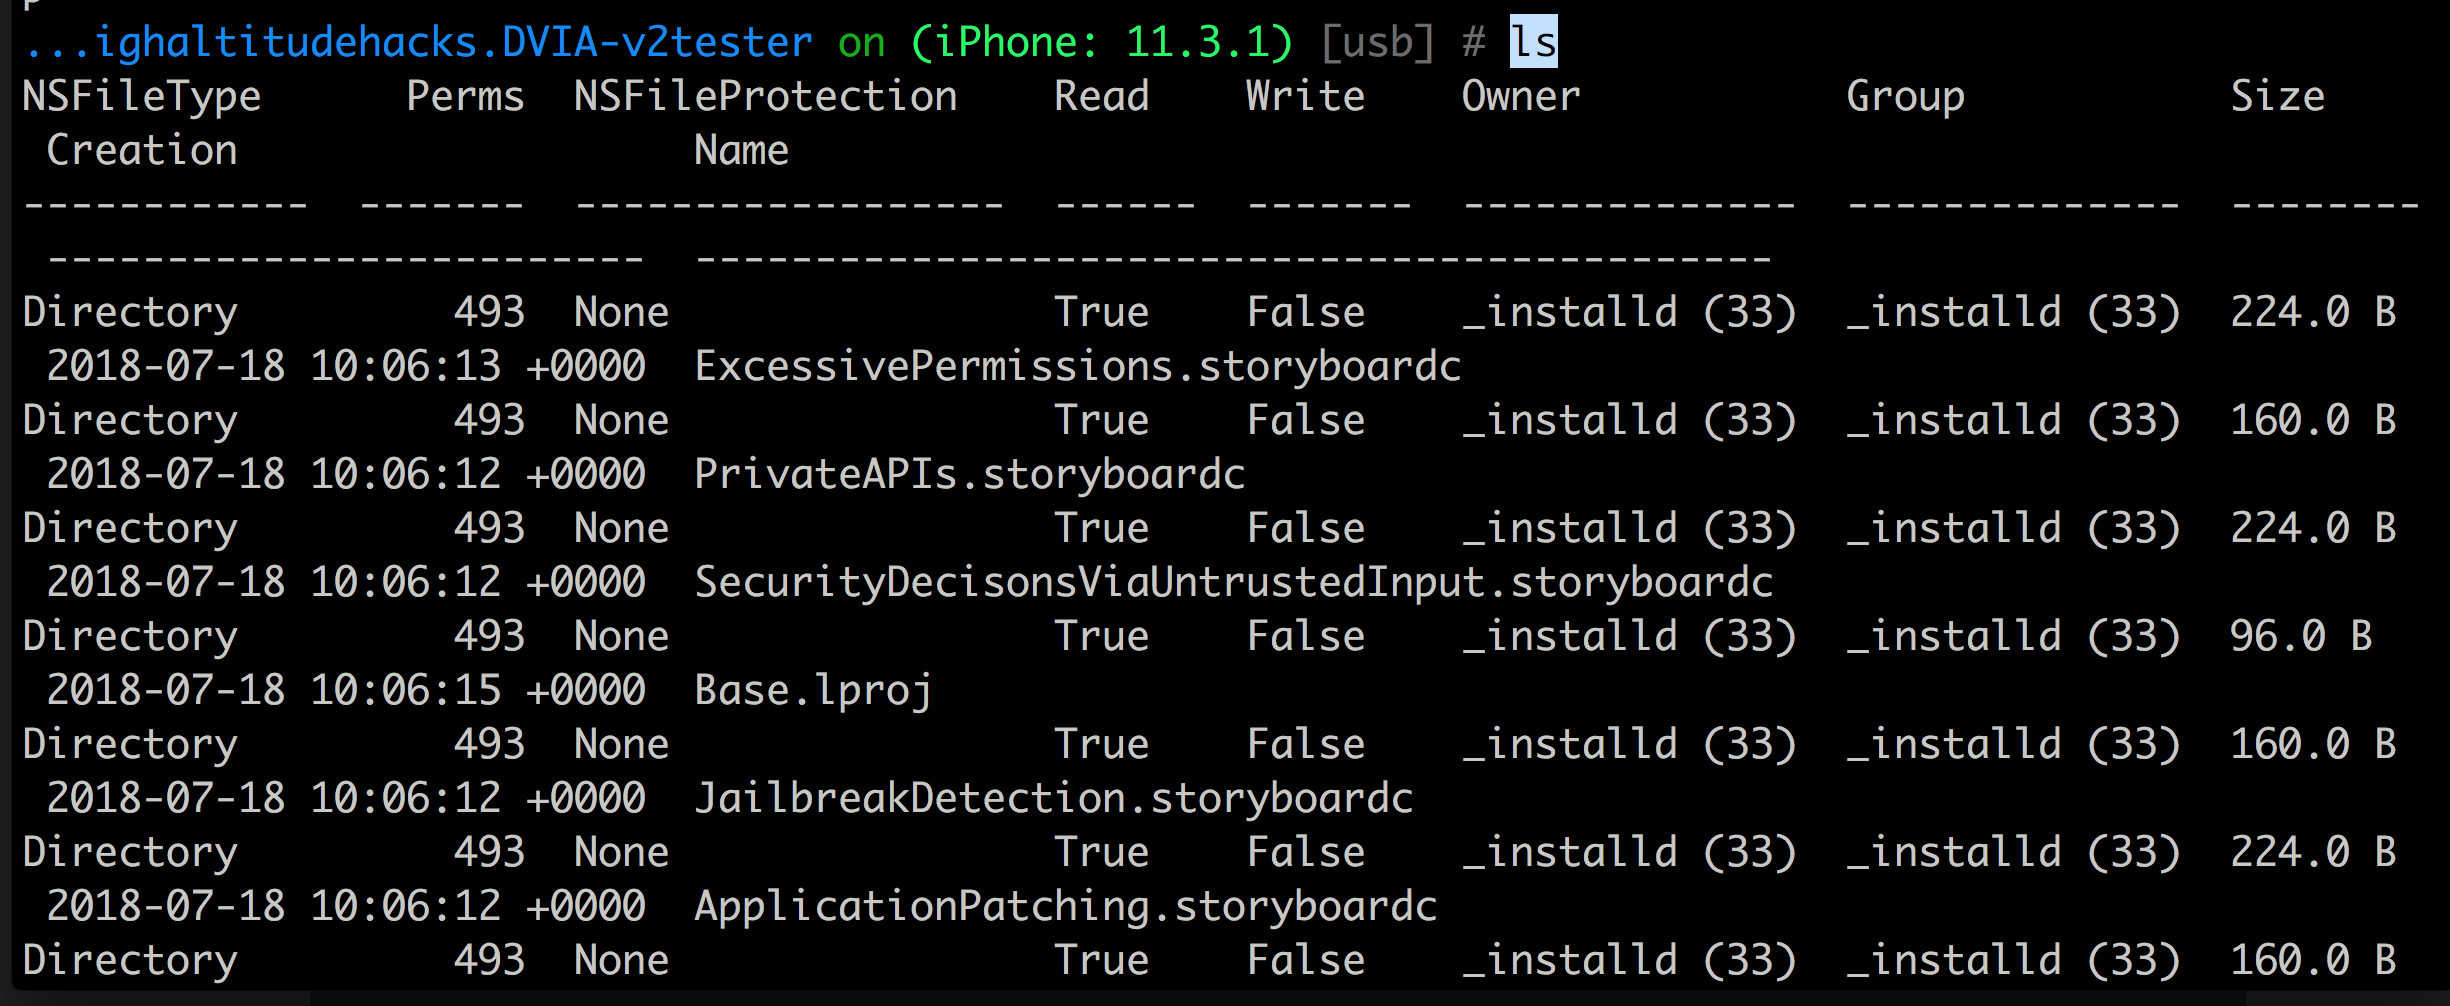
A simple ls command will dump the contents from the current working directory within the application context.
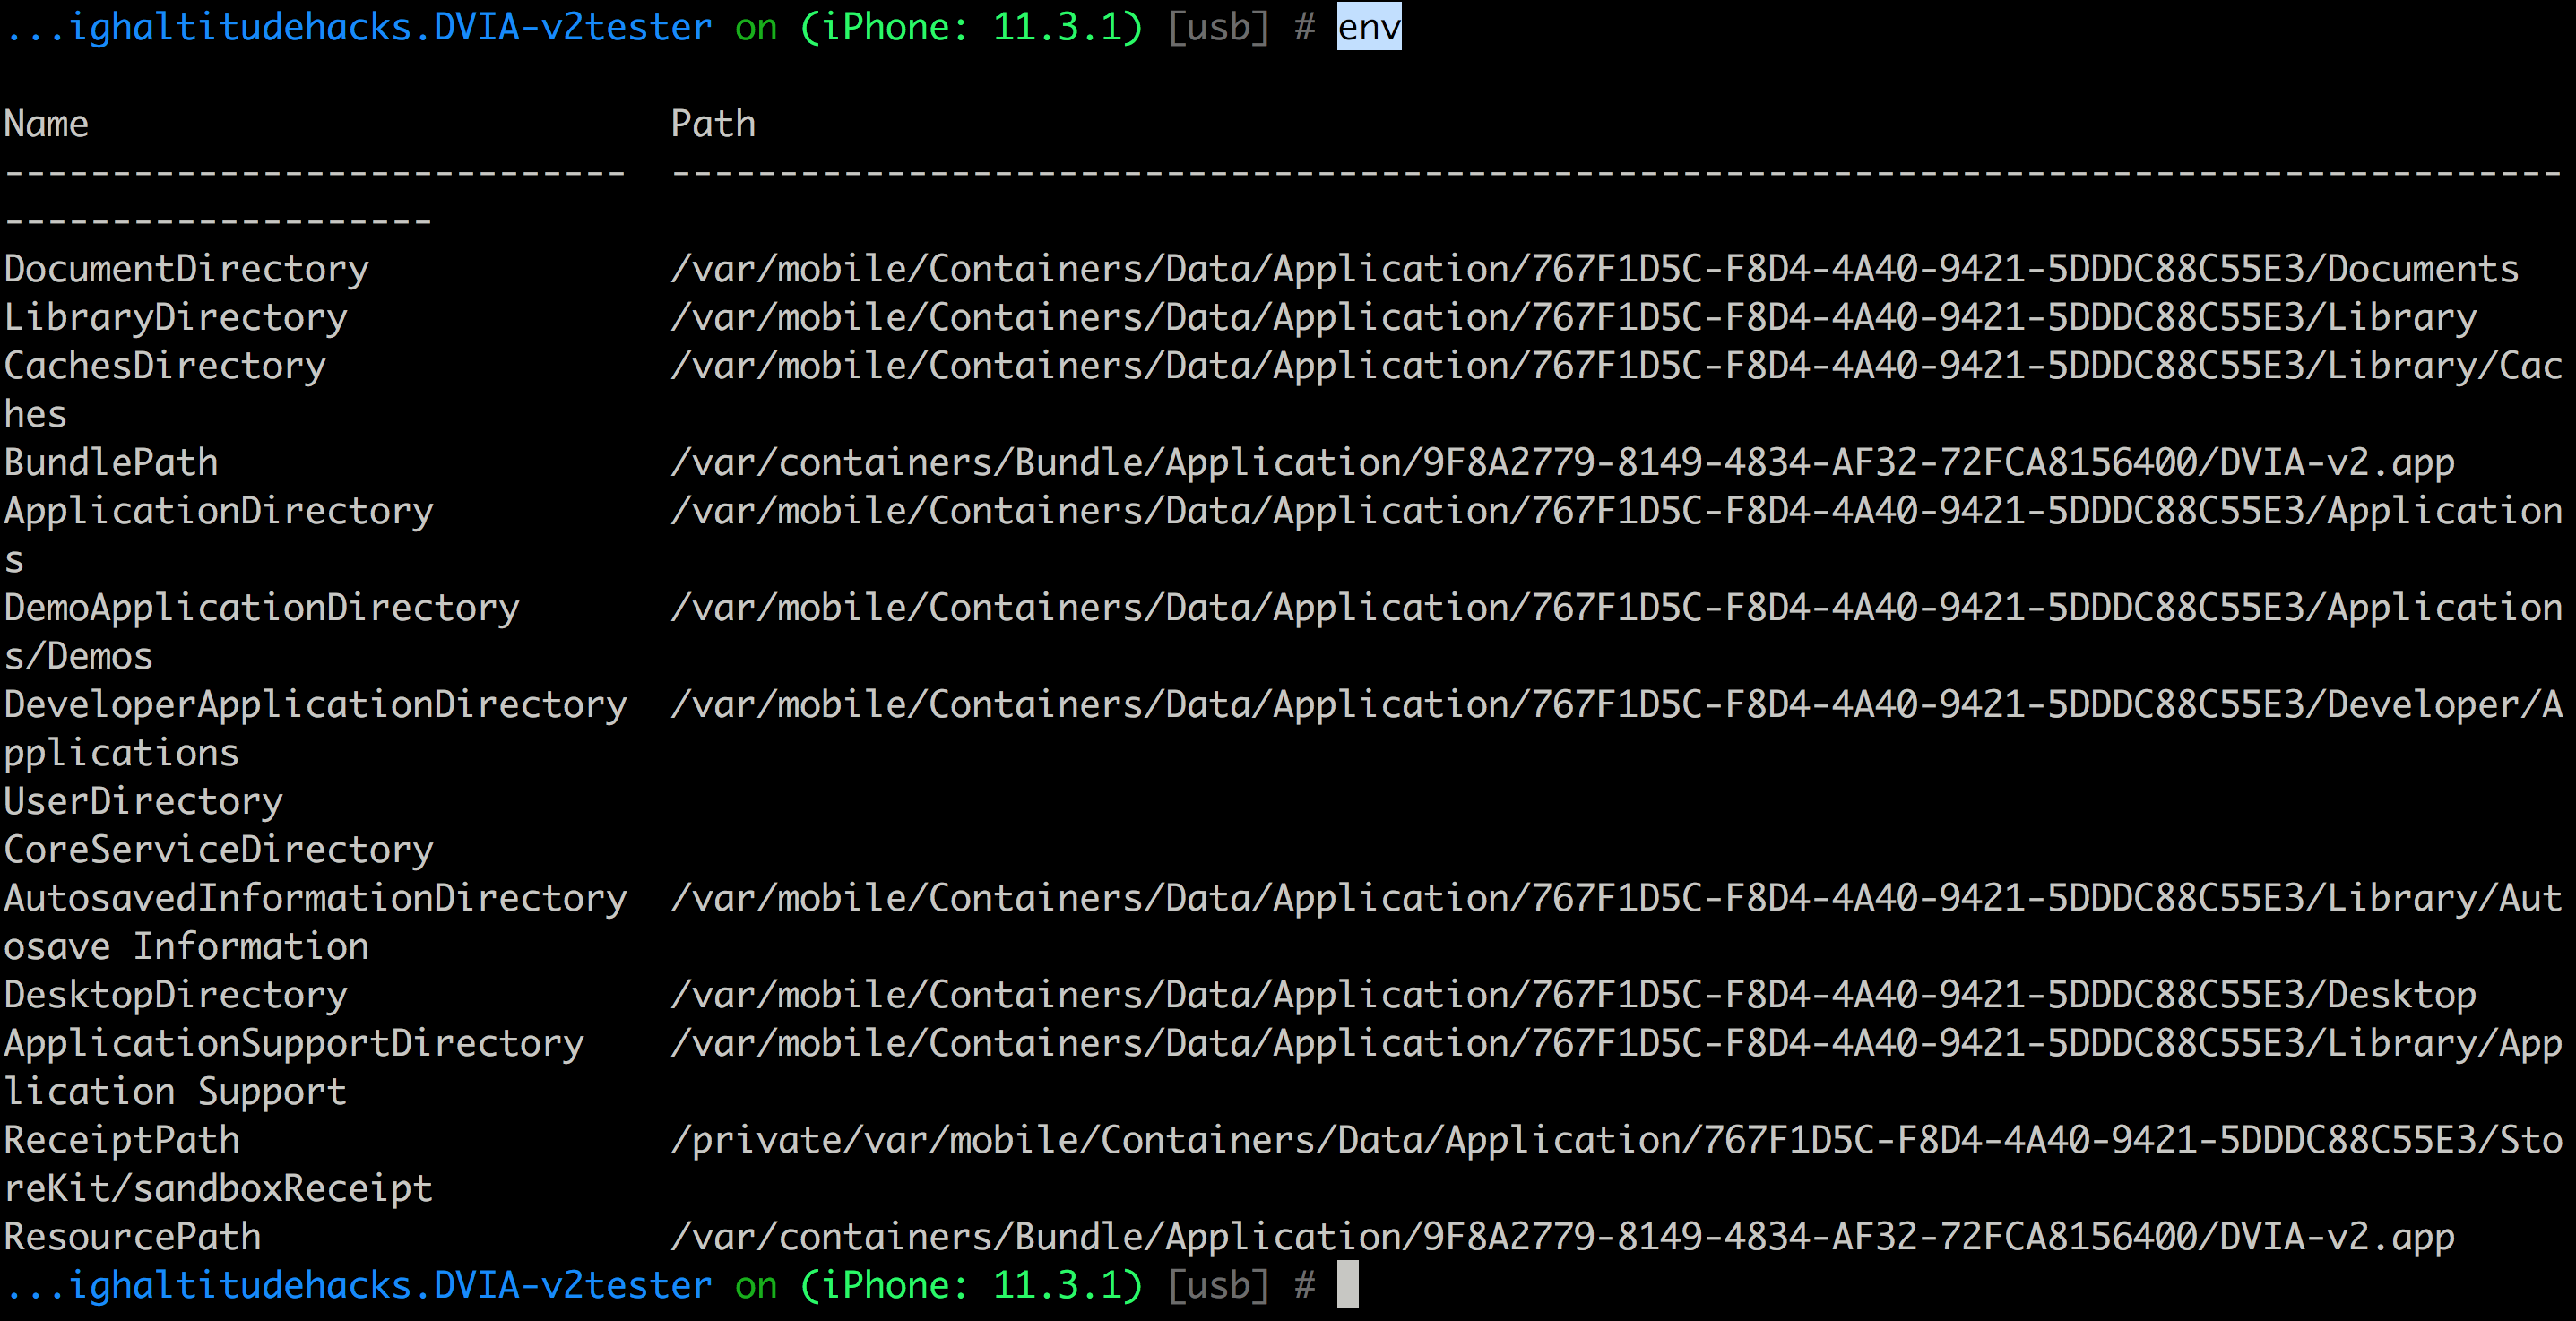
Let’s run env and this will give us all the folders related to the application. We are mostly interested in the application data here which is mostly present in the Documents folder.
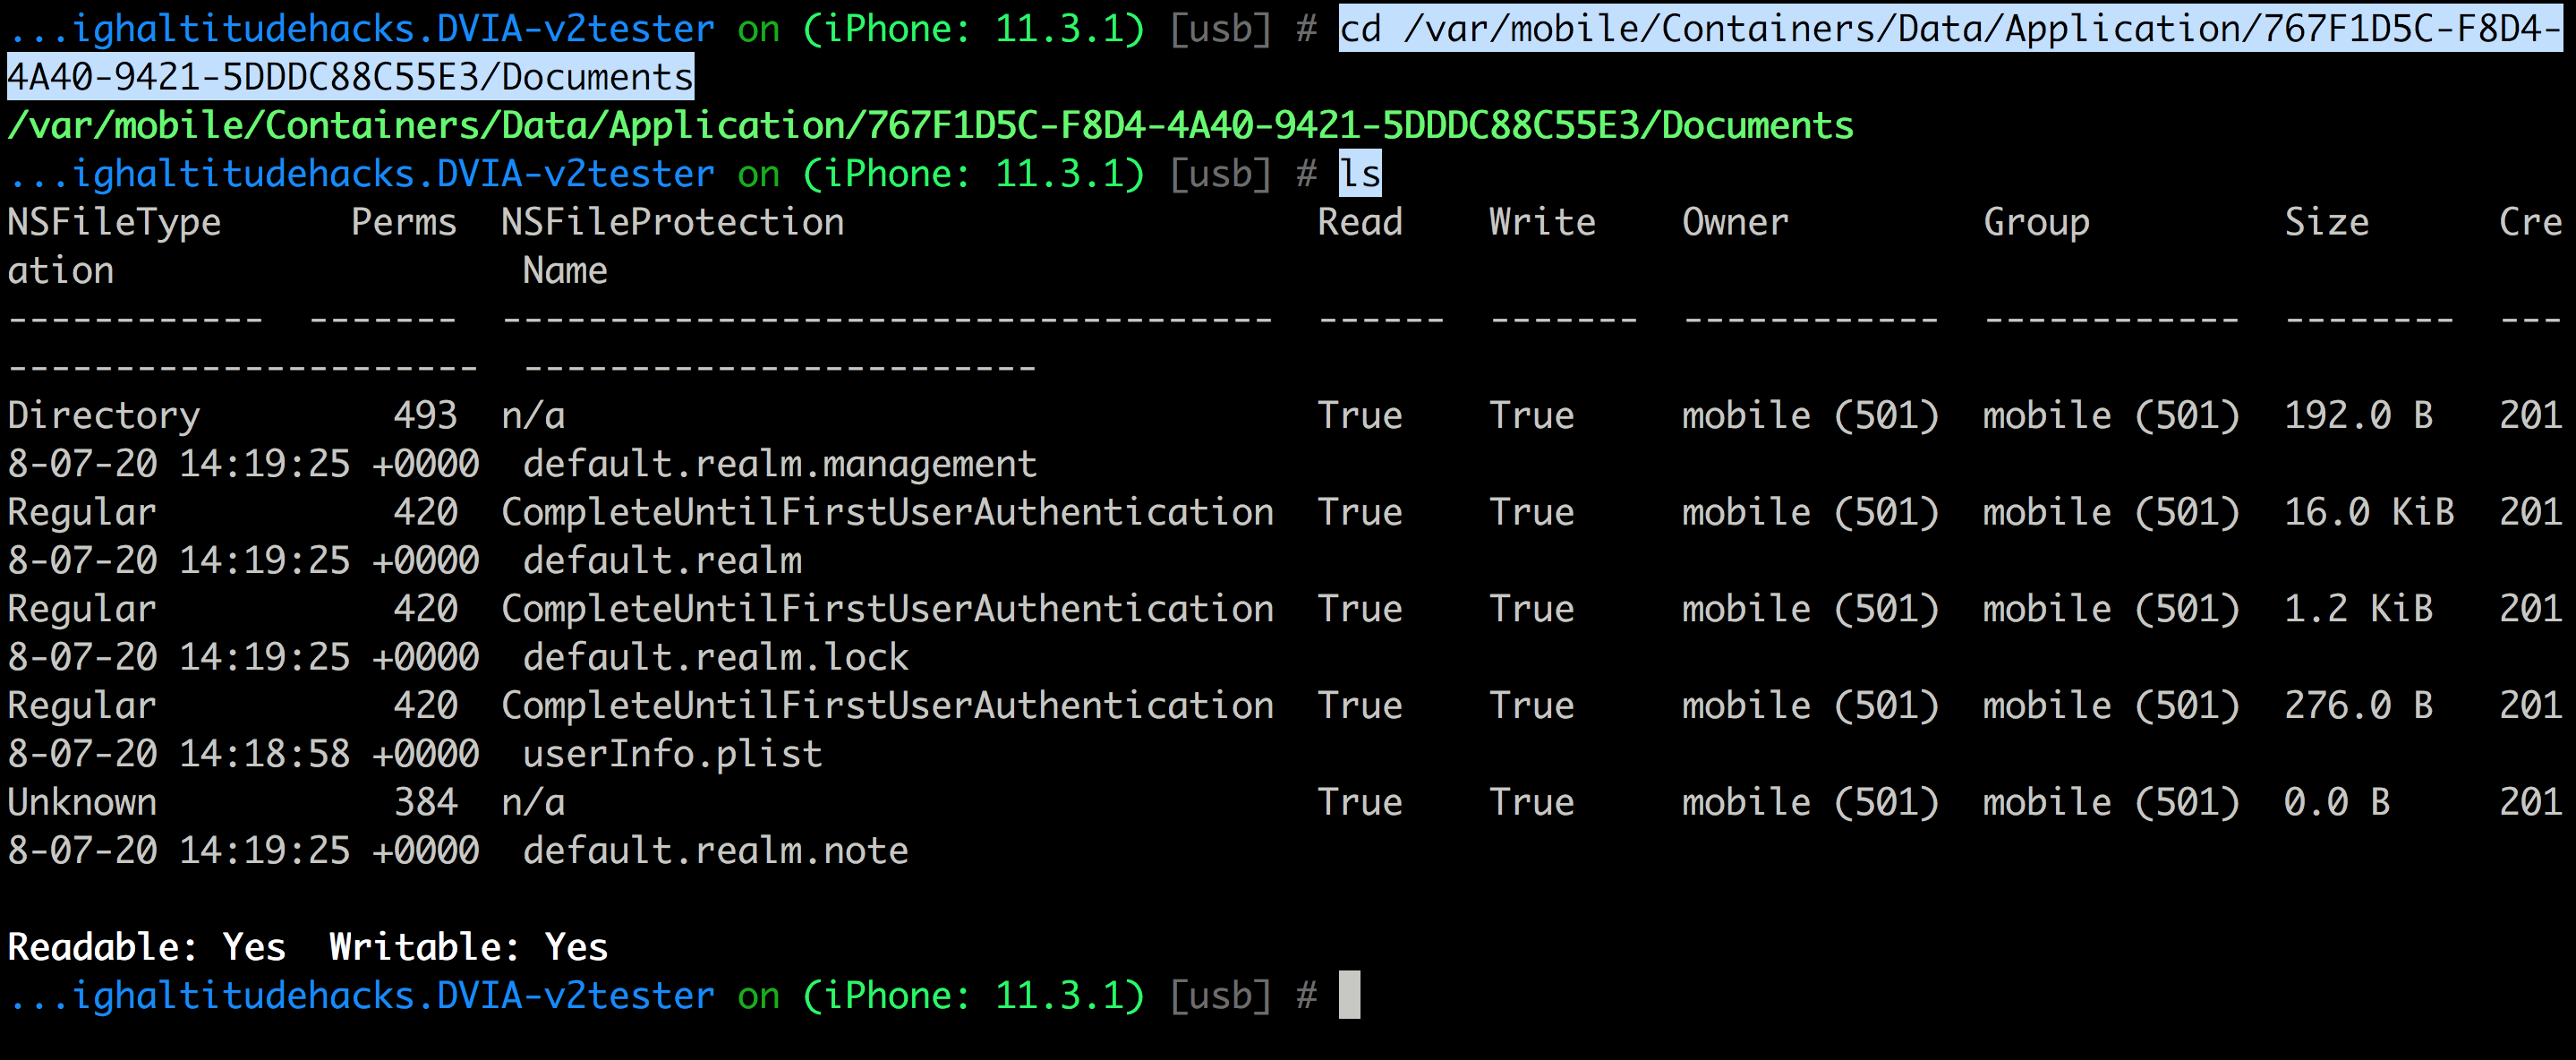
Now let’s head over to the Documents directory and run the ls command there.
The data stored in the info.plist file can be dumped with ios plist cat filename command.

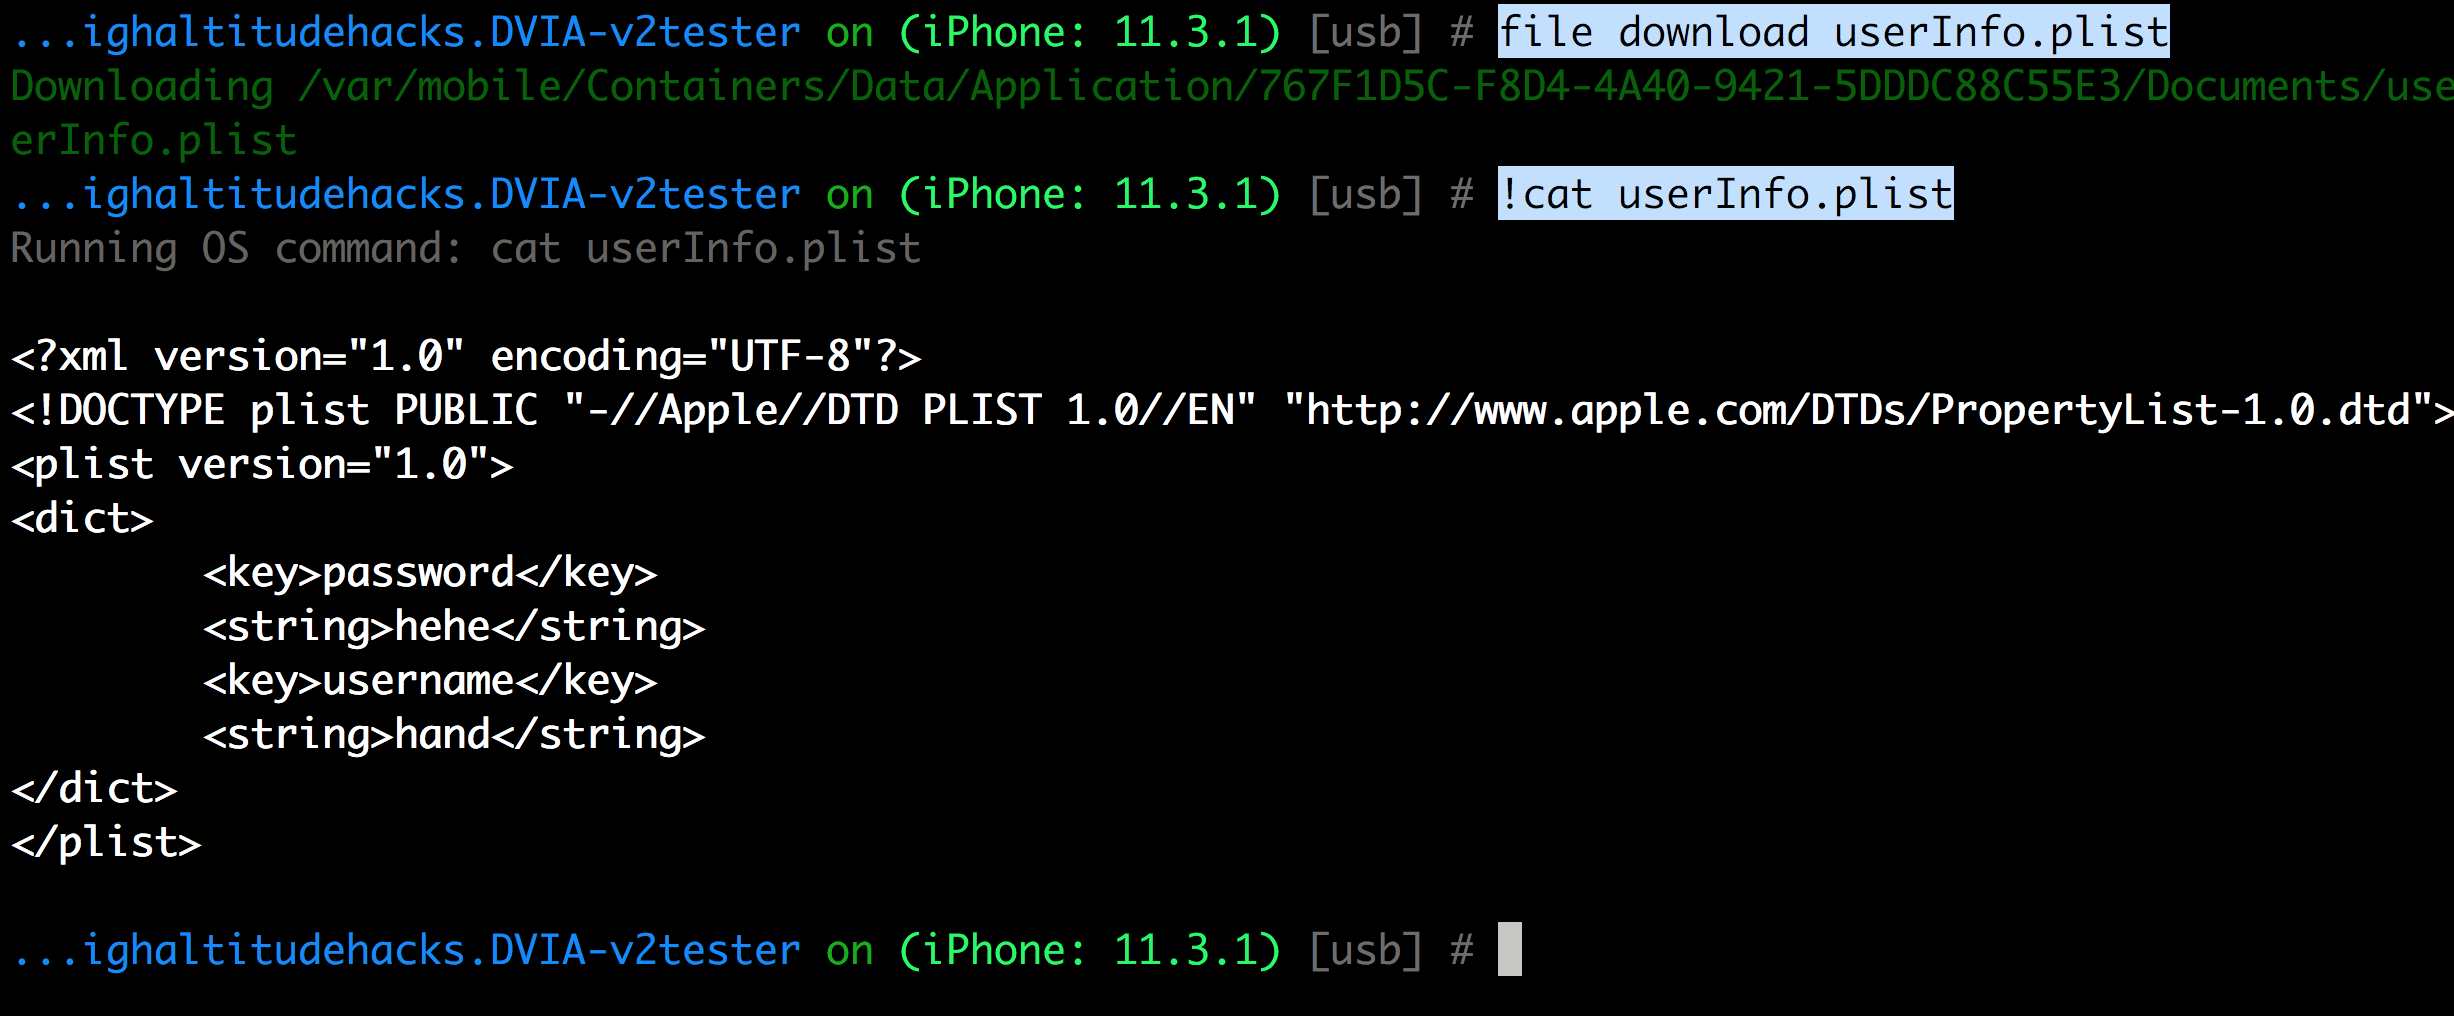
Optionally, another way of achieving the same would be to download the file to your computer with the file download filename command and then use the OS command cat (prepended with an !) to list the contents of the file.
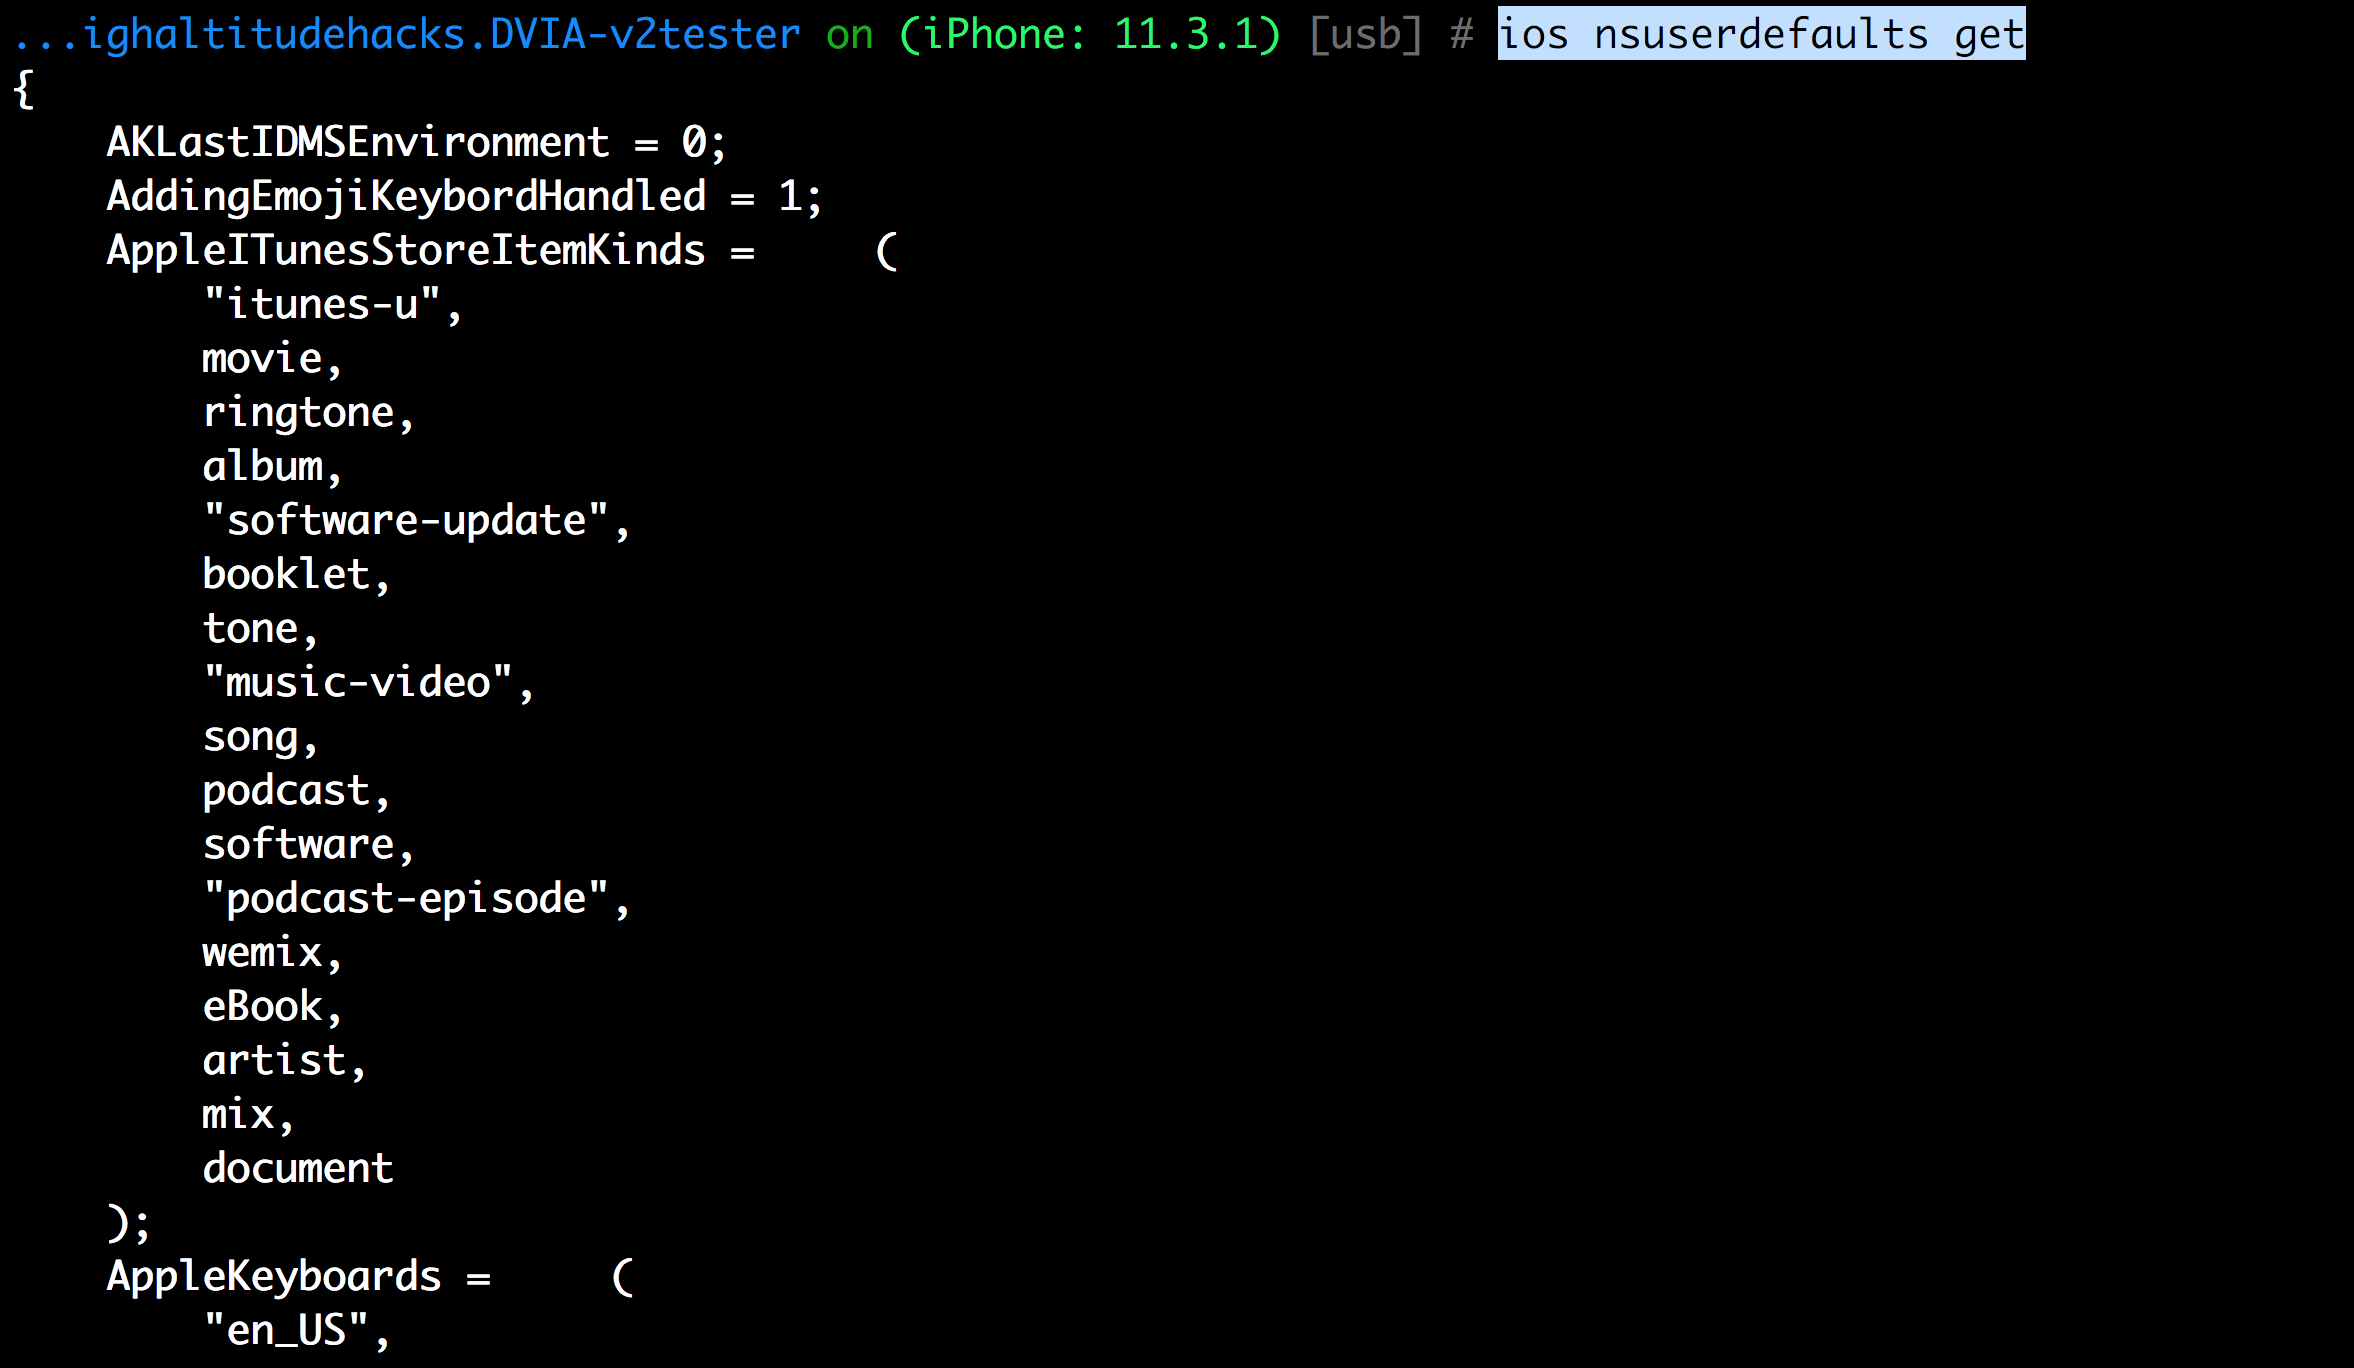
You can see all the data stored using the NSUserDefaults or UserDefaults (in new SDKs) using the ios nsuserdefaults get command.
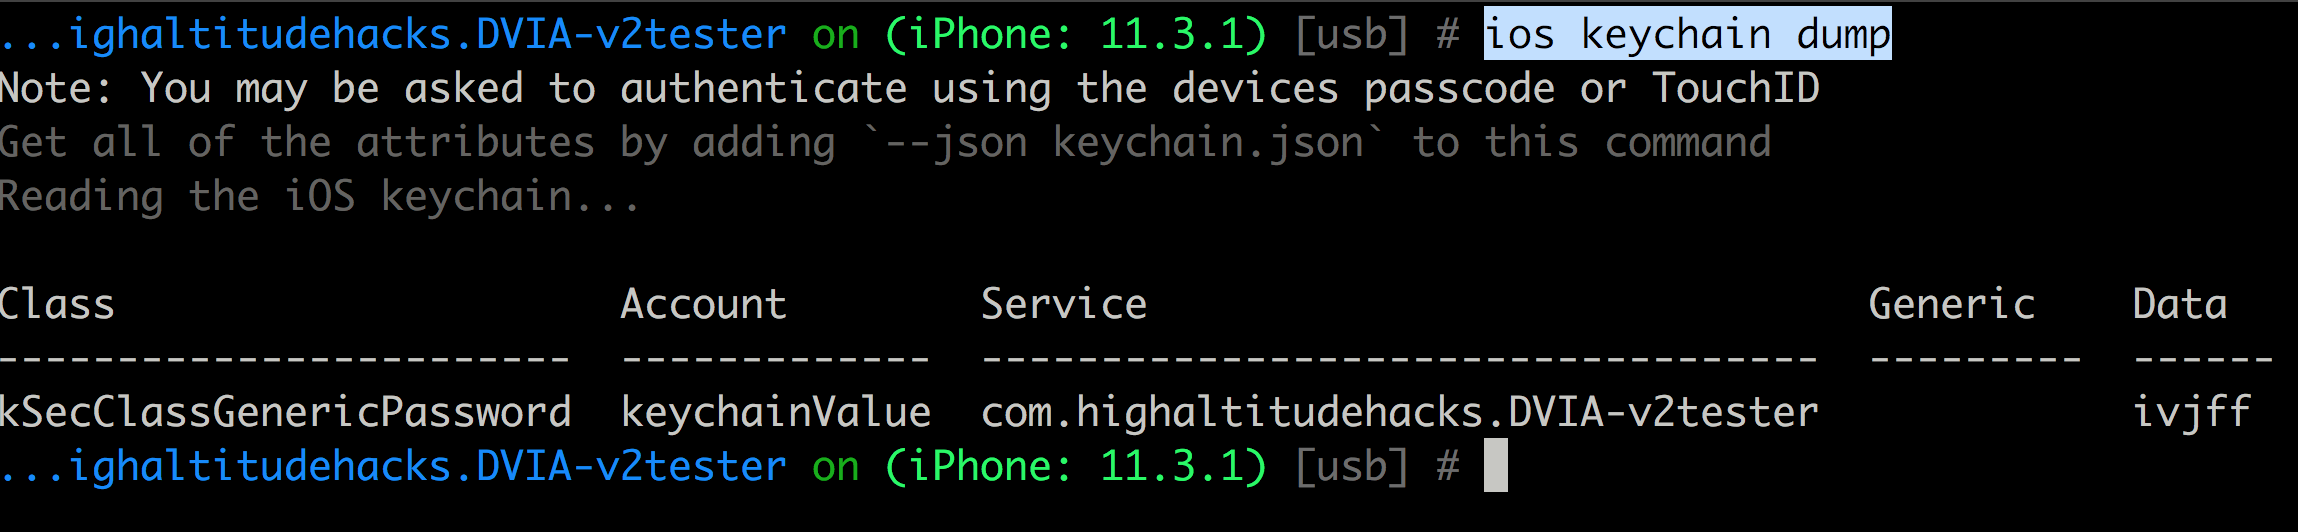
And you can use the ios keychain dump to dump the keychain.
In the next article, we will continue looking at some of the other useful functionalities of Objection.
References
- https://github.com/sensepost/objection